


“], “filter”: { “nextExceptions”: “img, blockquote, div”, “nextContainsExceptions”: “img, blockquote, a.btn, a.o-button”} }”>
Heading out the door? Read this article on the new Outside+ app available now on iOS devices for members!
>”,”name”:”in-content-cta”,”type”:”link”}}”>Download the app.
The following 15-minute yoga for hips practice is ideal for whenever you need to stretch out some soreness. It’s a straightforward flow featuring all sorts of hip-opening stretches that you can do at any time of day. Practice it to energize yourself in the morning, to stretch your hips after a workout, or to find release when your hips are feeling a little tight, tense, and sore at the end of the day. It’s all about increasing the flexibility in your lower body and doing it in a short amount of time.
You’ll hold each of the kneeling, seated, and reclined hip-opening stretches long enough to settle into the pose and take a few breaths before you flow into the next pose. The practice also includes options, depending on how much sensation you’re seeking, and is accessible even if you barely have any experience with yoga.
15-Minute Hip-Opening Stretches (for Anytime of Day)
This yoga for hips practice is beginner-friendly and requires no props (although you’re welcome to use them).
Seated Side Bend
You’re going to start sitting cross-legged with your right shin stacked slightly in front of your left. Sit with both sit bones anchored on the mat. Lift up tall through your spine and turn a little toward your left knee and lean forward as you crawl and reach your fingertips along that diagonal. You’re looking to lengthen and stretch along your right side to target your right hip and right glute. You might get a nice stretch through the right side of your waist at the same time.
Even though you’re leaning to the left side, think of pushing down even more into your right sit bone so it doesn’t lift off the mat. See if you can crawl your fingertips out a little farther forward. Take one more deep breath here.
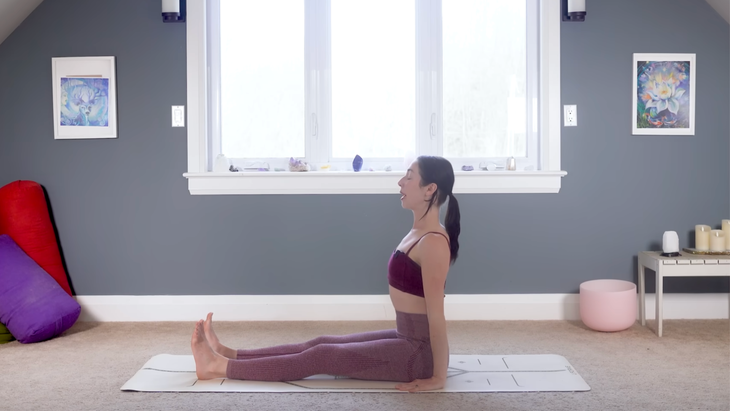
Staff Pose
Walk your hands back, inch by inch, slowly uncrossing and straightening your legs in front of you. Find Staff Pose with your feet hip distance apart. Press your palms into the mat alongside your hips as you sit tall and reach the crown of your head toward the ceiling, engaging your core as you flex your feet firmly and press the backs of your knees into the mat.
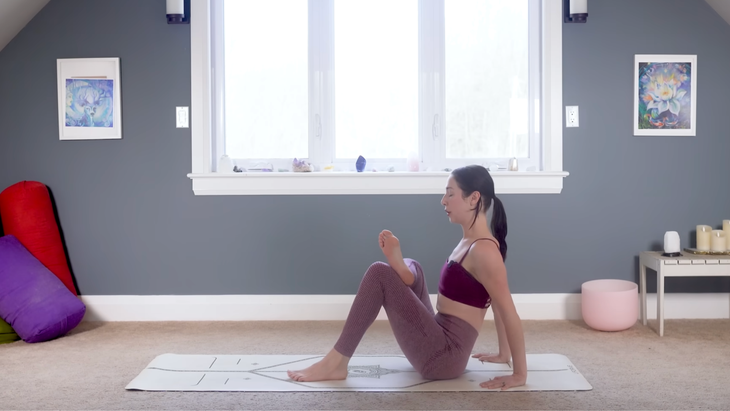
Seated Pigeon or Figure 4
Cross your right ankle over your left knee in a figure-4 shape, walk your hands back behind you for support, and then you choose how deep you go in this pose. The more you bend your left knee and inch your left heel closer to you, the more intensely you’ll feel this in your right hip. I like to just kind of come up onto my knuckles or my fingertips as I lean back. Lift your chest rather than round your back. Let your weight shift from side to side, breathing in and out through your nose, sending that breath all the way down to your lower belly.
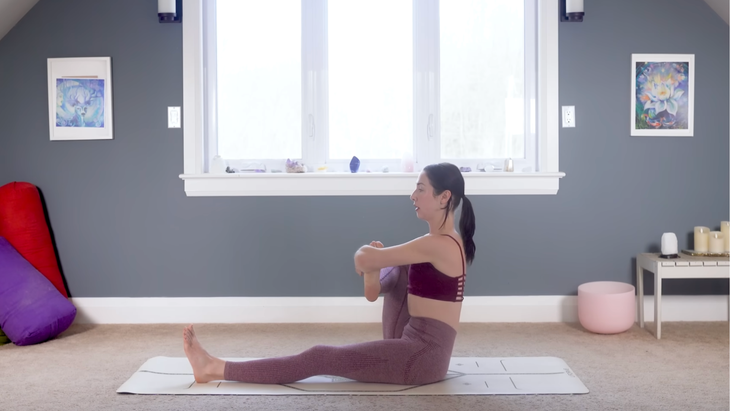
If this is already enough sensation, stay here. If you’d like to intensify the stretch, interlace your fingers behind your left thigh or shin and straighten your left leg. So you’re holding that leg in place with clasped hands. Your right foot will be in the crease of your left elbow, and your right knee will be in your right elbow crease.

Seated Side Body Stretch
Straighten your left leg if it isn’t already and then place your right foot to the inside of your left thigh. Take your legs a little wider so you’re not squared to the front of the mat but more angled on a diagonal as if you were coming into Head to Knee Pose. Take a side body stretch. Reach your right arm up and over. You’ll start to feel a little hamstring stretch in your left leg. Actively flex your left foot for this first variation.
Baby Wild Thing Pose
Come all the way back to sitting and place your right down behind your right hip, press into the mat, shift your weight into your right knee and shin, and lift your hips in Baby Wild Thing. Reach your left arm up and alongside your head, giving yourself a big hip stretch as you push your hips forward and point through your left toes.
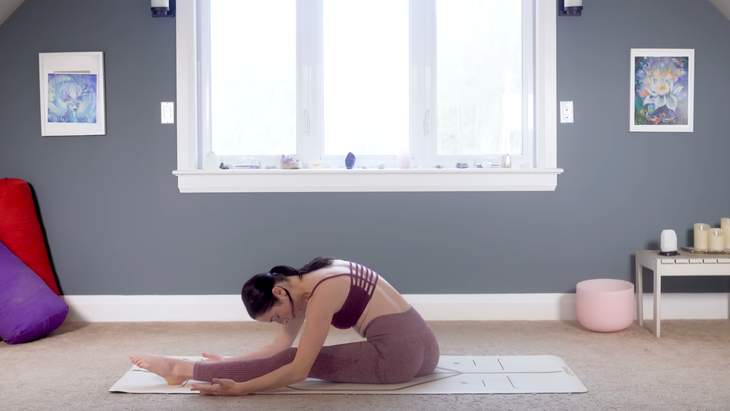
Head to Knee Pose
Set your hips back down on the mat. Turn and rotate your upper body toward your left leg, point through your toes, and find a passive forward fold in Head to Knee Pose. So let your spine round and gravity do the work for you in this forward fold. You’re not pushing, you’re not forcing it, you’re not even really going to your full end range of motion. I’m not grabbing hold of my leg here. I’m turning my palms facing up so that I’m not tempted to push and pull. But just get to the point where you feel a hamstring stretch.
Walk your hands in and lift your chest. It might feel good to drop your knees in a windshield-wiper motion. Then sit cross-legged again, this time with your left shin staggered slightly in front of your right one, sitting tall, and then turning your chest toward your right knee and right thigh, and start to walk those hands out. Repeat the poses on this side.
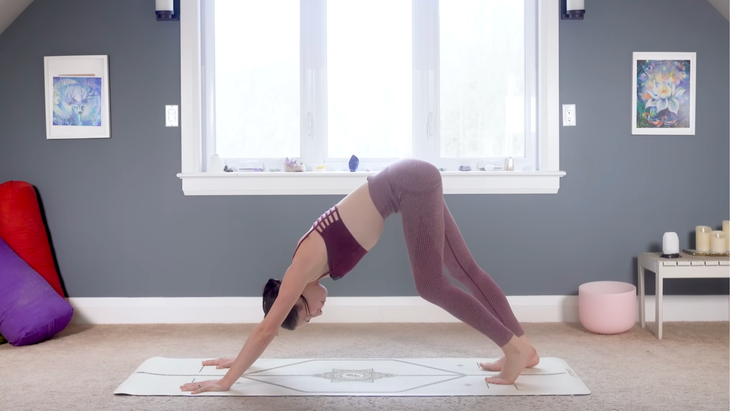
Downward-Facing Dog
From sitting, cross your legs at the ankles, lean forward and take your palms in front of you shoulder-distance apart, and then step your feet hip-distance apart. As you lift your hips up and back in your first Downward-Facing Dog, bend your knees as much as you would like. Keep reaching your chest toward your thighs.
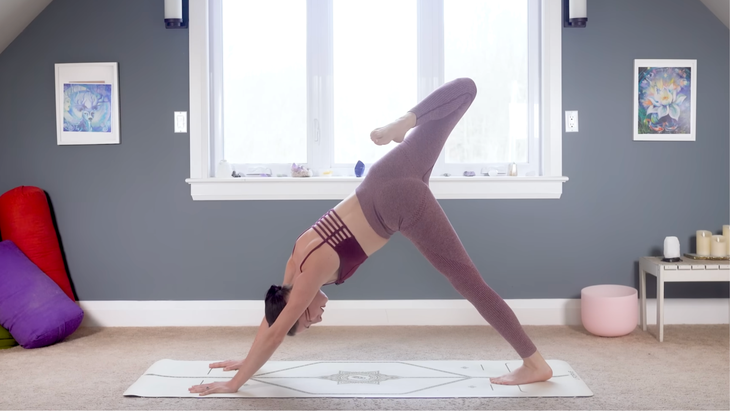
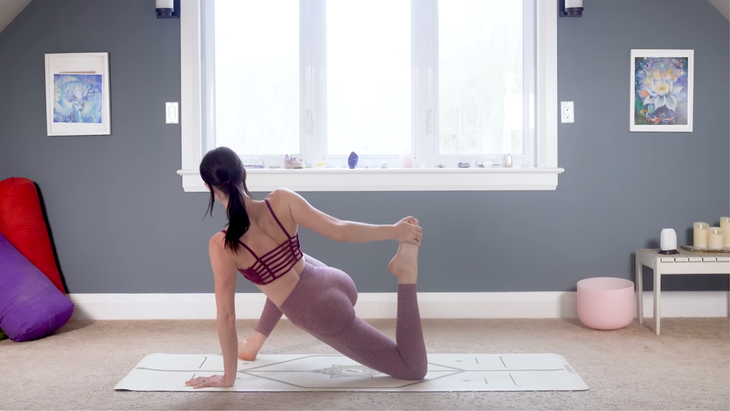
Scorpion Dog
Shifting your weight a little more into your left leg. Lift your right leg toward the sky, bend your right knee, and open your hip, trying to close the gap between your heel and your seat, as if you’re trying to bring your calf and your hamstrings together to touch behind you. See if that can help lift your knee even higher.
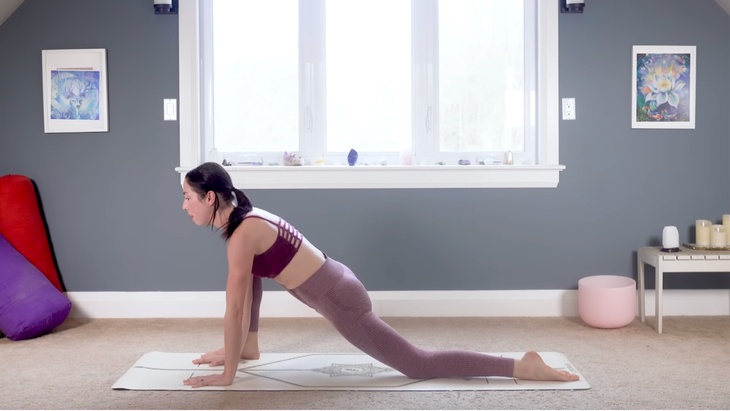
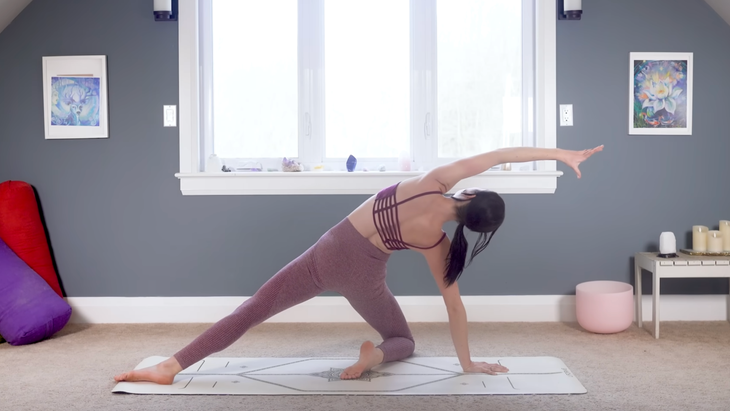
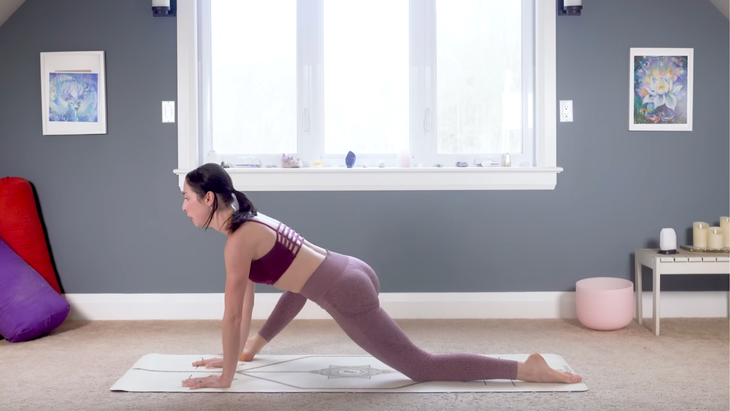
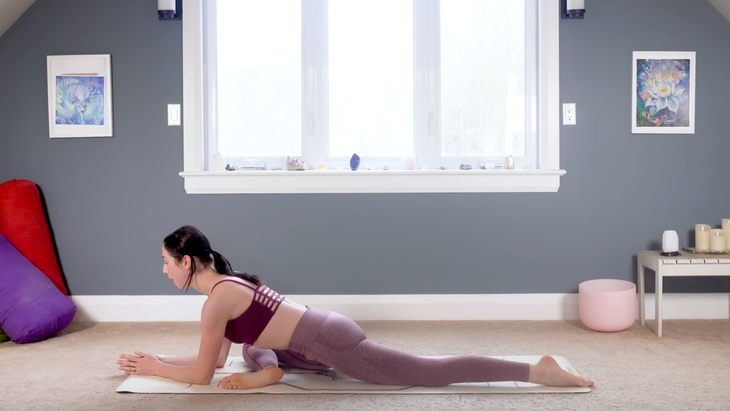
Low Lunge
Step your right foot to the outer edge of your right hand. So you might need to move your palms a little here. Lower your back knee to the mat in a wider variation of Low Lunge. Your knee is stacked over your ankle, creating some space here and lengthening out.
If you’d like to intensify the sensation, roll onto the outer edge of your right foot for some external hip rotation. Maybe you hold here.
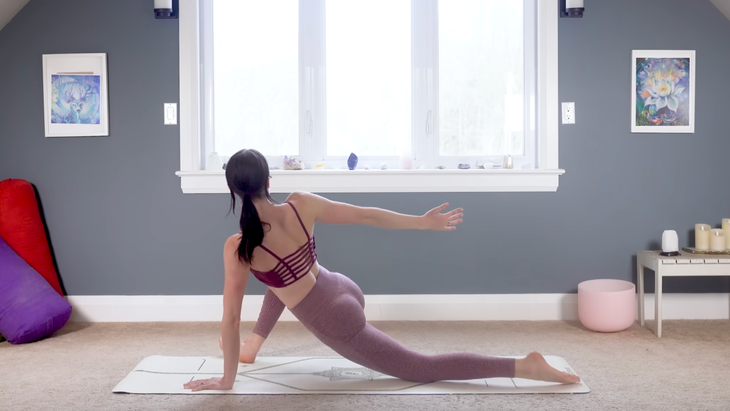
You can add a twist by circling your right arm up and back as you turn toward the right.
Maybe hold your twist or add a quad stretch by bending your left knee and pulling your left heel toward your seat. This is a big twist and you don’t need to take it.
Wherever you’re at, keep drawing your shoulders away from your ears. Can you sink your hips down a little more? Take one more breath and carefully release hold of your back foot and bring your hands back to the mat.
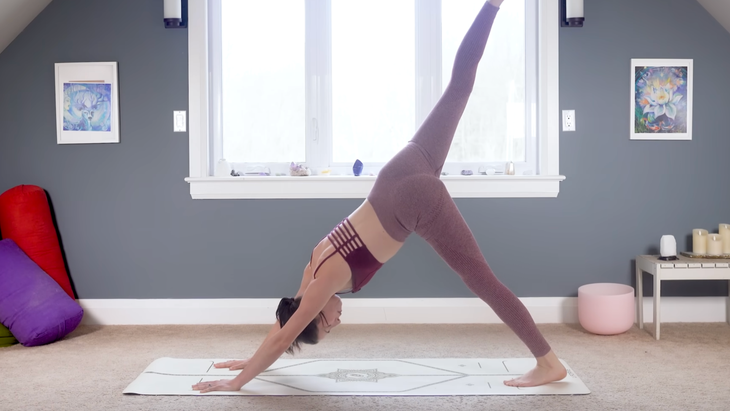
Three-Legged Dog
Tuck your back toes and lift your back knee off the mat. Reach your right leg back and up as you come into Three-Legged Dog. Give it a big stretch and then your foot comes down.
Take Scorpion Dog, Low Lunge, and Three-Legged Dog on the other side.

Pigeon Pose
From Downward-Facing Dog, set yourself up for Pigeon Pose. Your right leg extends up, and then bring your right knee behind your right wrist. Extend your left leg farther back behind you. Try to even out your weight so you’re not leaning on one hip more than the other as you find the alignment that feels the best to you. Take a little back bend here as you sit tall.
When you’re ready, exhale as you fold forward. Maybe you’re going to hang out on your forearms, going only as far forward as is appropriate to you.
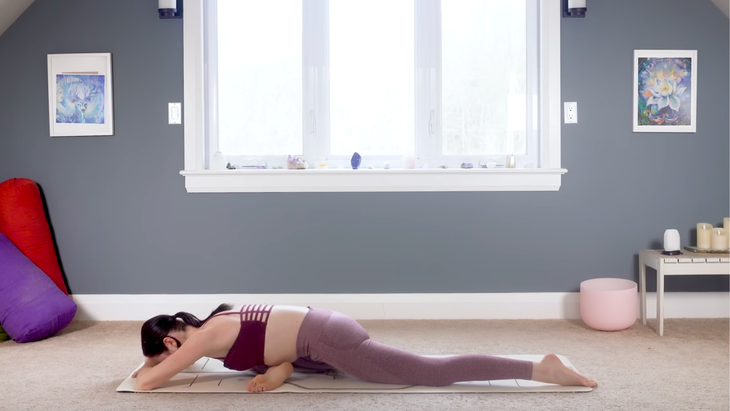
You can also come all the way down to the mat if that’s an option for you. Take 5 slow, steady breaths here. Let gravity pull you into the stretch.
Walk our hands in and slowly transition back into your Downward-Facing Dog. Take your time to get there and then take Pigeon on the second side. It’s totally normal for one side to feel different than the other. If you find it hard to breathe deeply, it’s usually a pretty good indication that you’re going too far into a pose and need to ease your way out. Sometimes it also means that you’re distracted and need to come back to the present moment, to the experience you’re having right now in your body.
Downward-Facing Dog
Slowly lift yourself up from Pigeon. This will be your last Down Dog so make any little movements and adjustments here that feel good, stretching it all out.
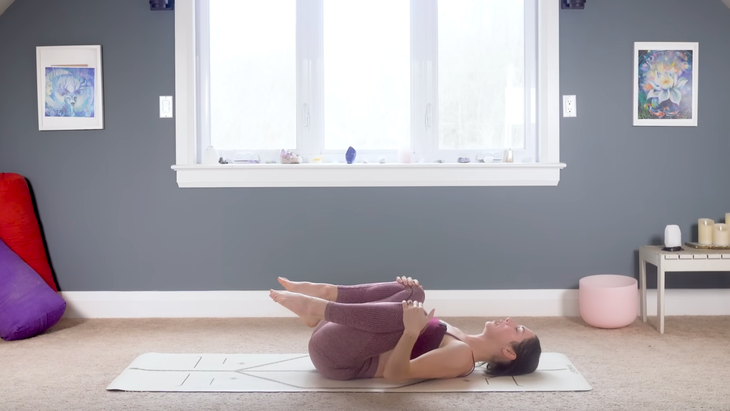
Happy Baby Pose
Bring your knees to the mat, swing your legs out in front of you, and lower onto your back, pulling your knees toward your belly. Widen your knees toward your shoulders, maybe rocking a little side to side. If this is enough sensation, stay here.
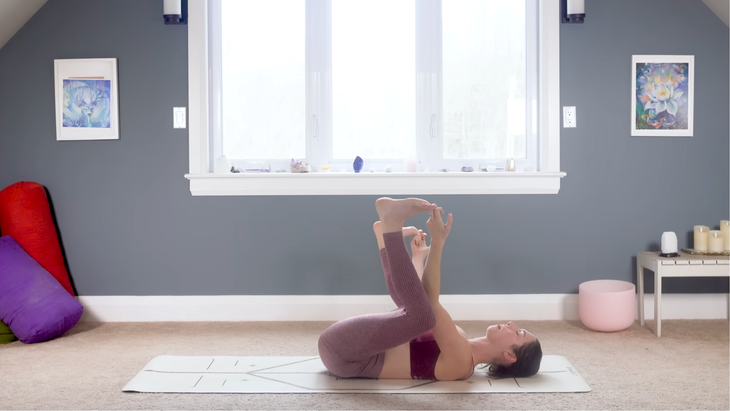
Or you can grab hold of your big toes or ankles, stacking them over your knees in Happy Baby. Breathe here.
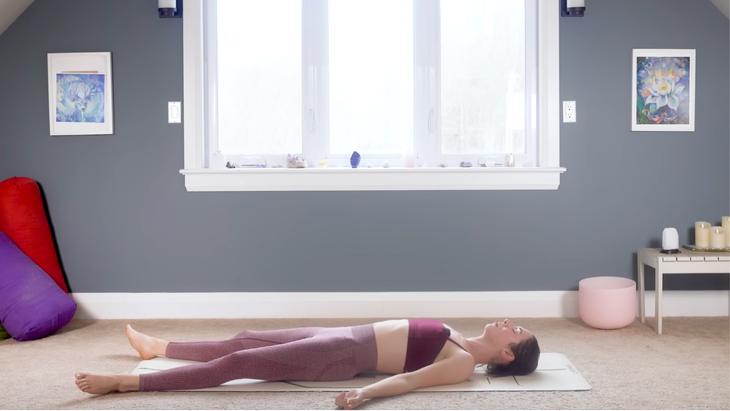
Savasana
Release your pose and let yourself take up some space. Feel the length and the space that you’ve created through those hip sockets and into your lower body. Take at least 10
deep breaths here, feeling the effects of your practice and noticing what has changed and shifted. Give yourself a little time to process and integrate this work.
When you’re ready, extend your arms overhead, take a big stretch as if you’re just waking up in the morning, and turn over to one side. Lift yourself and come to take a seat in any way that’ss comfortable. Bring your hands together at the front of the heart, close your eyes, and pause here before continuing with your day. Thank you for practicing this 15-minute yoga session.


