
Published November 4, 2026 06:17AM
In Yoga Journal’s Archives series, we share a curated collection of articles originally published in past issues beginning in 1975. This article about the backbend Locust Pose first appeared in the July-August 1996 issue of Yoga Journal. Find more of our Archives here.
If a picture is worth a thousand words, then our posture speaks volumes. Poor carriage of the torso—rounded shoulders, sunken chest, and a downward cast of the eyes—generally suggests a negative state of being. Good posture, on the other hand—shoulders rolled back and down, chest lifted, and an energetic carriage—demonstrates confidence and a sense of purpose.
All the backbending yoga postures help create this physical expression of assurance. You feel better, have more energy, and benefit from an enhanced respiratory system. The internal alignment of the organs is refined as we adjust and improve the external alignment.
The postures actually have the potential to positively and profoundly affect you on all levels: physical, mental, emotional, and spiritual. Approaching your asanas with this awareness is the key to the enrichment of your practice.
The repertoire of backbending postures, or hyperextensions of the spine, is vast. In this article, we are going to focus on one of the more basic back-bending poses, Grasshopper or Locust Pose (Salabhasana). There are several variations of this posture, according to different systems or styles of hatha yoga. We will practice two versions of Locust, beginning with Salabhasana One as described in B.K.S. Iyengar’s Light on Yoga.
Locust is excellent for correcting poor posture, as well as for counteracting the development of kyphosis, the rounding of the upper back. It tones the whole posterior of the body, strengthens the abdominals, and enhances digestion.
How to Practice Locust Pose
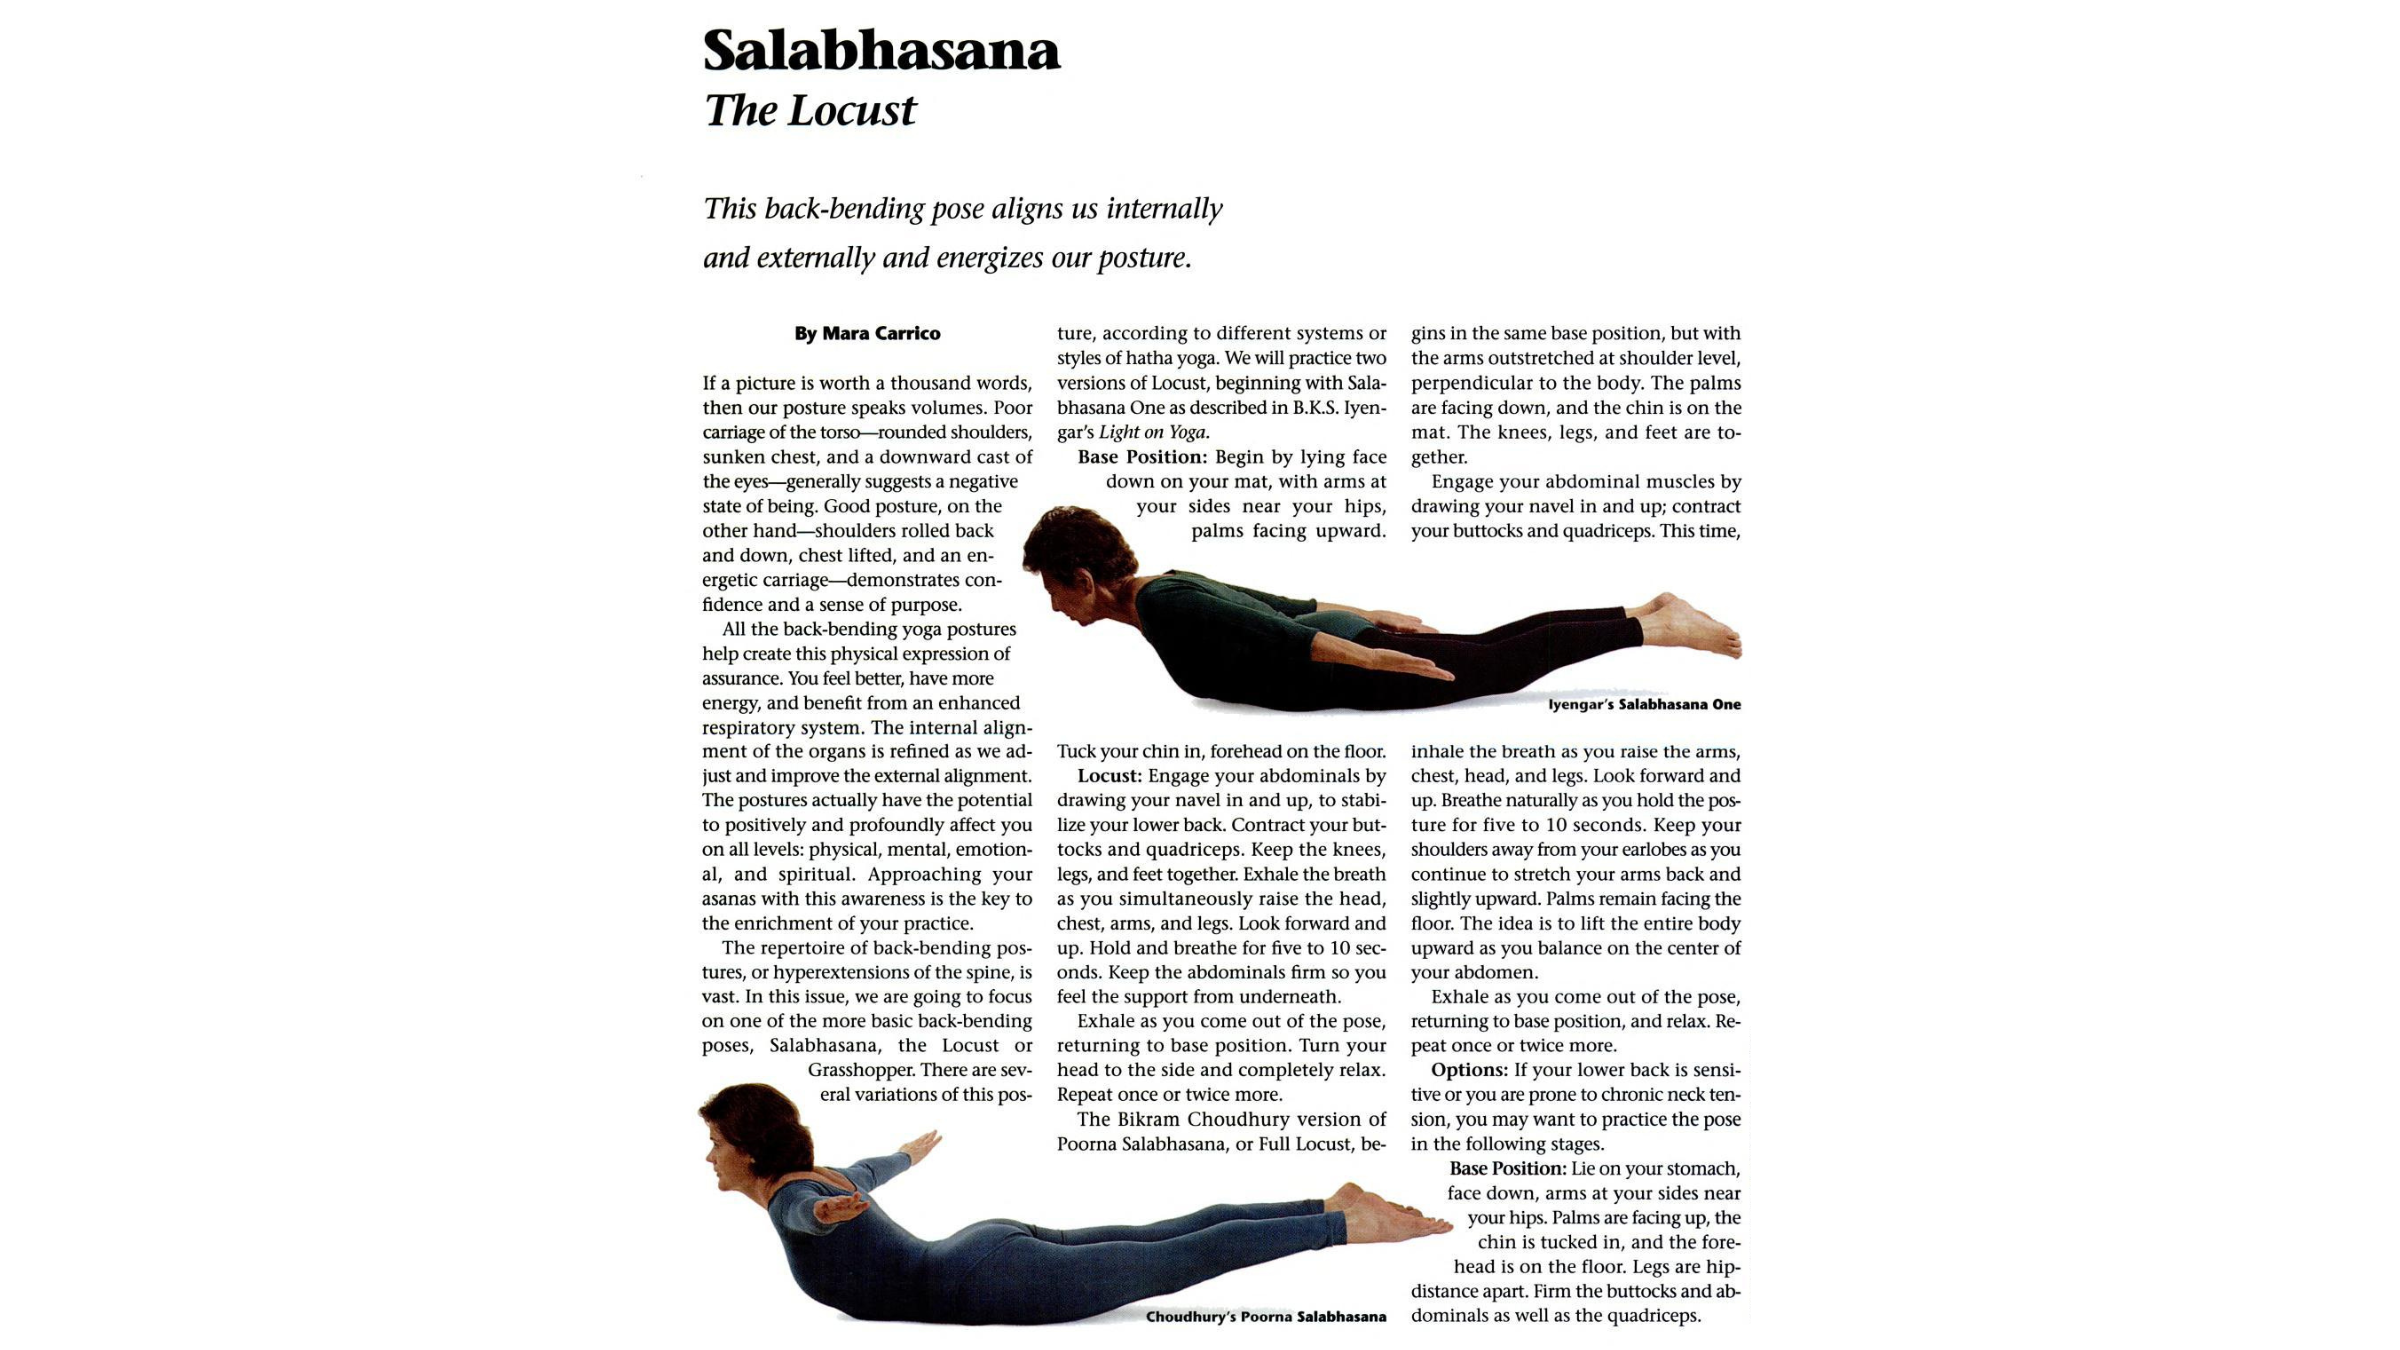
Begin by lying face down on your mat, with your arms at your sides near your hips, palms facing upward. Tuck your chin in, forehead on the floor.
Engage your abdominals by drawing your navel in and up, to stabilize your lower back. Contract your buttocks and quadriceps. Keep the knees, legs, and feet together. Exhale the breath as you simultaneously raise the head, chest, arms, and legs. Look forward and up. Hold and breathe for five to 10 seconds. Keep the abdominals firm so you feel the support from underneath.
Exhale as you come out of the pose, returning to base position. Turn your head to the side and completely relax. Repeat once or twice more.
Full Locust begins in the same base position, but with the arms outstretched at shoulder level, perpendicular to the body. The palms are facing down, and the chin is on the mat. The knees, legs, and feet are together.
Engage your abdominal muscles by drawing your navel in and up; contract your buttocks and quadriceps. This time, inhale the breath as you raise the arms, chest, head, and legs. Look forward and up. Breathe naturally as you hold the posture for five to 10 seconds. Keep your shoulders away from your earlobes as you continue to stretch your arms back and slightly upward. Palms remain facing the floor. The idea is to lift the entire body upward as you balance on the center of your abdomen.
Exhale as you come out of the pose, returning to base position, and relax. Repeat once or twice more.
Locust Pose Modification
If your lower back is sensitive or you are prone to chronic neck tension, you may want to practice the pose in the following stages.
Lie on your stomach, face down, arms at your sides near your hips. Palms are facing up, the chin is tucked in, and the forehead is on the floor. Legs are hip-distance apart. Firm the buttocks and abdominals as well as the quadriceps.
Inhale the breath. Exhaling, raise just the arms to about hip level, keeping the palms facing up. The head remains on the floor. Lengthen the neck and focus on strengthening your back muscles. Feel your shoulder blades pull down your back and slightly together.
Hold and breathe for 5-10 seconds.
Keep the abdominals, buttocks, and legs firm. Exhale and lower down.
Next, repeat what you’ve just done and add the lifting of the chest. The neck and head will come up as well, but keep looking downward so the neck remains extended rather than arched. Inhale in your base position. Exhale and raise the arms only. Inhale and hold. Ex-haling, raise the chest. Again, hold and breathe rhythmically for five to 10 seconds. Exhale as you lower down.
In the same beginning position, inhale the breath, and exhale raising the arms up. Hold and inhale. Exhale, raising the chest. Hold and inhale. Finally, exhale and raise the legs. Hold and breathe. Keep looking at the floor, focusing on lengthening the body from the top of your head to your fingertips on down to your toes. When you’re ready, lower down on an exhalation. Turn your head to the side, release the pose completely, and relax.
Counter-Pose
A natural inclination after performing a back bend is to pull your knees to your chest. So after your last repetition, you may want to got into Child’s Pose: Kneel back onto your heels, folding your torso over your thighs with your head resting on the floor in front of your knees. Arms are at your sides with palms facing up.
If your head doesn’t rest on the floor easily, simply fold your arms underneath your forehead for support.