

Published July 24, 2026 07:34AM
You know that frustrating feeling when your body just doesn’t move the way you want it to? You feel stiff. Tight. Stuck. Maybe it’s more difficult to stand up after sitting down or climb stairs without feeling a nagging ache or pain. Maybe you assume the sensation is from hours spent working at your desk or being on your feet. Or maybe you don’t know what, exactly, is causing it. You just know that you don’t feel good in your body.
The discomfort that many people assume is a “bad back” or “weak knees” often begins in your hips and hamstrings. When your hip muscles remain tight, other parts of your body need to compensate. And tight hamstrings pull on the pelvis, which changes how your entire body moves and feels. It’s all connected—you can’t fully address one without paying attention to the other.
The next step to feeling better in your body isn’t pushing through the pain or accepting “stiff” as your baseline. Instead, it’s taking a few minutes out of your day to practice yoga for tight hips and hamstrings, which slowly stretches the often-overlooked muscles of your lower body so you feel more supported—and less restricted—throughout the day.
20-Minute Yoga for Tight Hips and Hamstrings
This practice doesn’t require you to be flexible or “advanced” in yoga. It only asks that you move intentionally so you can start giving your hips and hamstrings the relief they need.
1. Reclined Bound Angle Pose
Lie on your back on the mat. Draw the soles of your feet together and let your knees fall to the sides in Reclined Bound Angle Pose. Place your hands on your body. Take a deep breath.
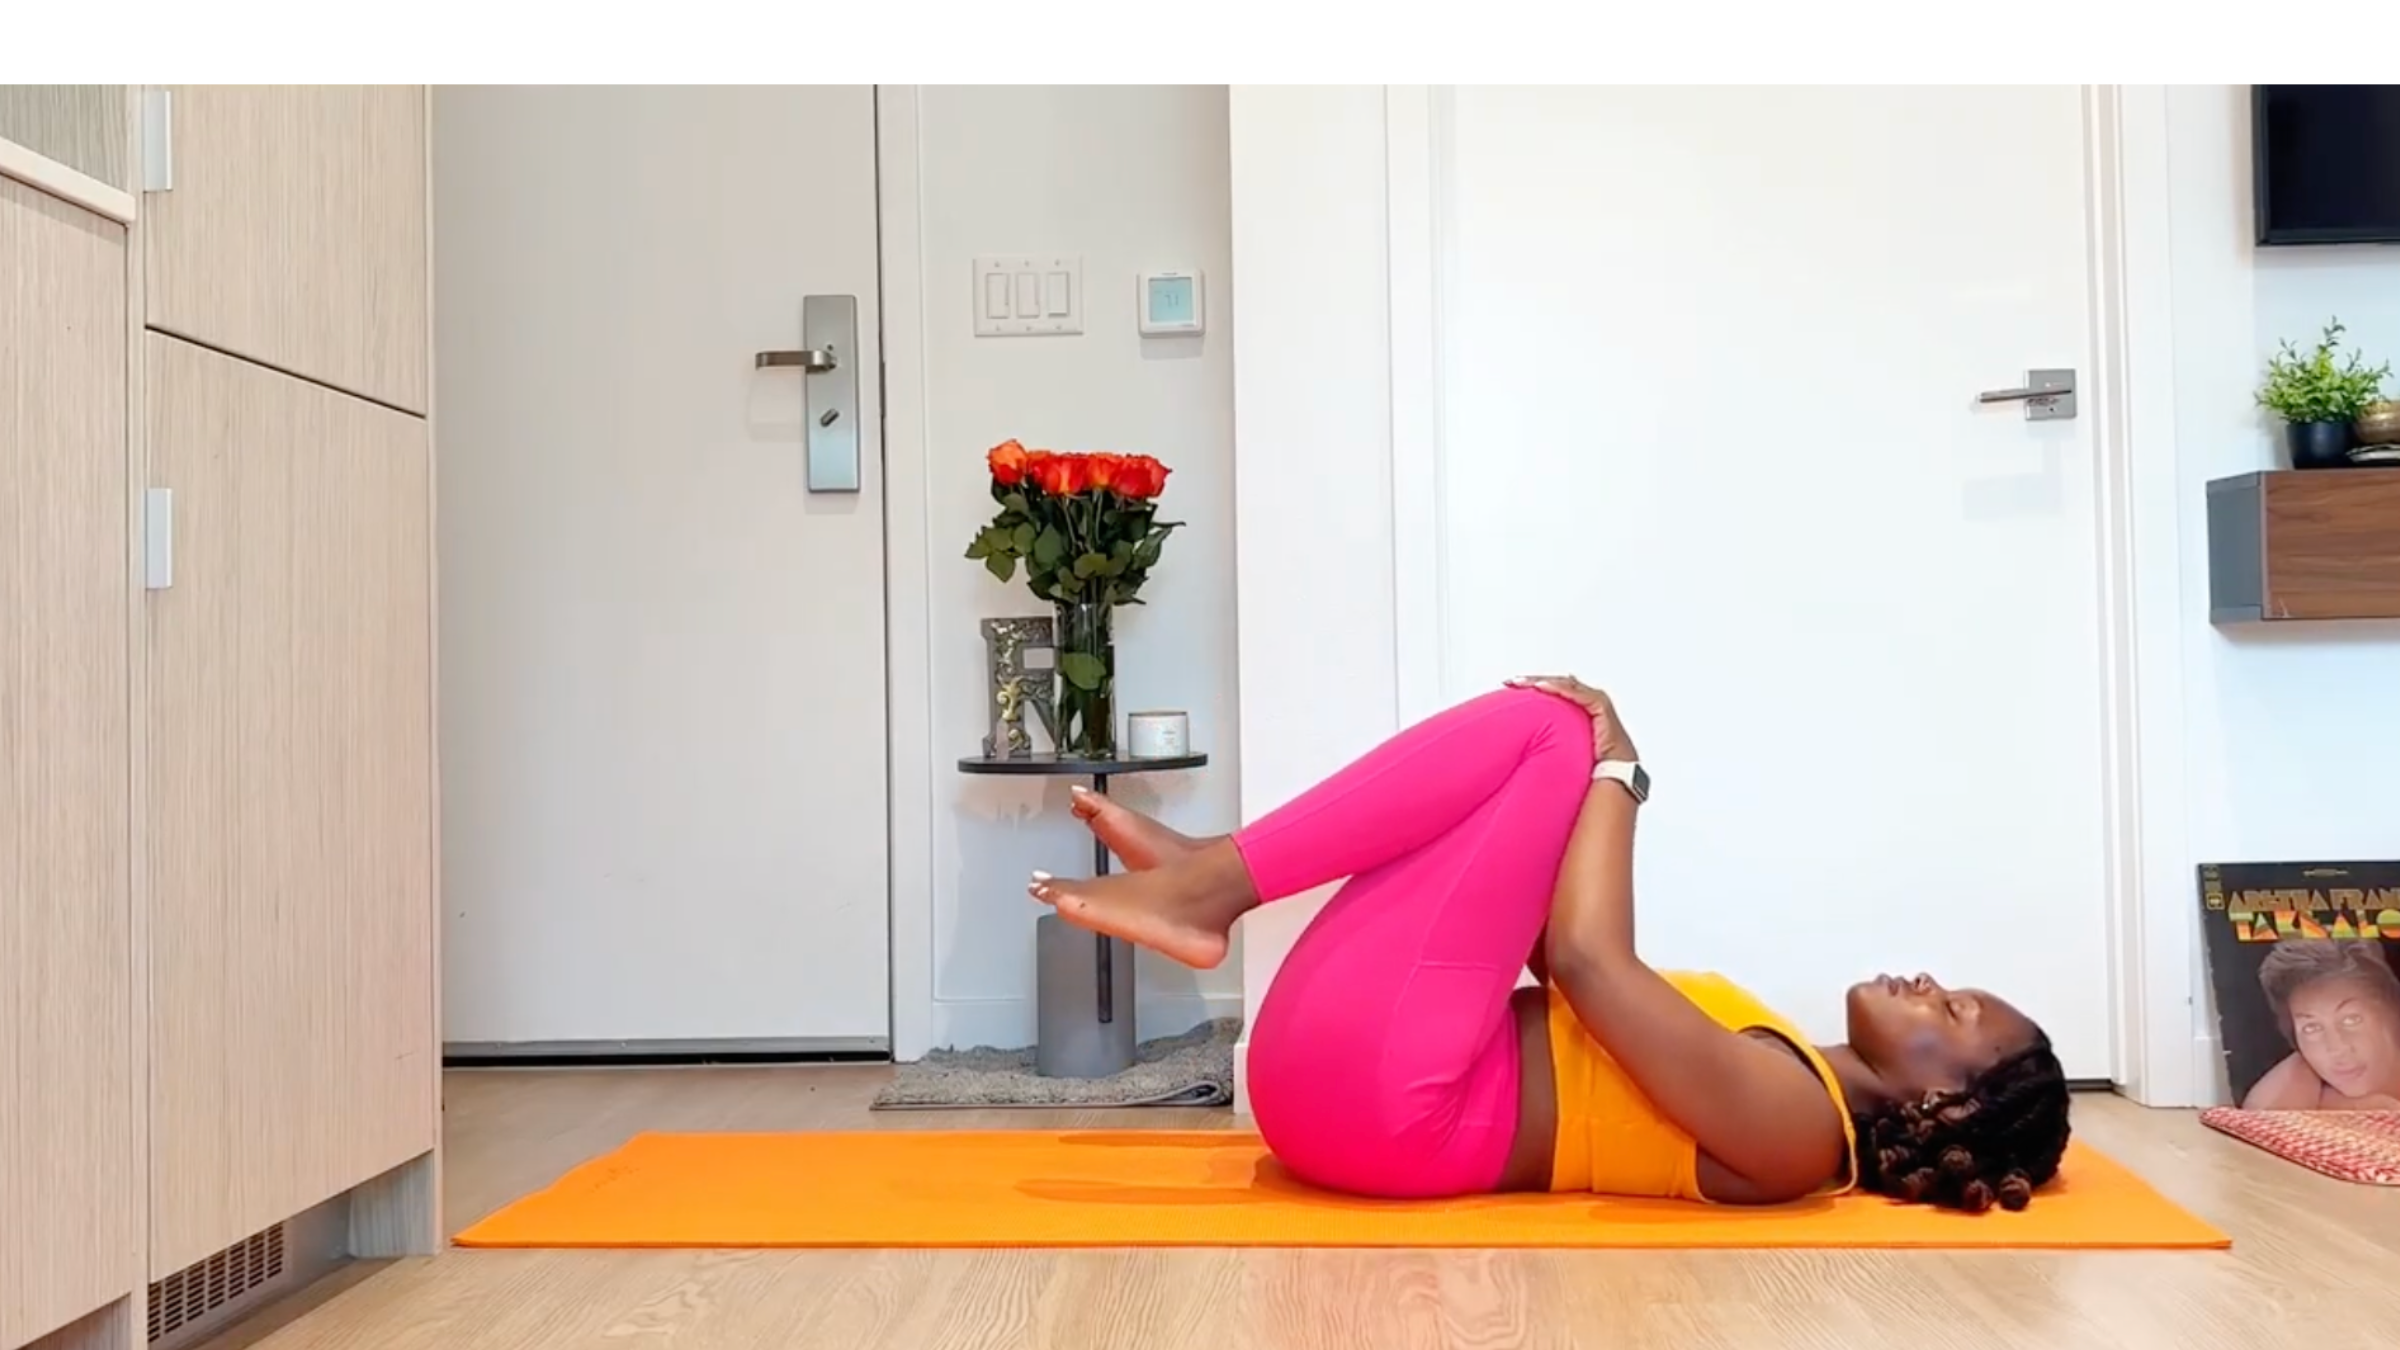
2. Knee Circles
Draw your knees toward your chest and rest your hands on your knees or behind your thighs. Draw a few circles with your knees in one direction, then switch directions.
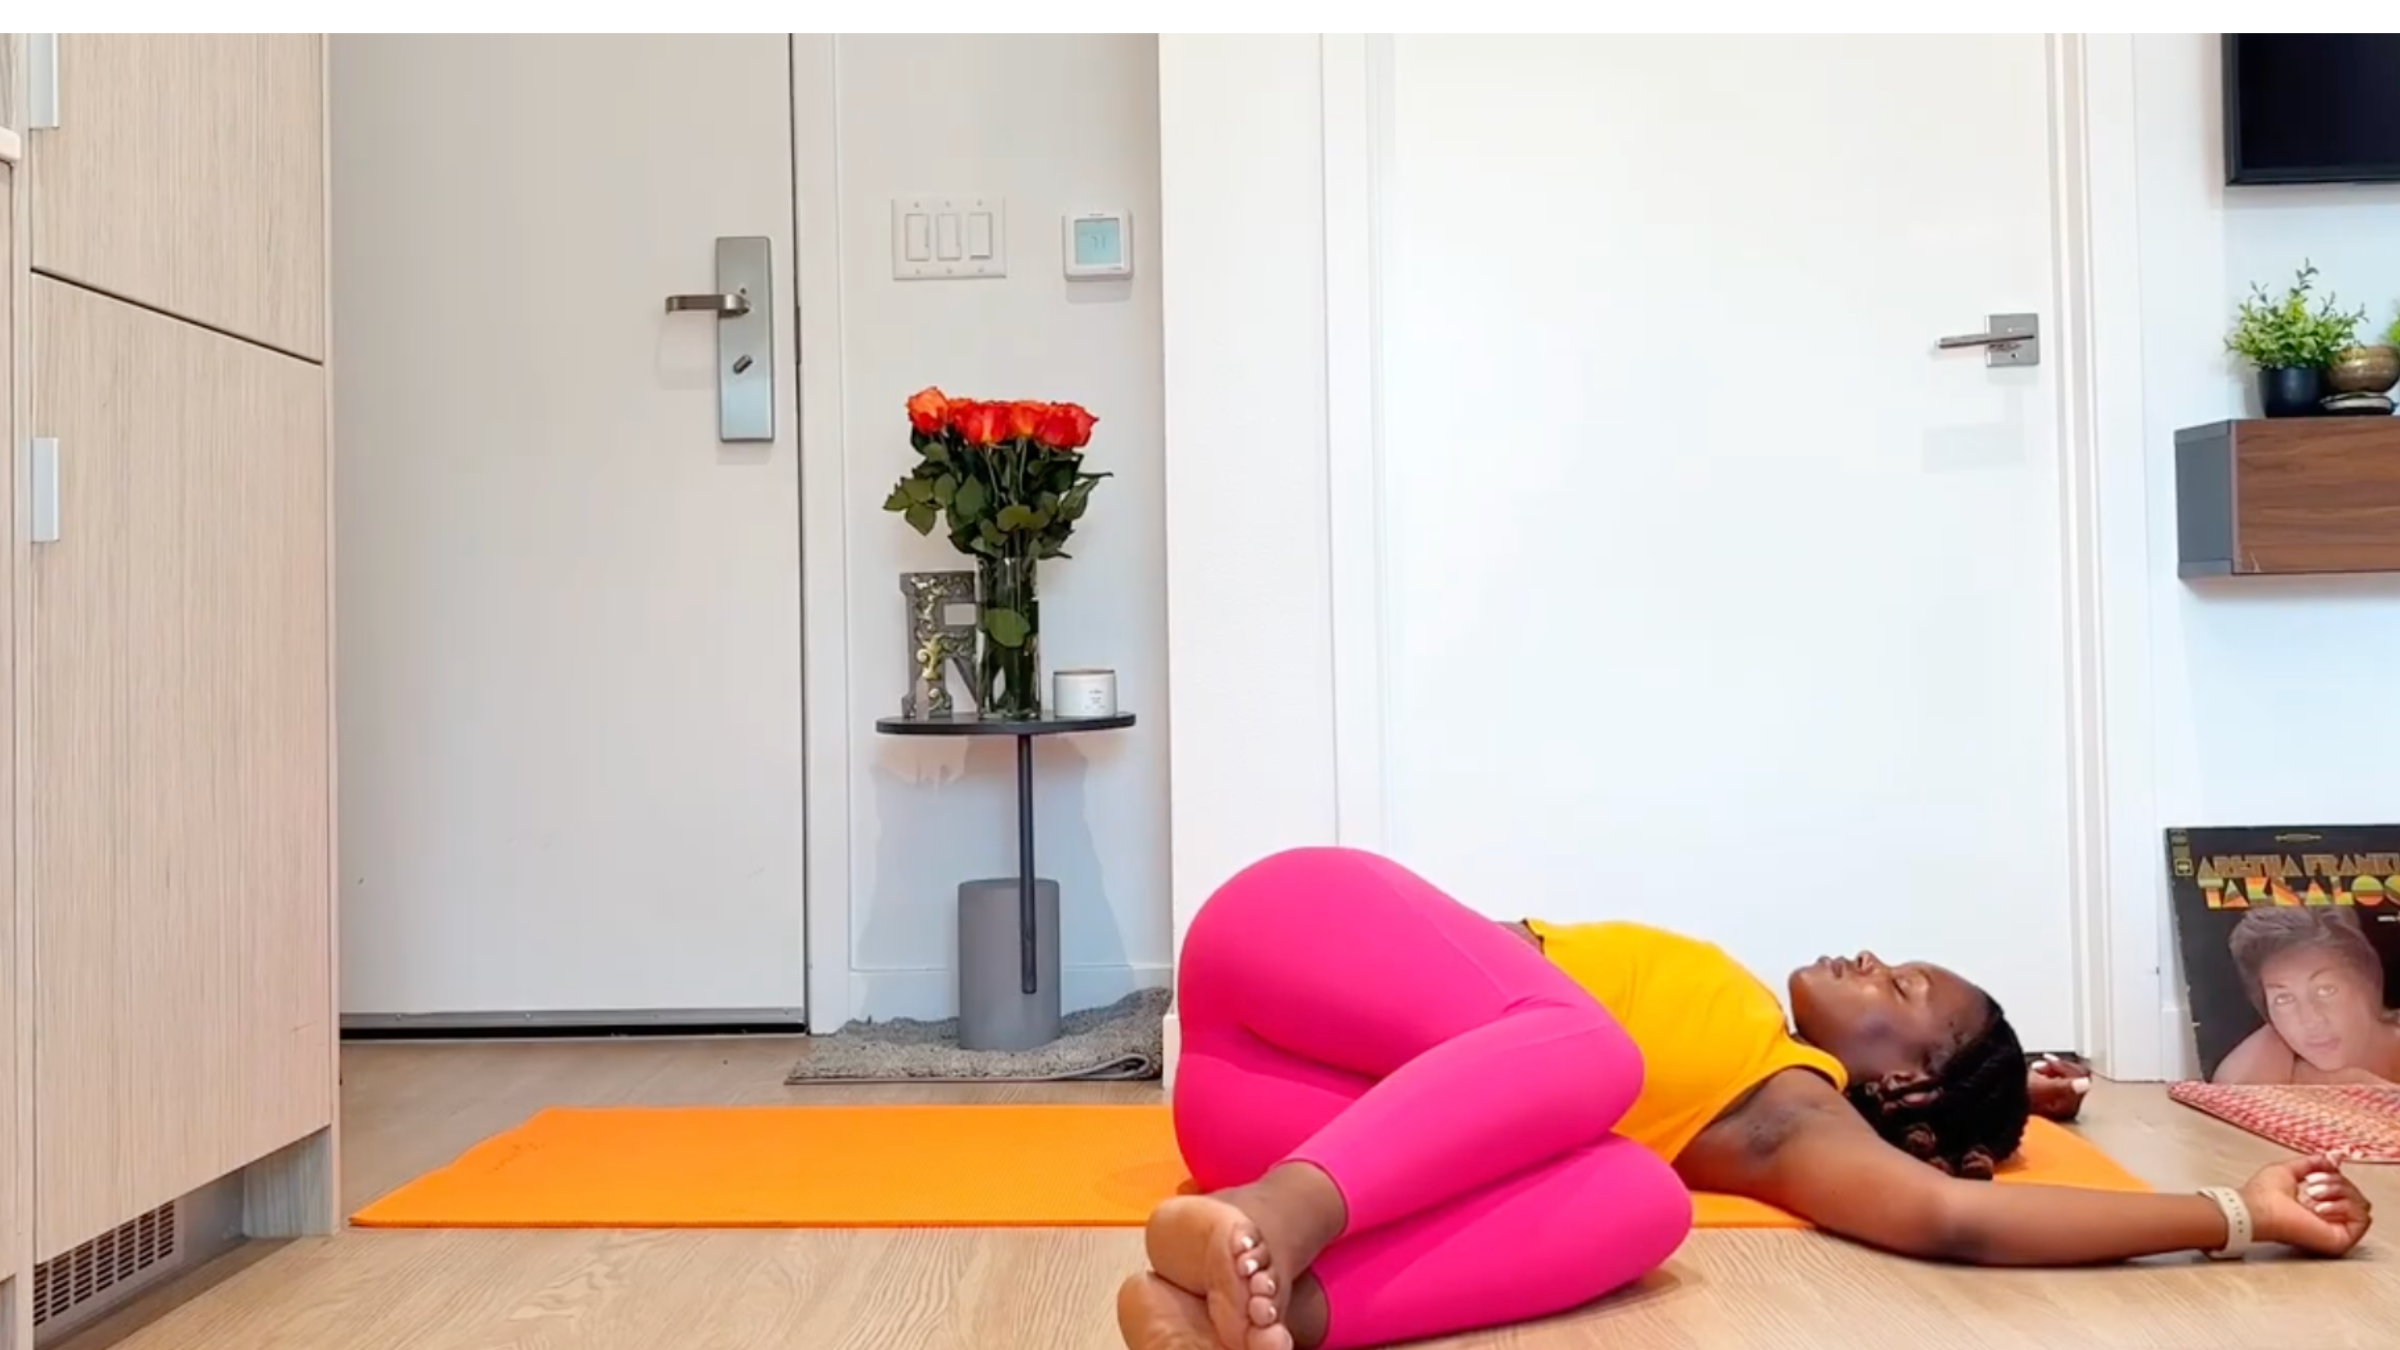
3. Supine Spinal Twist with Knees Bent
With your knees drawn toward your chest, lower them toward the left side in a Supine Spinal Twist. Keep your shoulders on the mat. Take a few breaths here, then return to center and repeat on the right side.
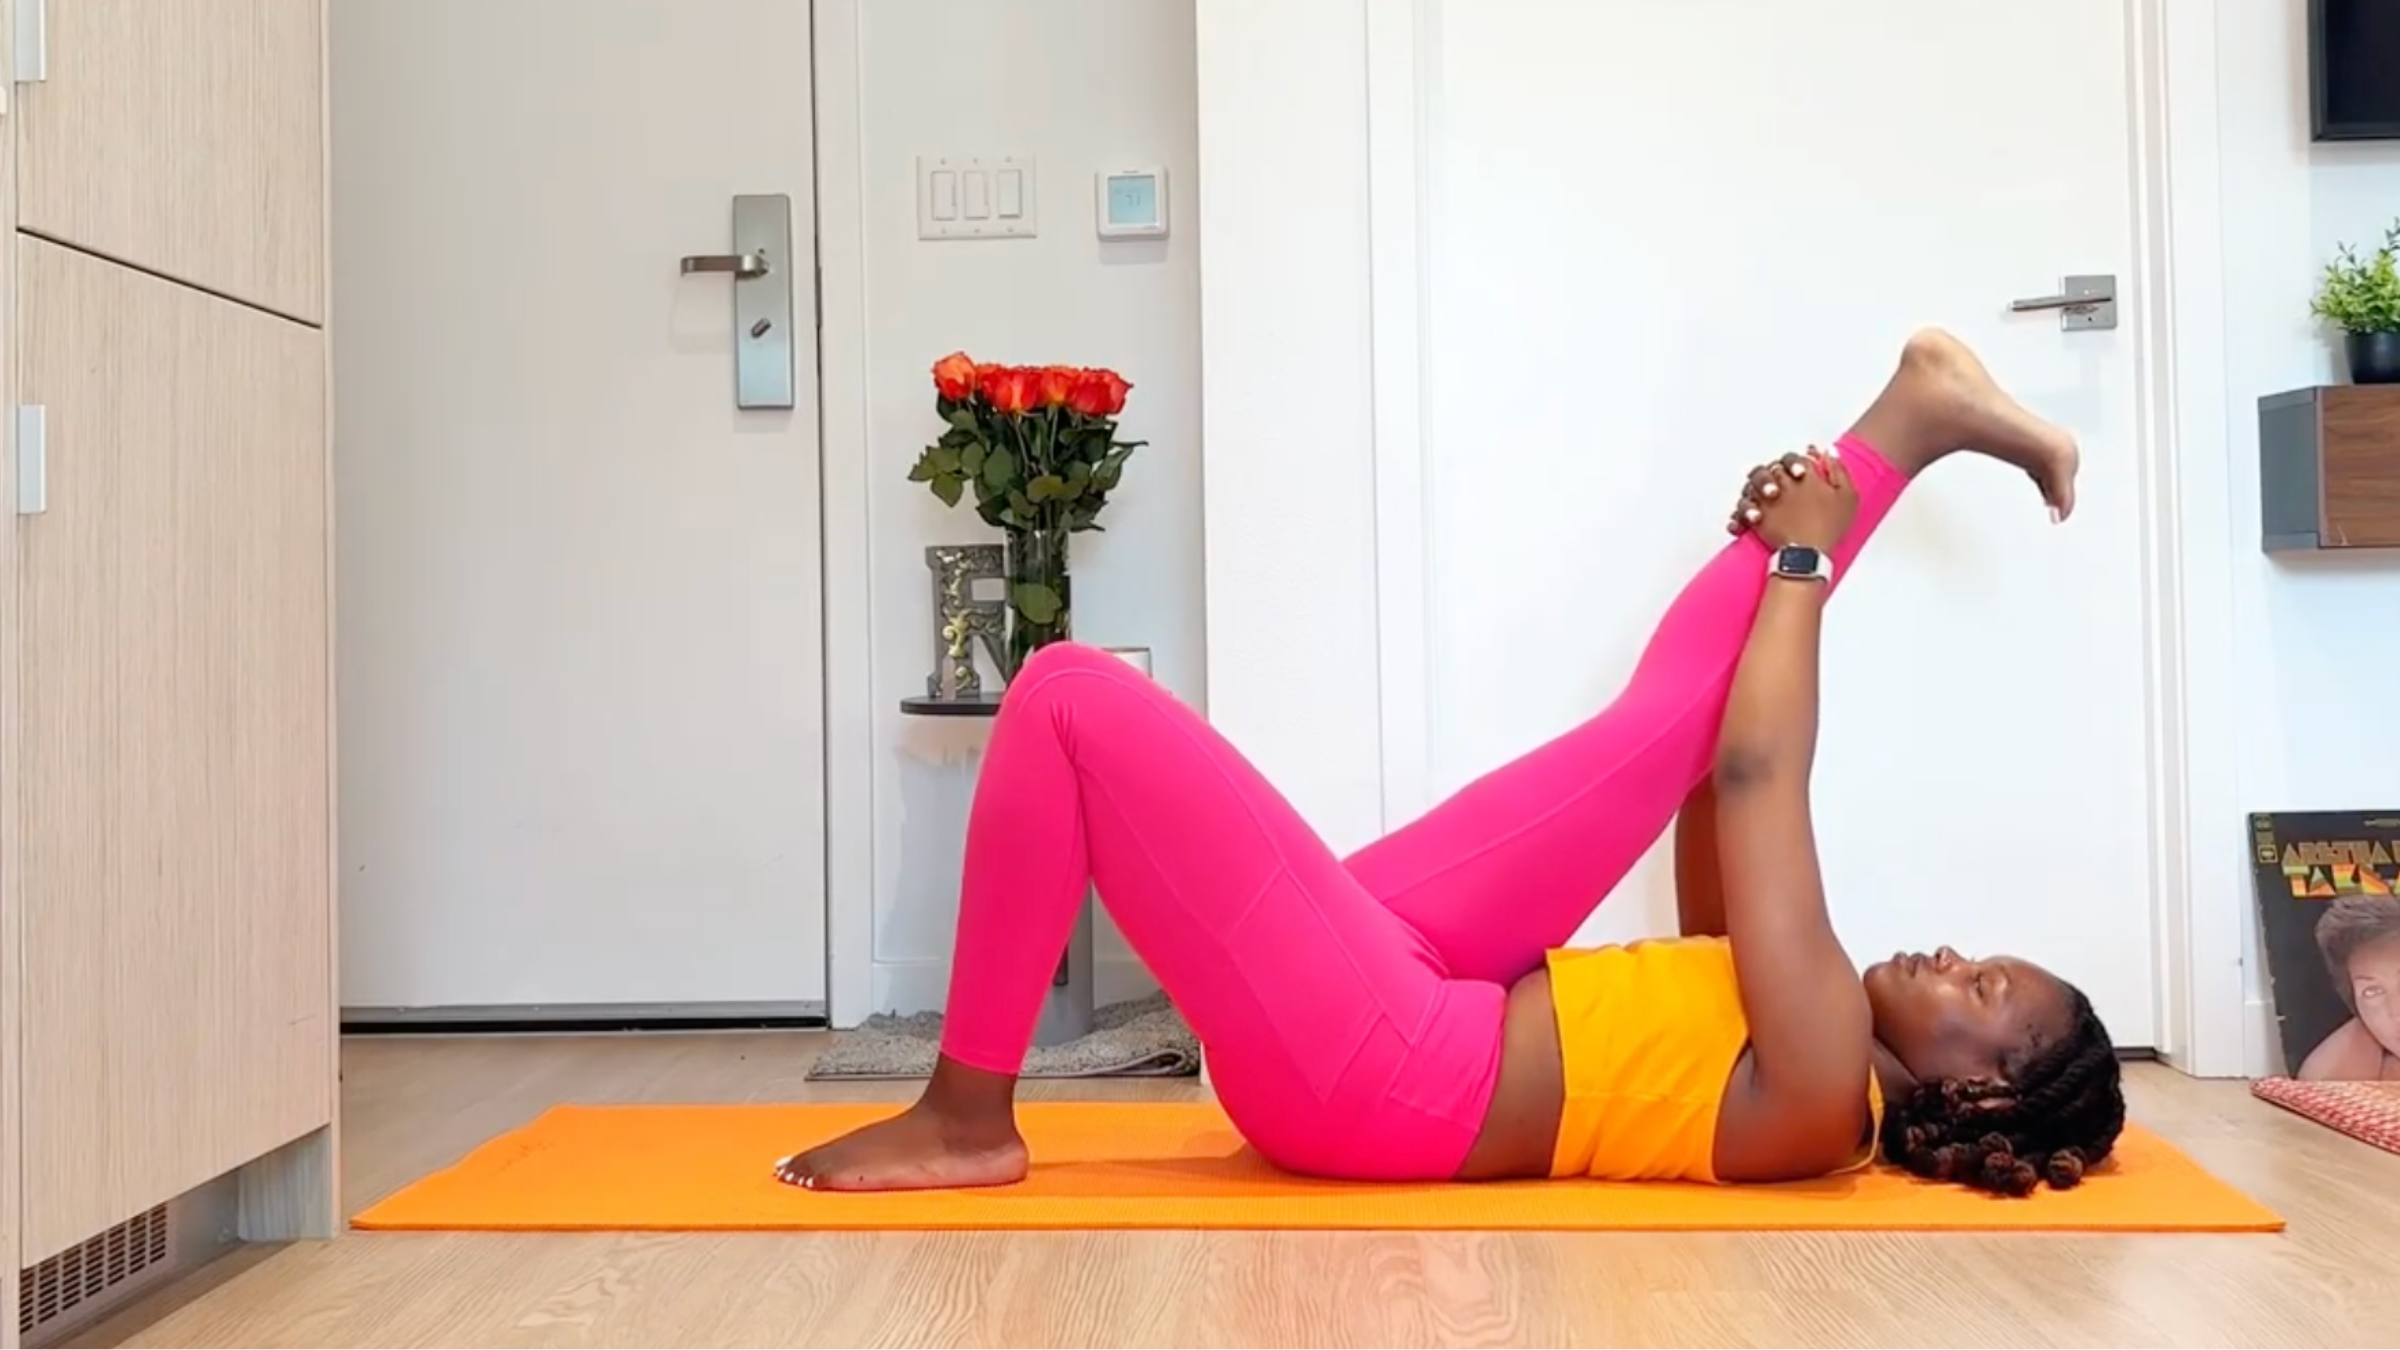
4. Hamstring Stretch
Still lying on your back, bend your knees and plant both feet on the mat. Straighten your right leg and reach your foot toward the ceiling (keeping your knee slightly bent). Grasp the back of your right thigh with your hands or wrap a strap or belt around your thigh and hold onto either end of it. Take a few breaths here.
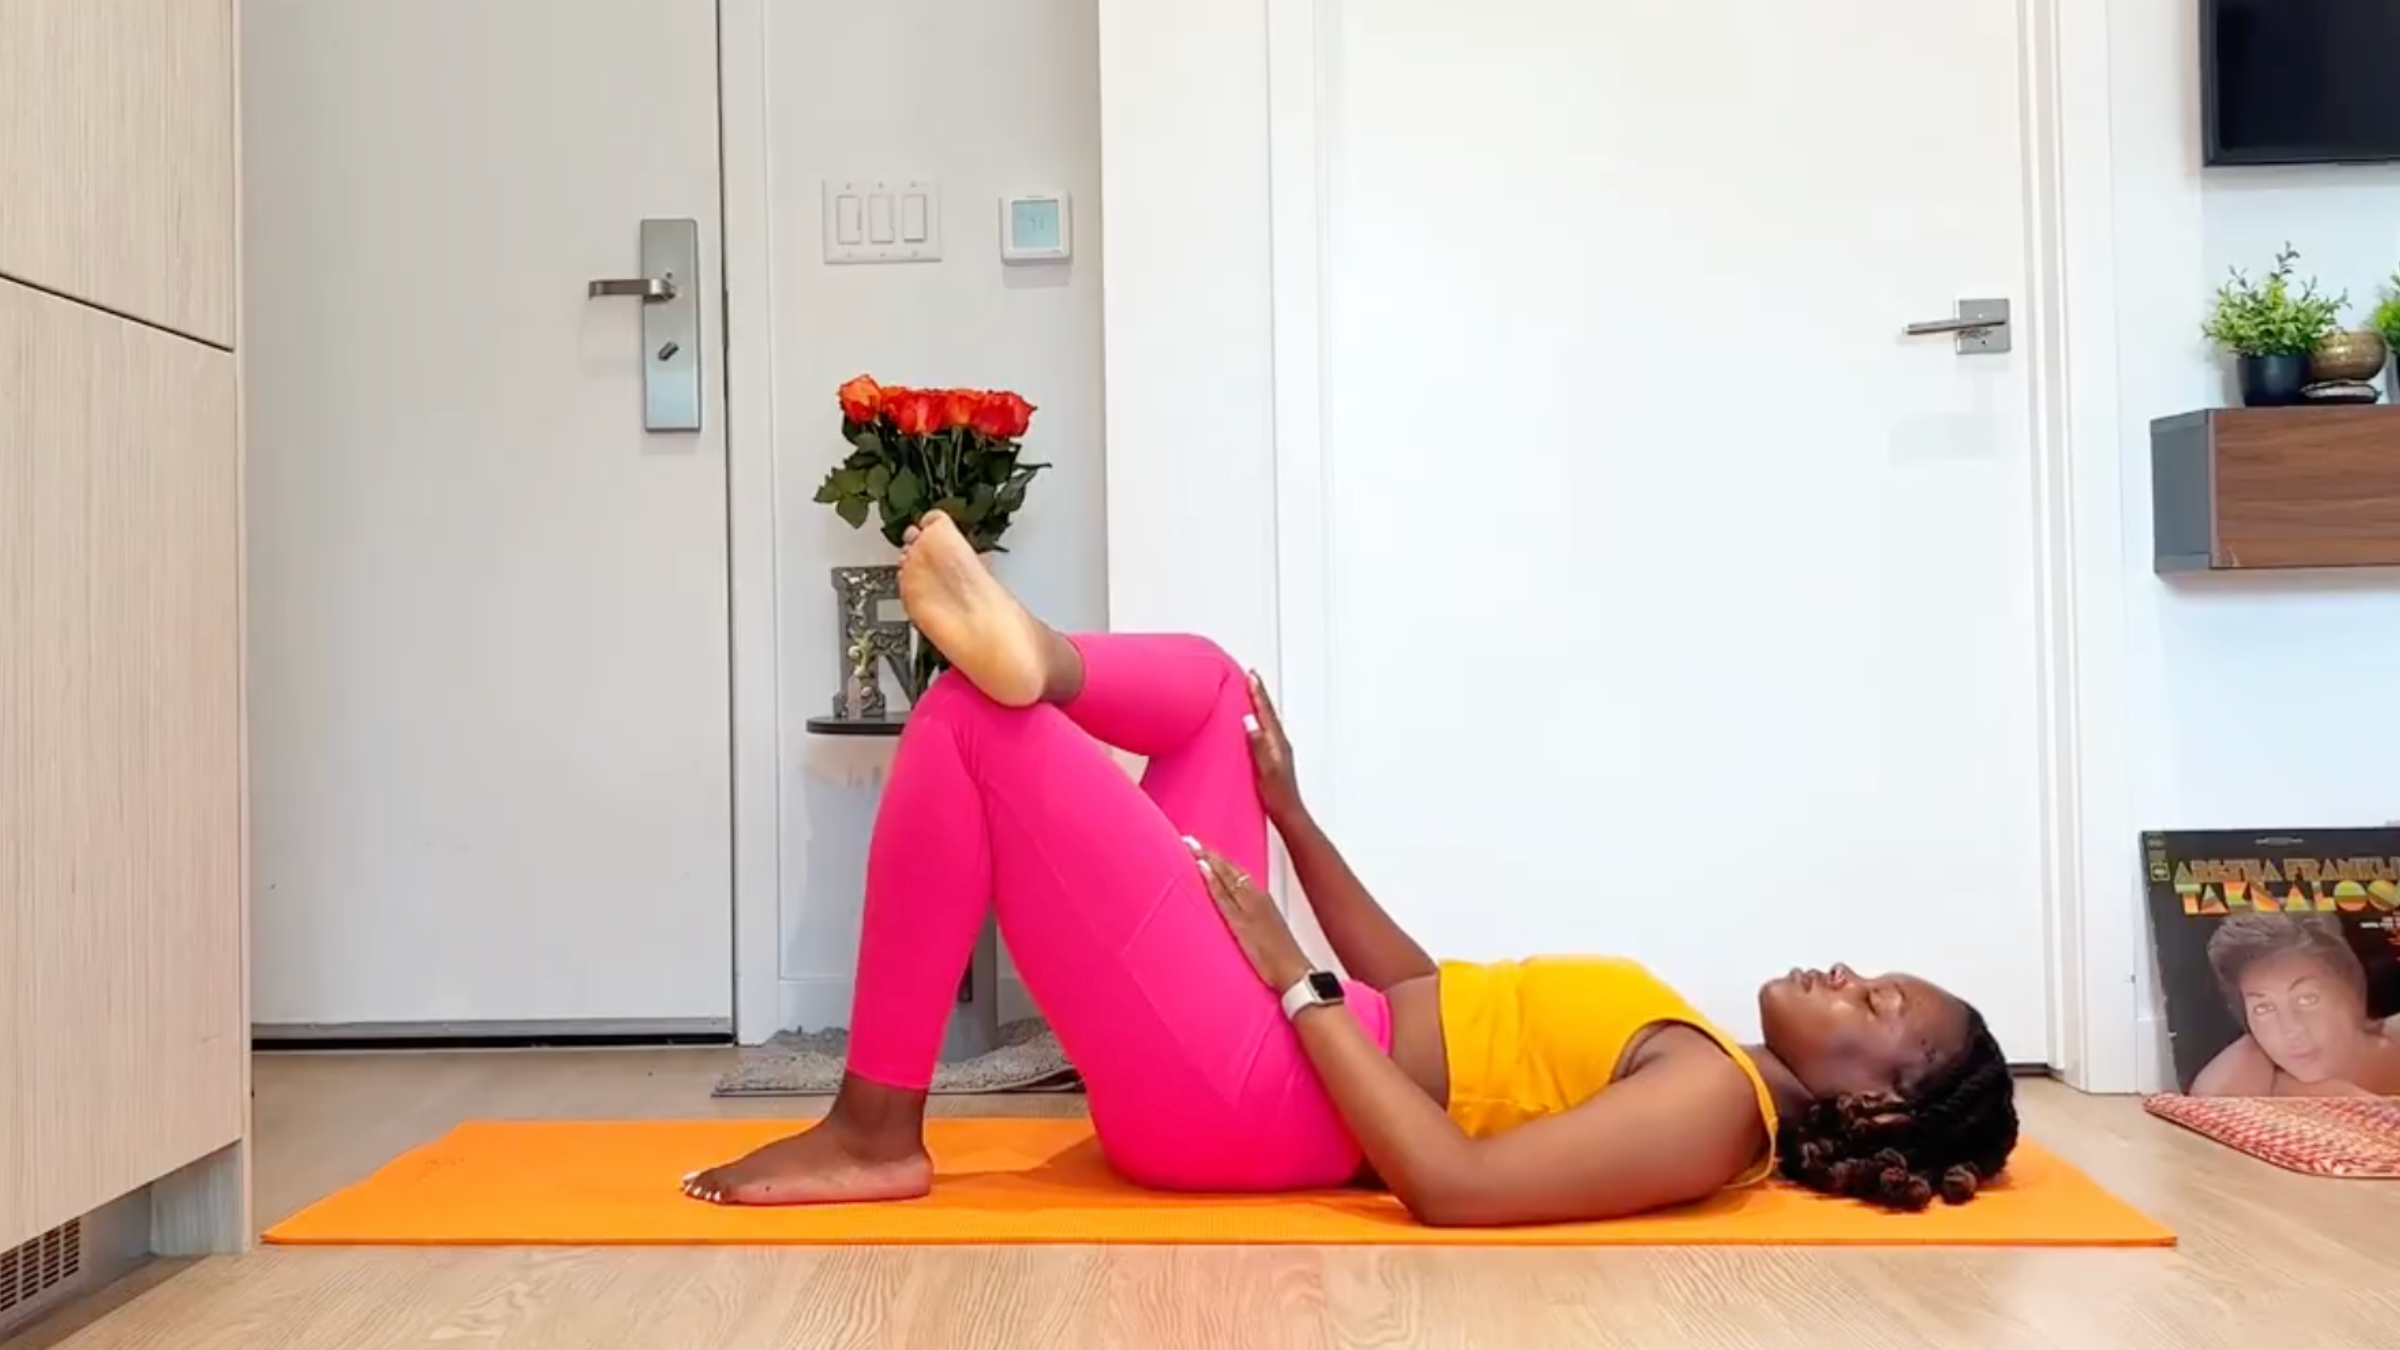
5. Figure 4
From Hamstring Stretch, cross your right ankle over your left knee. Stay here or draw your legs toward your chest, grasping your left shin or behind your thigh. Take a few breaths here, then lower your left foot to the mat.
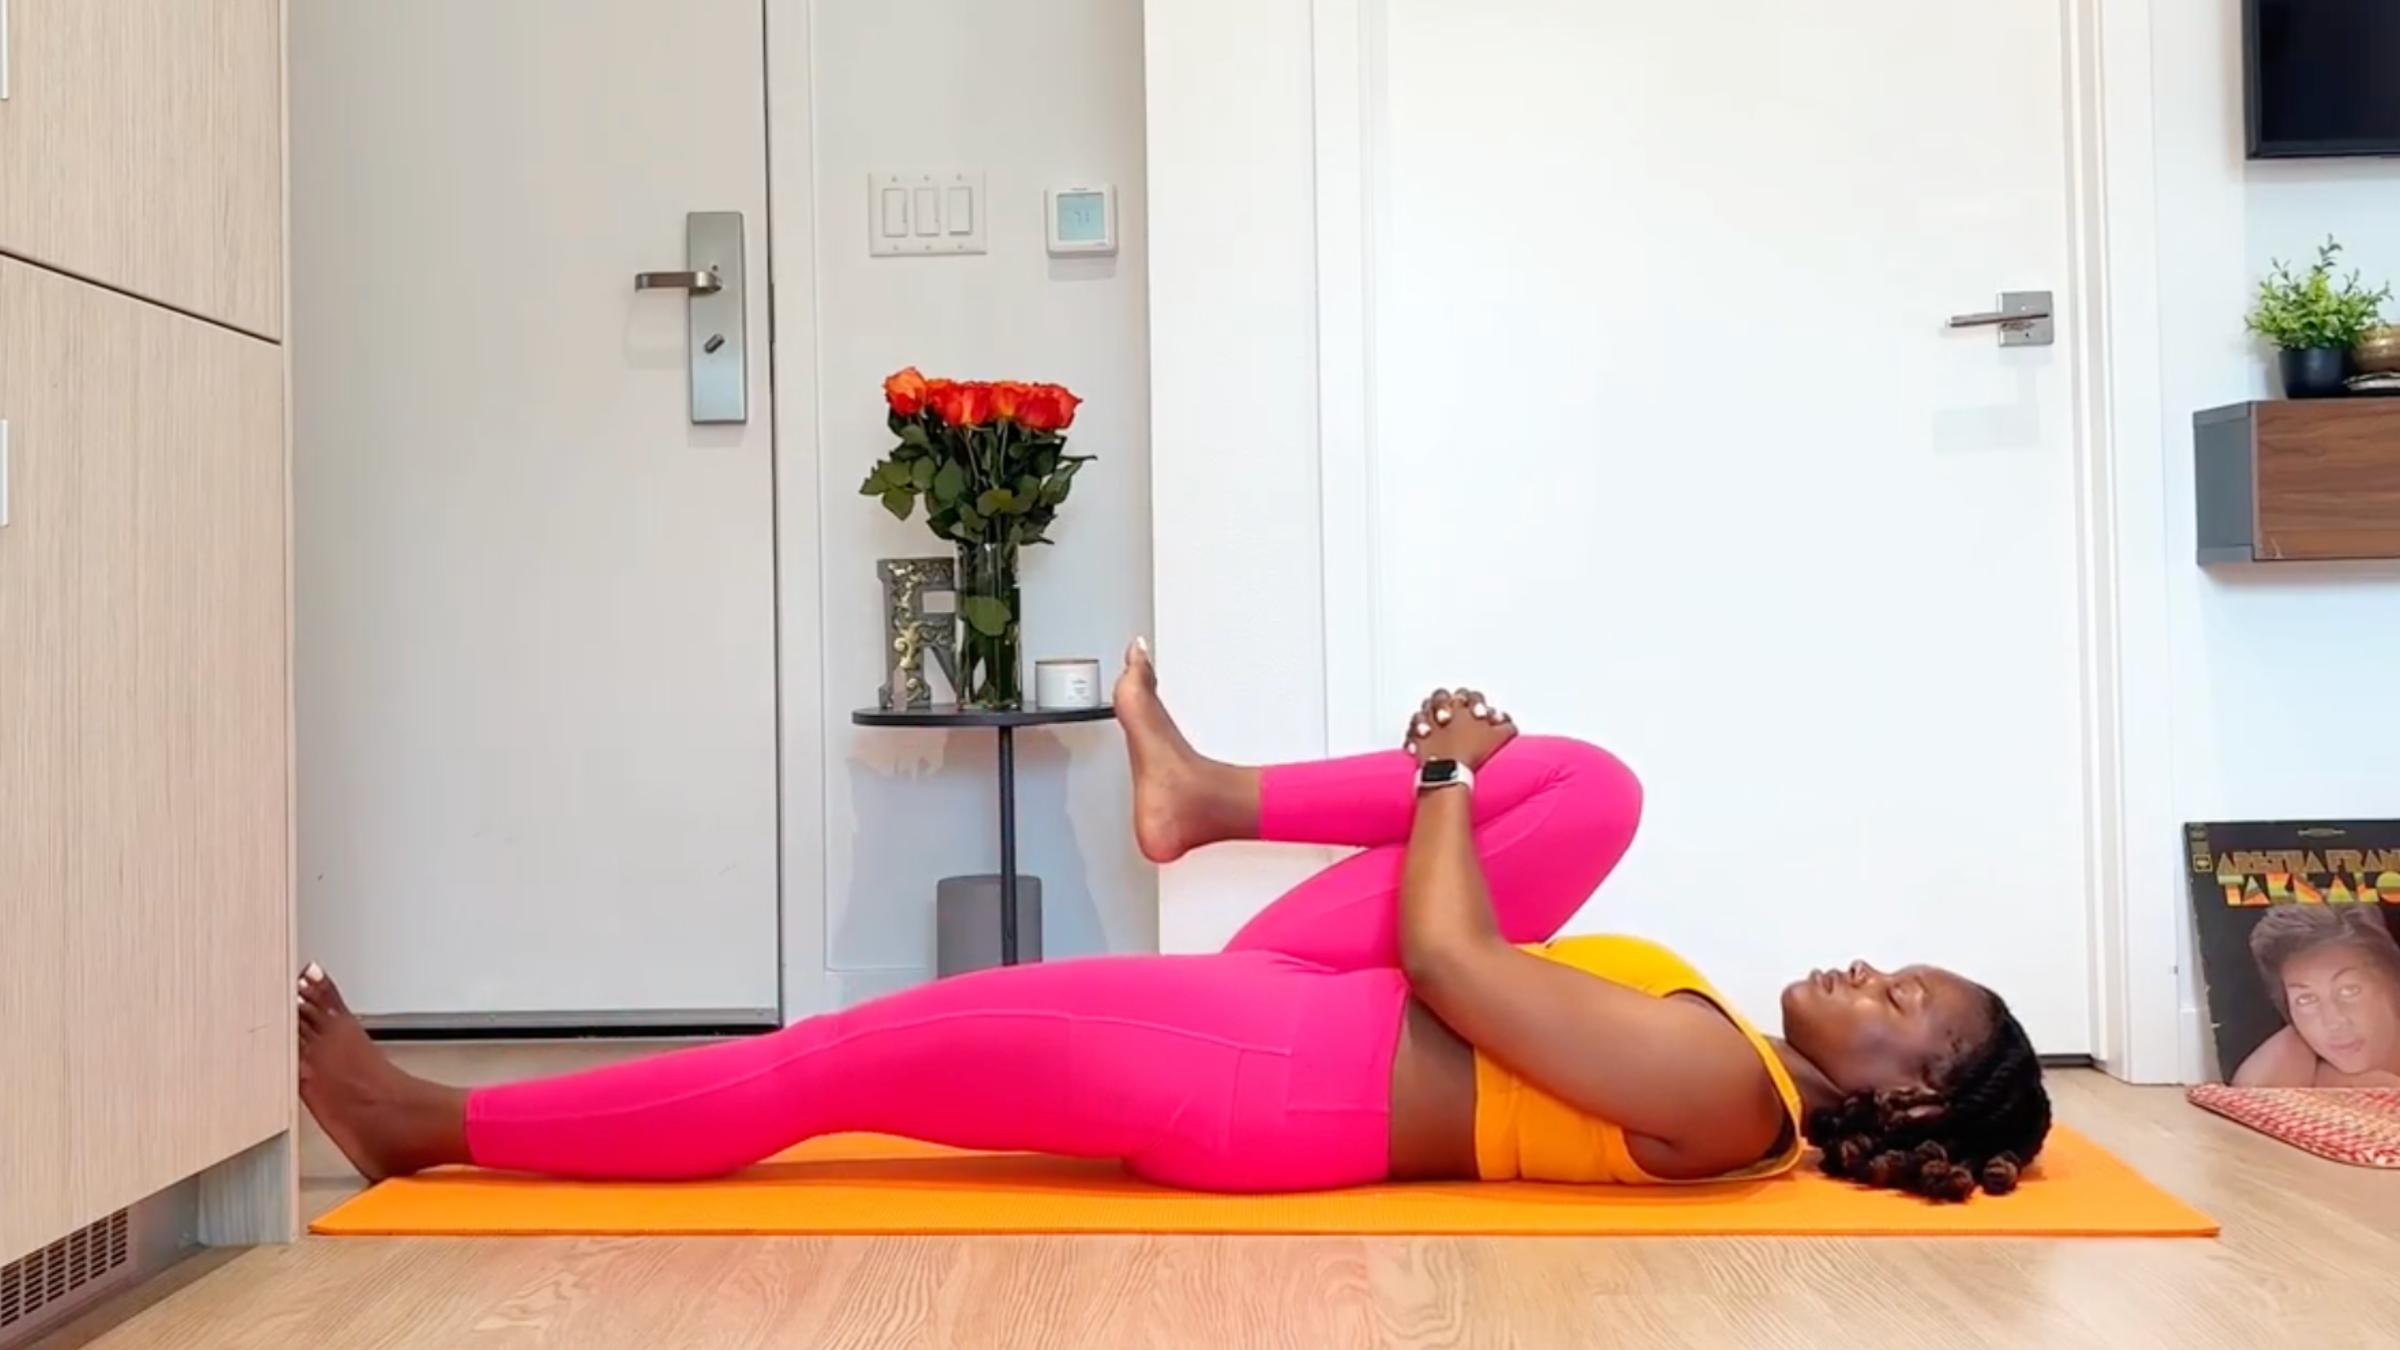
6. Knee to Chest
Draw your right knee toward your chest and straighten your left leg on the mat. Stay here for a breath, then draw your right knee to the side (toward your right shoulder).
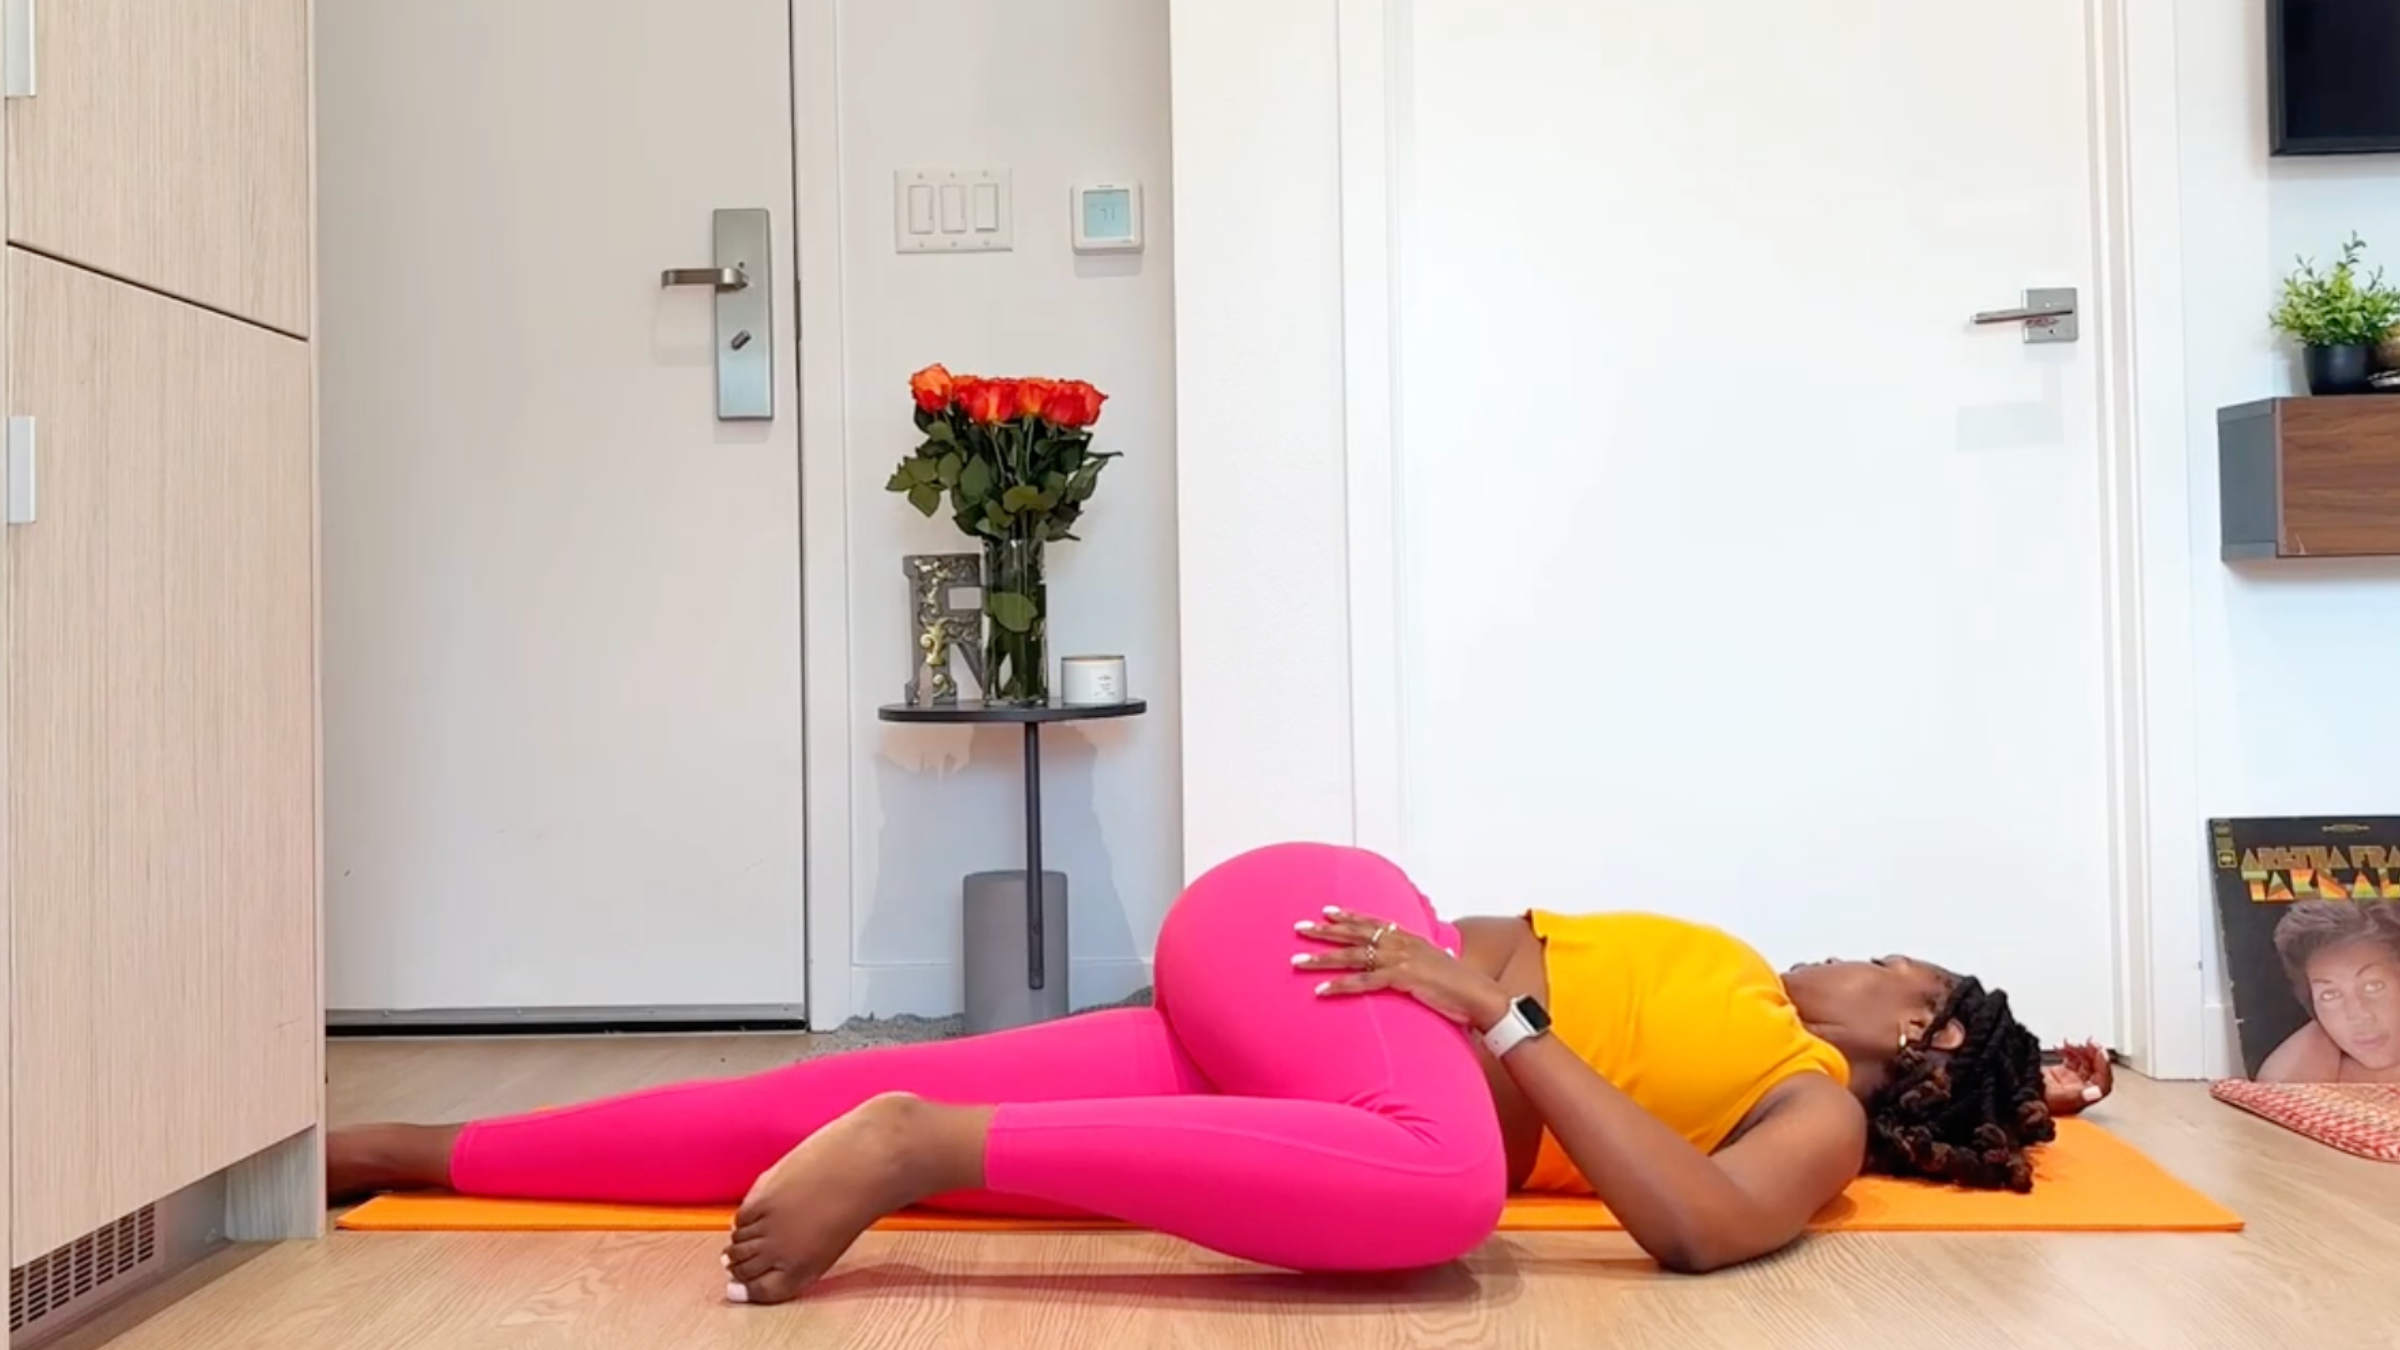
7. Supine Spinal Twist
Cross your right knee toward the left in a Supine Spinal Twist. Keep your shoulders on the mat. Take a few breaths here, then return to center. Plant both feet on the mat.
Repeat Hamstring Stretch, Figure 4, Knee to Chest, and Supine Spinal Twist on the left side.
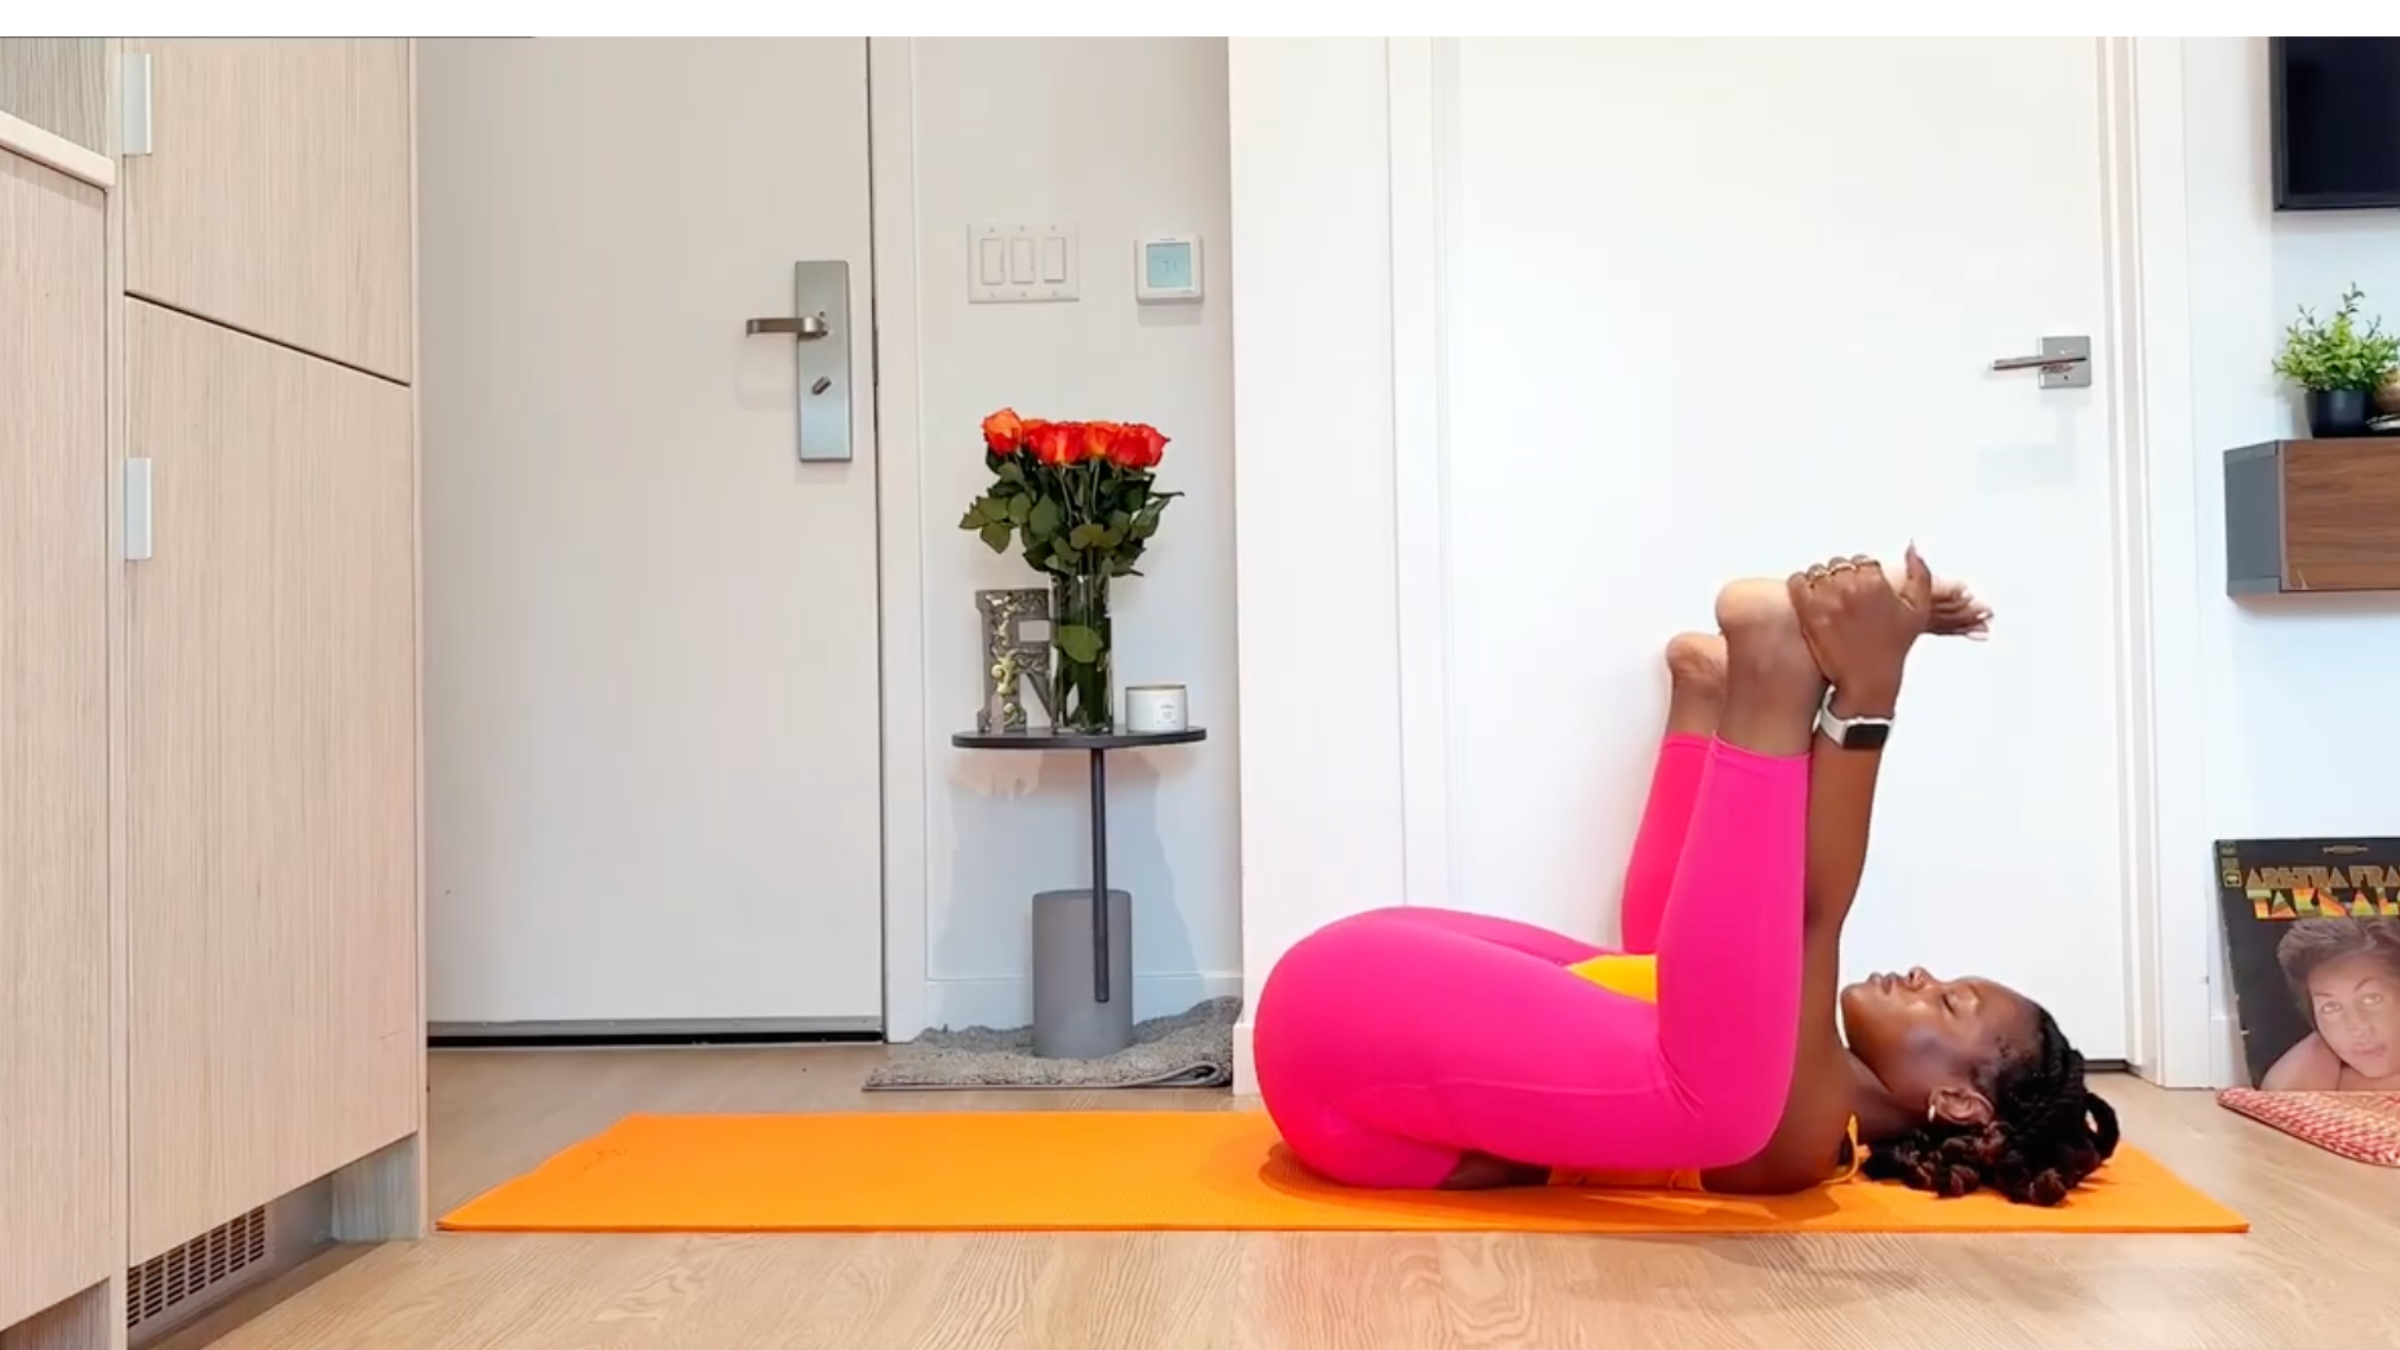
8. Happy Baby
Draw your knees toward your armpits. Keeping your lower back on the mat, grasp your outer thighs, shins, or feet in Happy Baby. Breathe here.
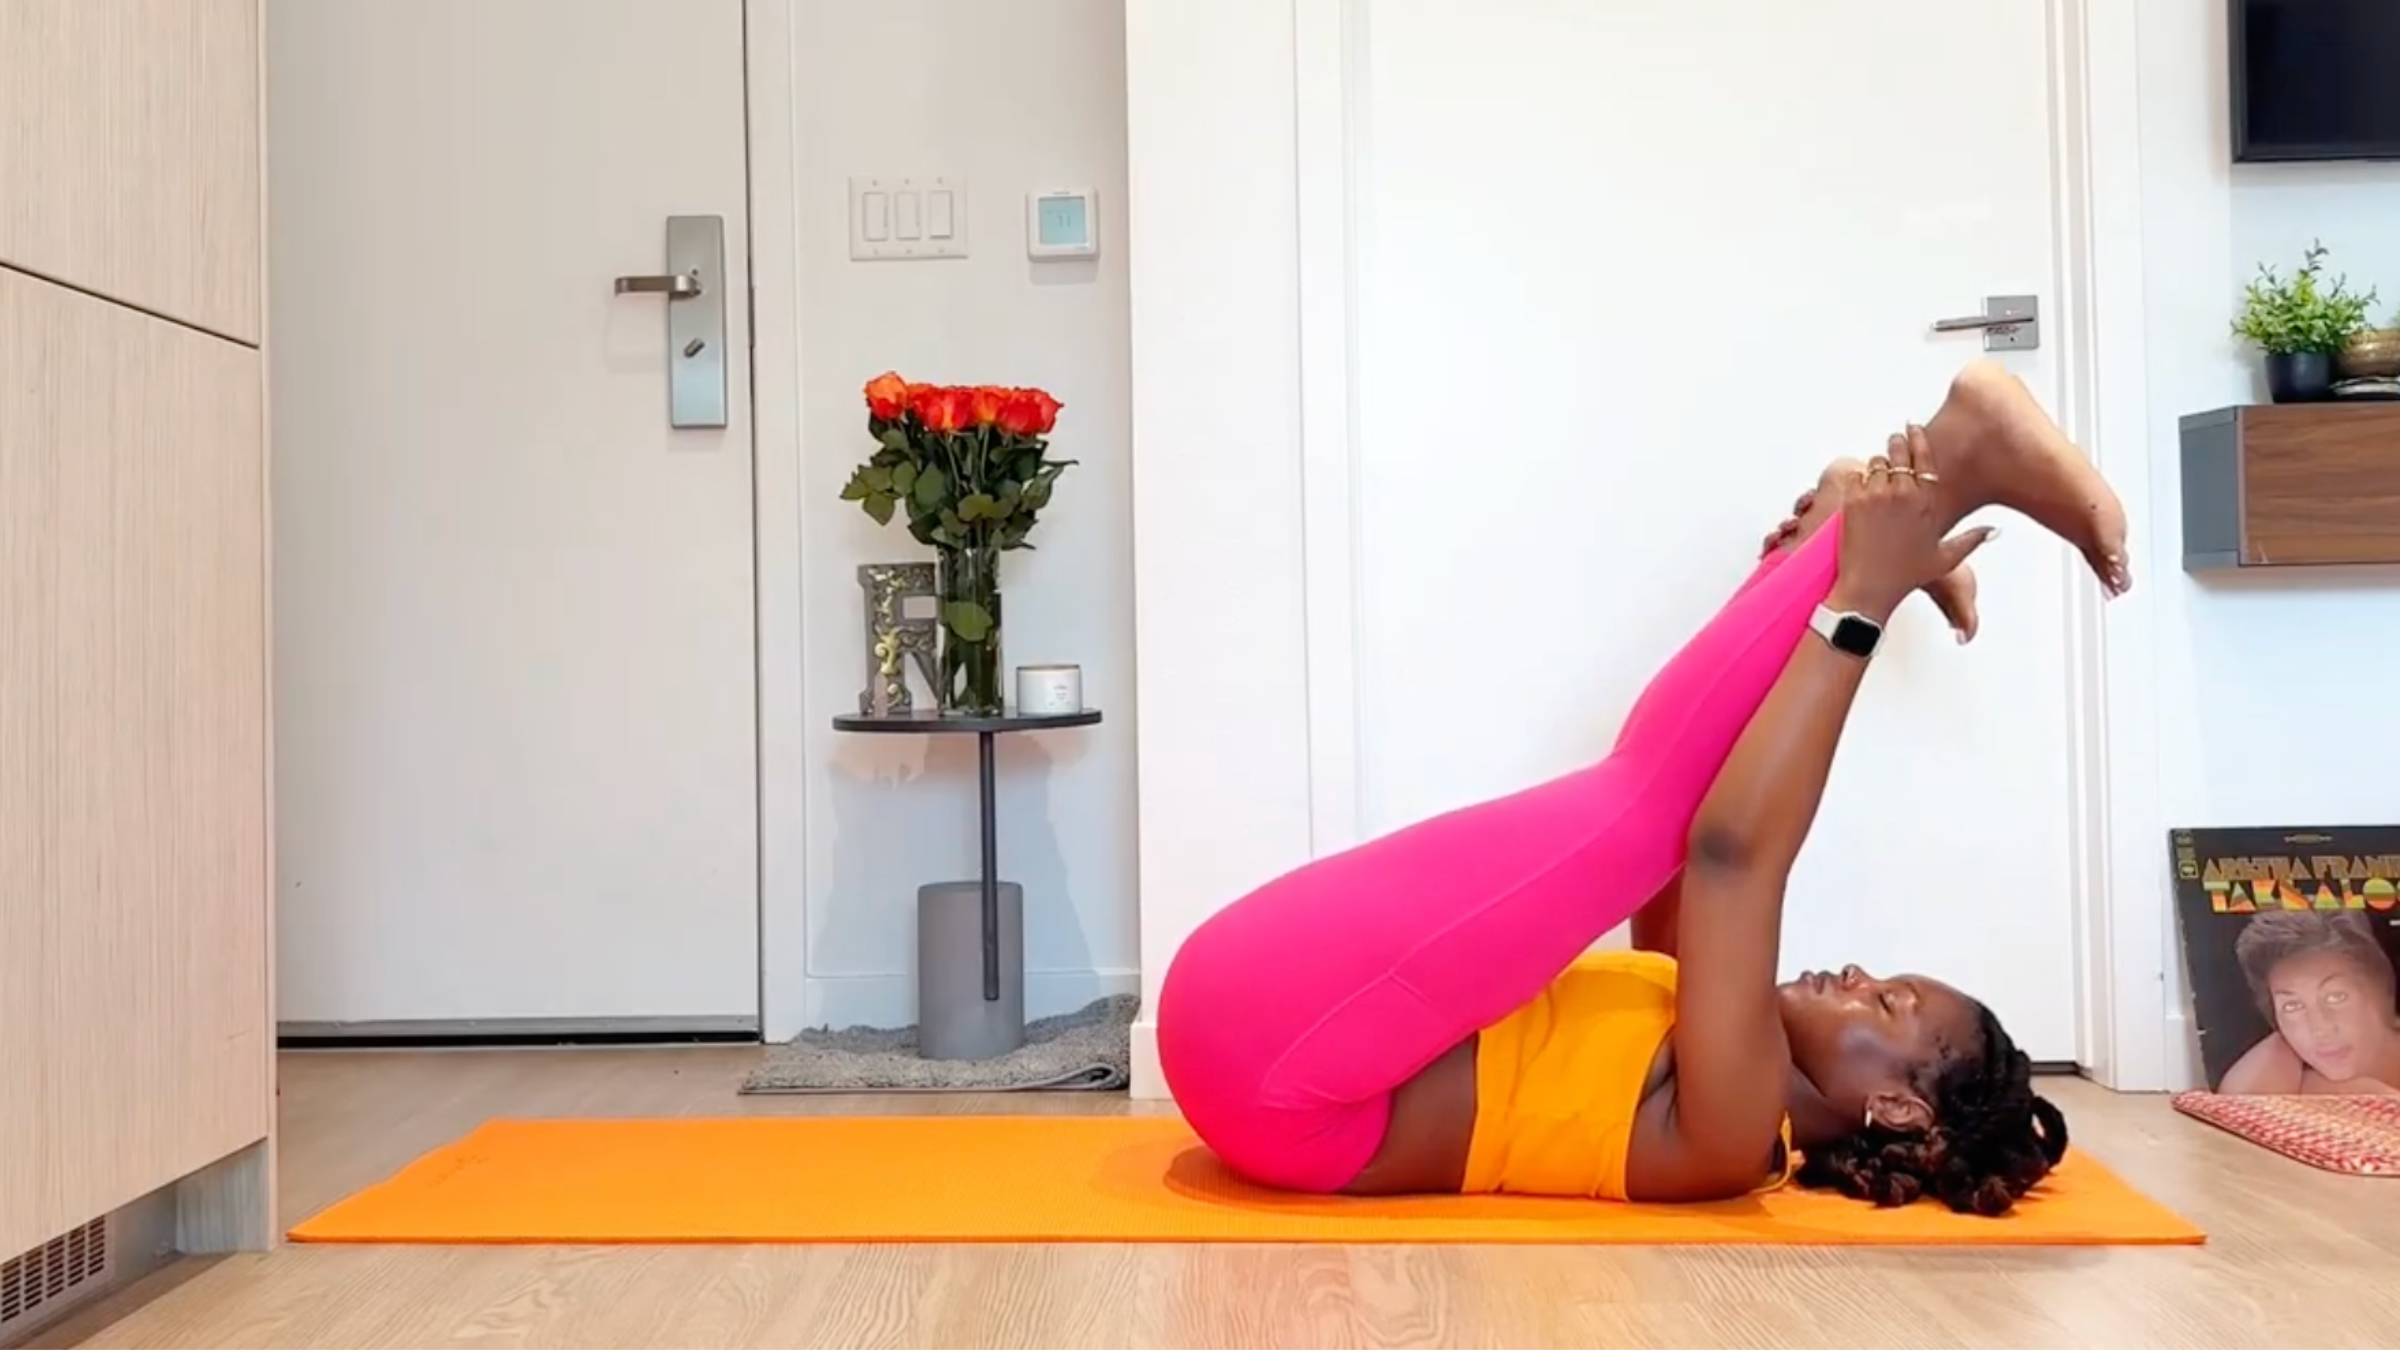
9. Reclining Forward Bend
From Happy Baby, straighten your legs and reach your heels toward the ceiling. Keeping your lower back on the mat, gently pull your legs toward you in Reclining Forward Bend.
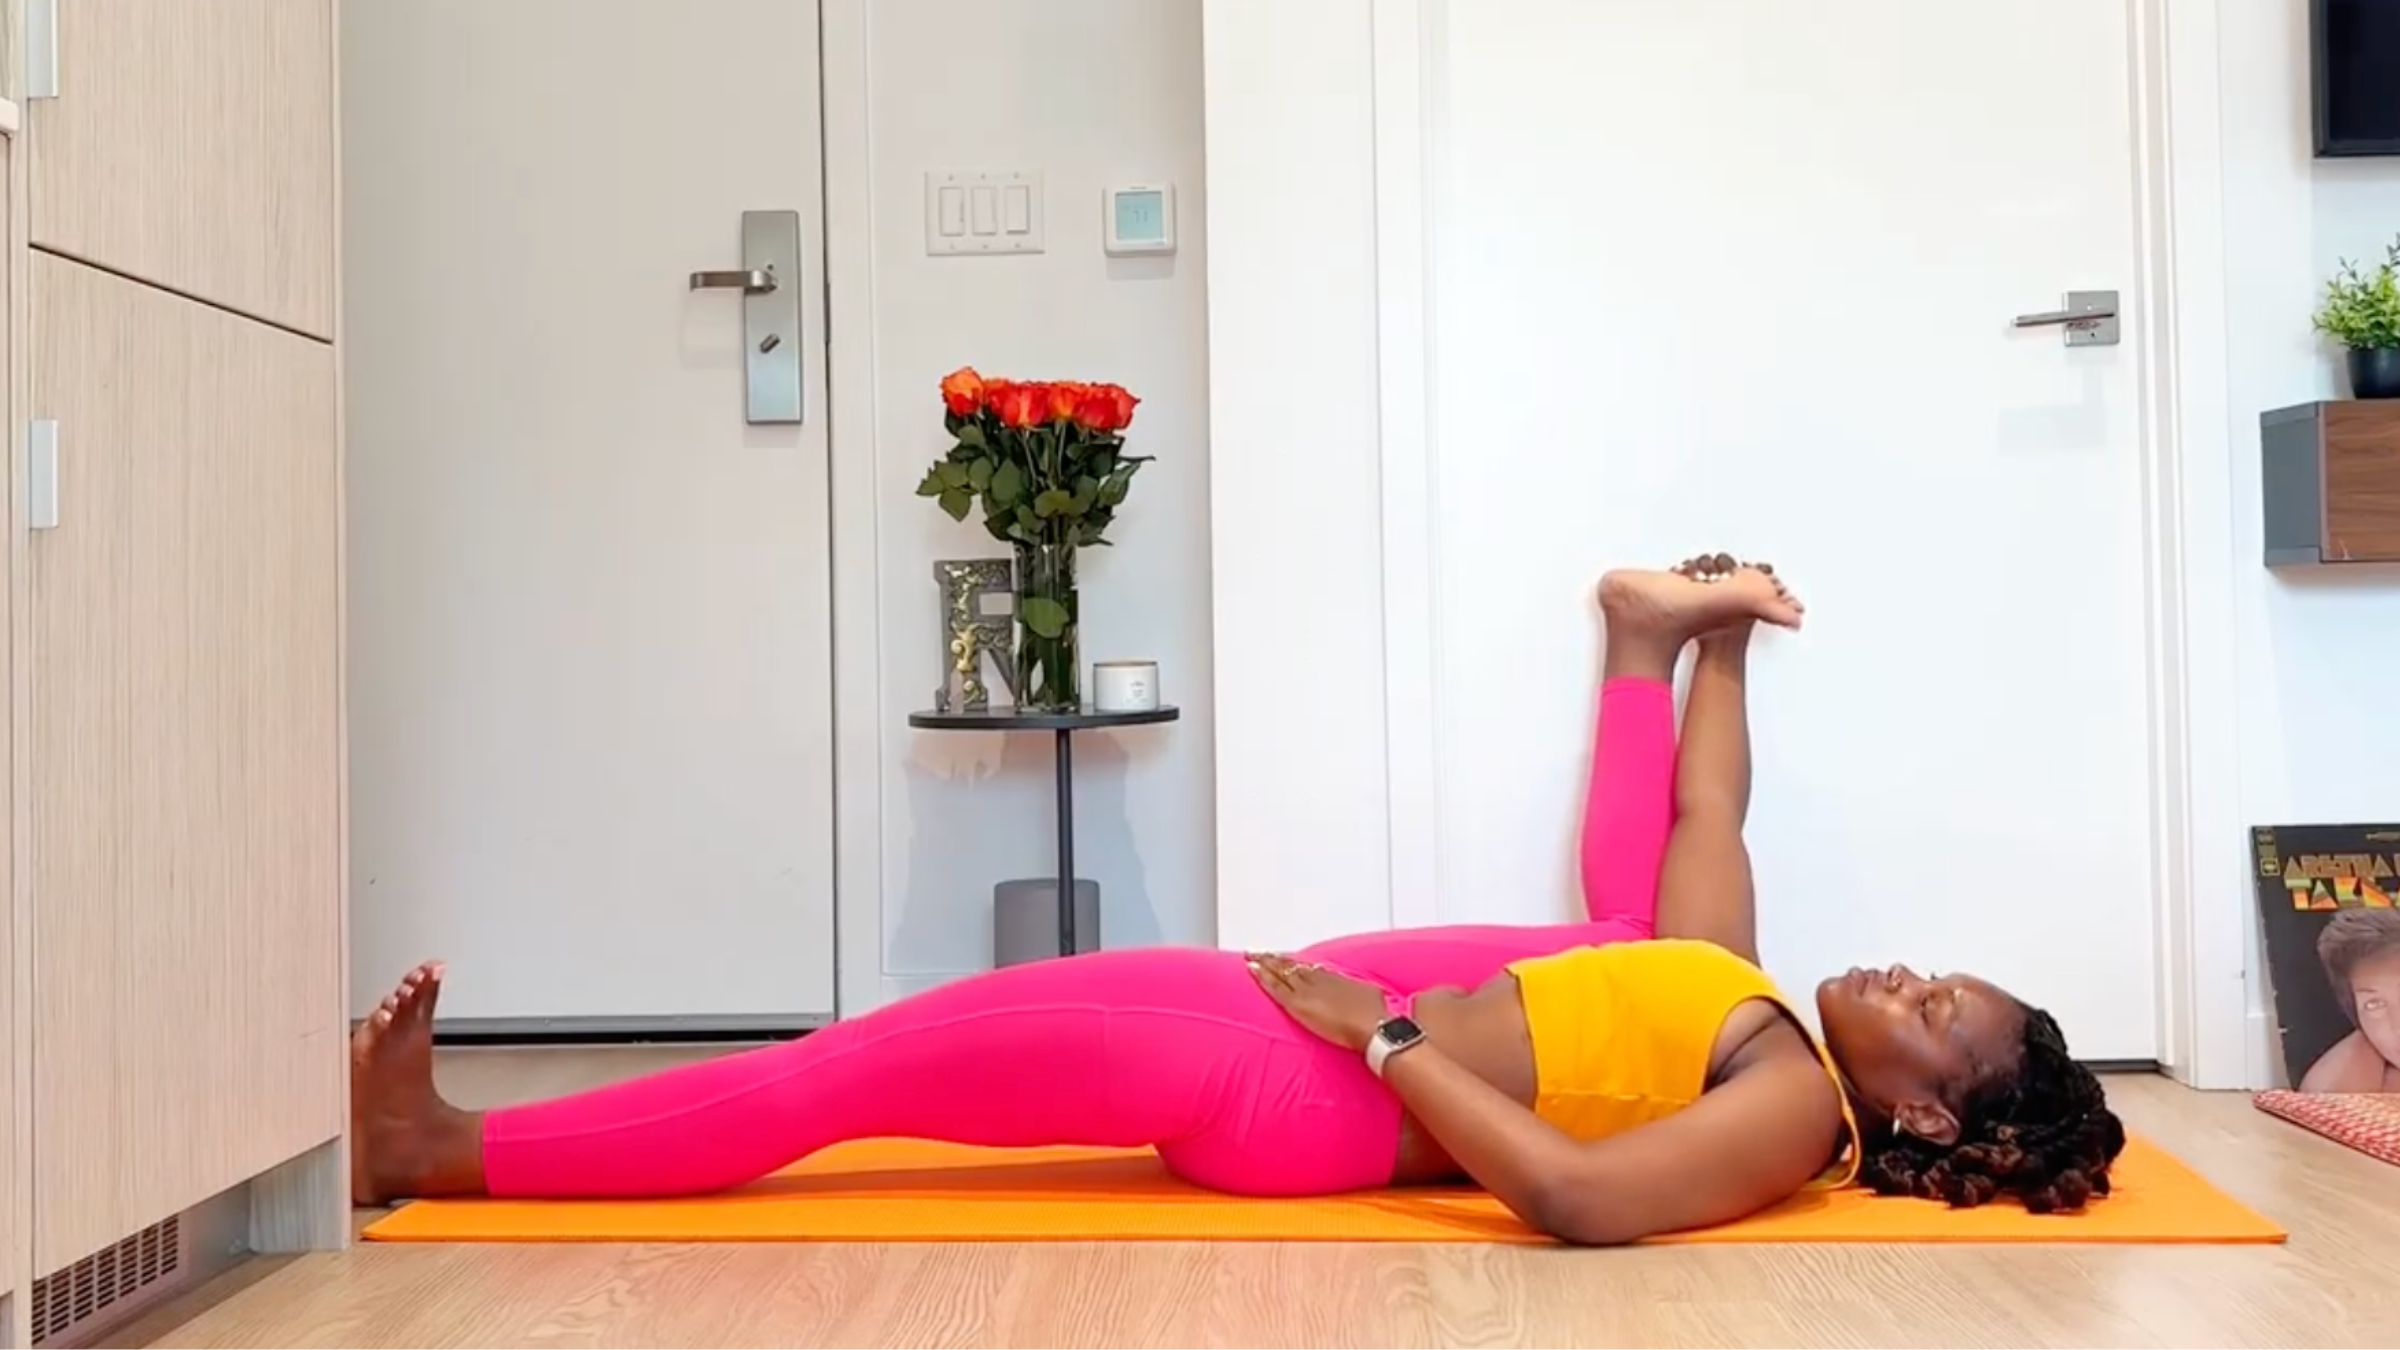
10. Half Happy Baby
From Reclining Forward Bend, bend both legs and draw your knees toward your armpits in Happy Baby. Lower your right foot to the mat in Half Happy Baby. Stay here or for a more intense stretch, straighten your right leg on the mat.
Return both legs to Happy Baby, then lower your left foot to the mat or straighten your left leg in Half Happy Baby on the opposite side.
Draw your knees toward your chest and rock back and forth on your back a few times before coming to a seated position on the mat.
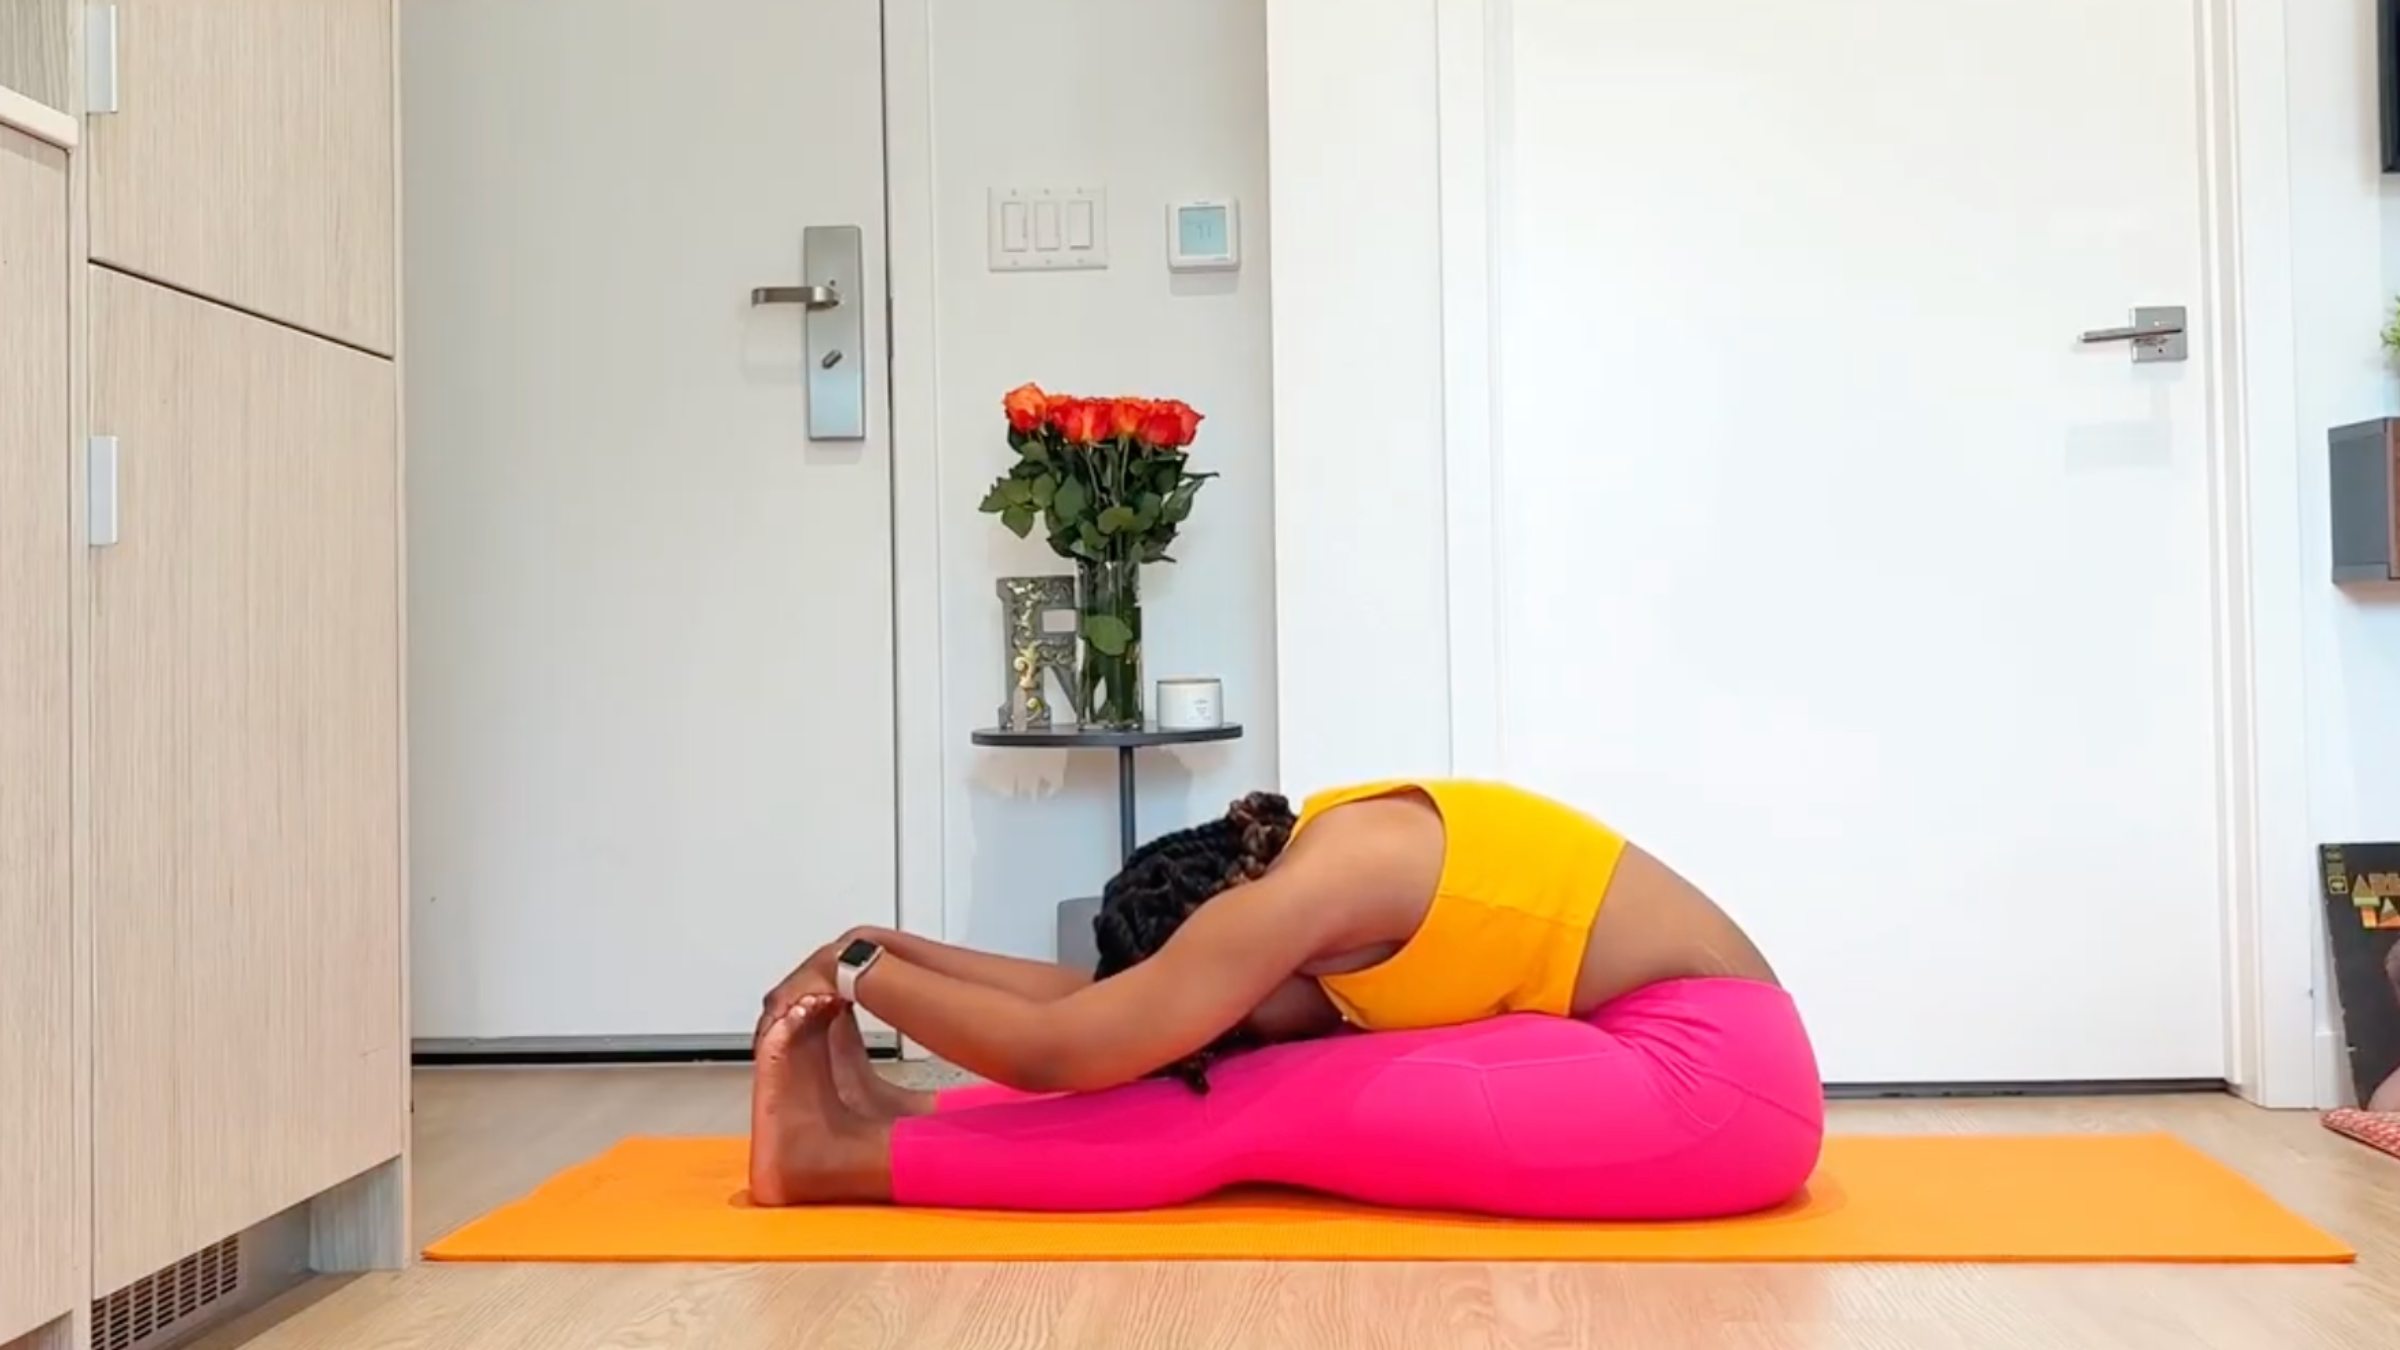
11. Seated Forward Bend
Sit tall on the mat with your legs straight in front of you. Hinge from your hips and reach your chest forward over your legs in Seated Forward Bend. Keep your knees slightly bent if it’s more comfortable. Rest your hands on your shins or grasp your feet. Take a few breaths here, then slowly roll up.
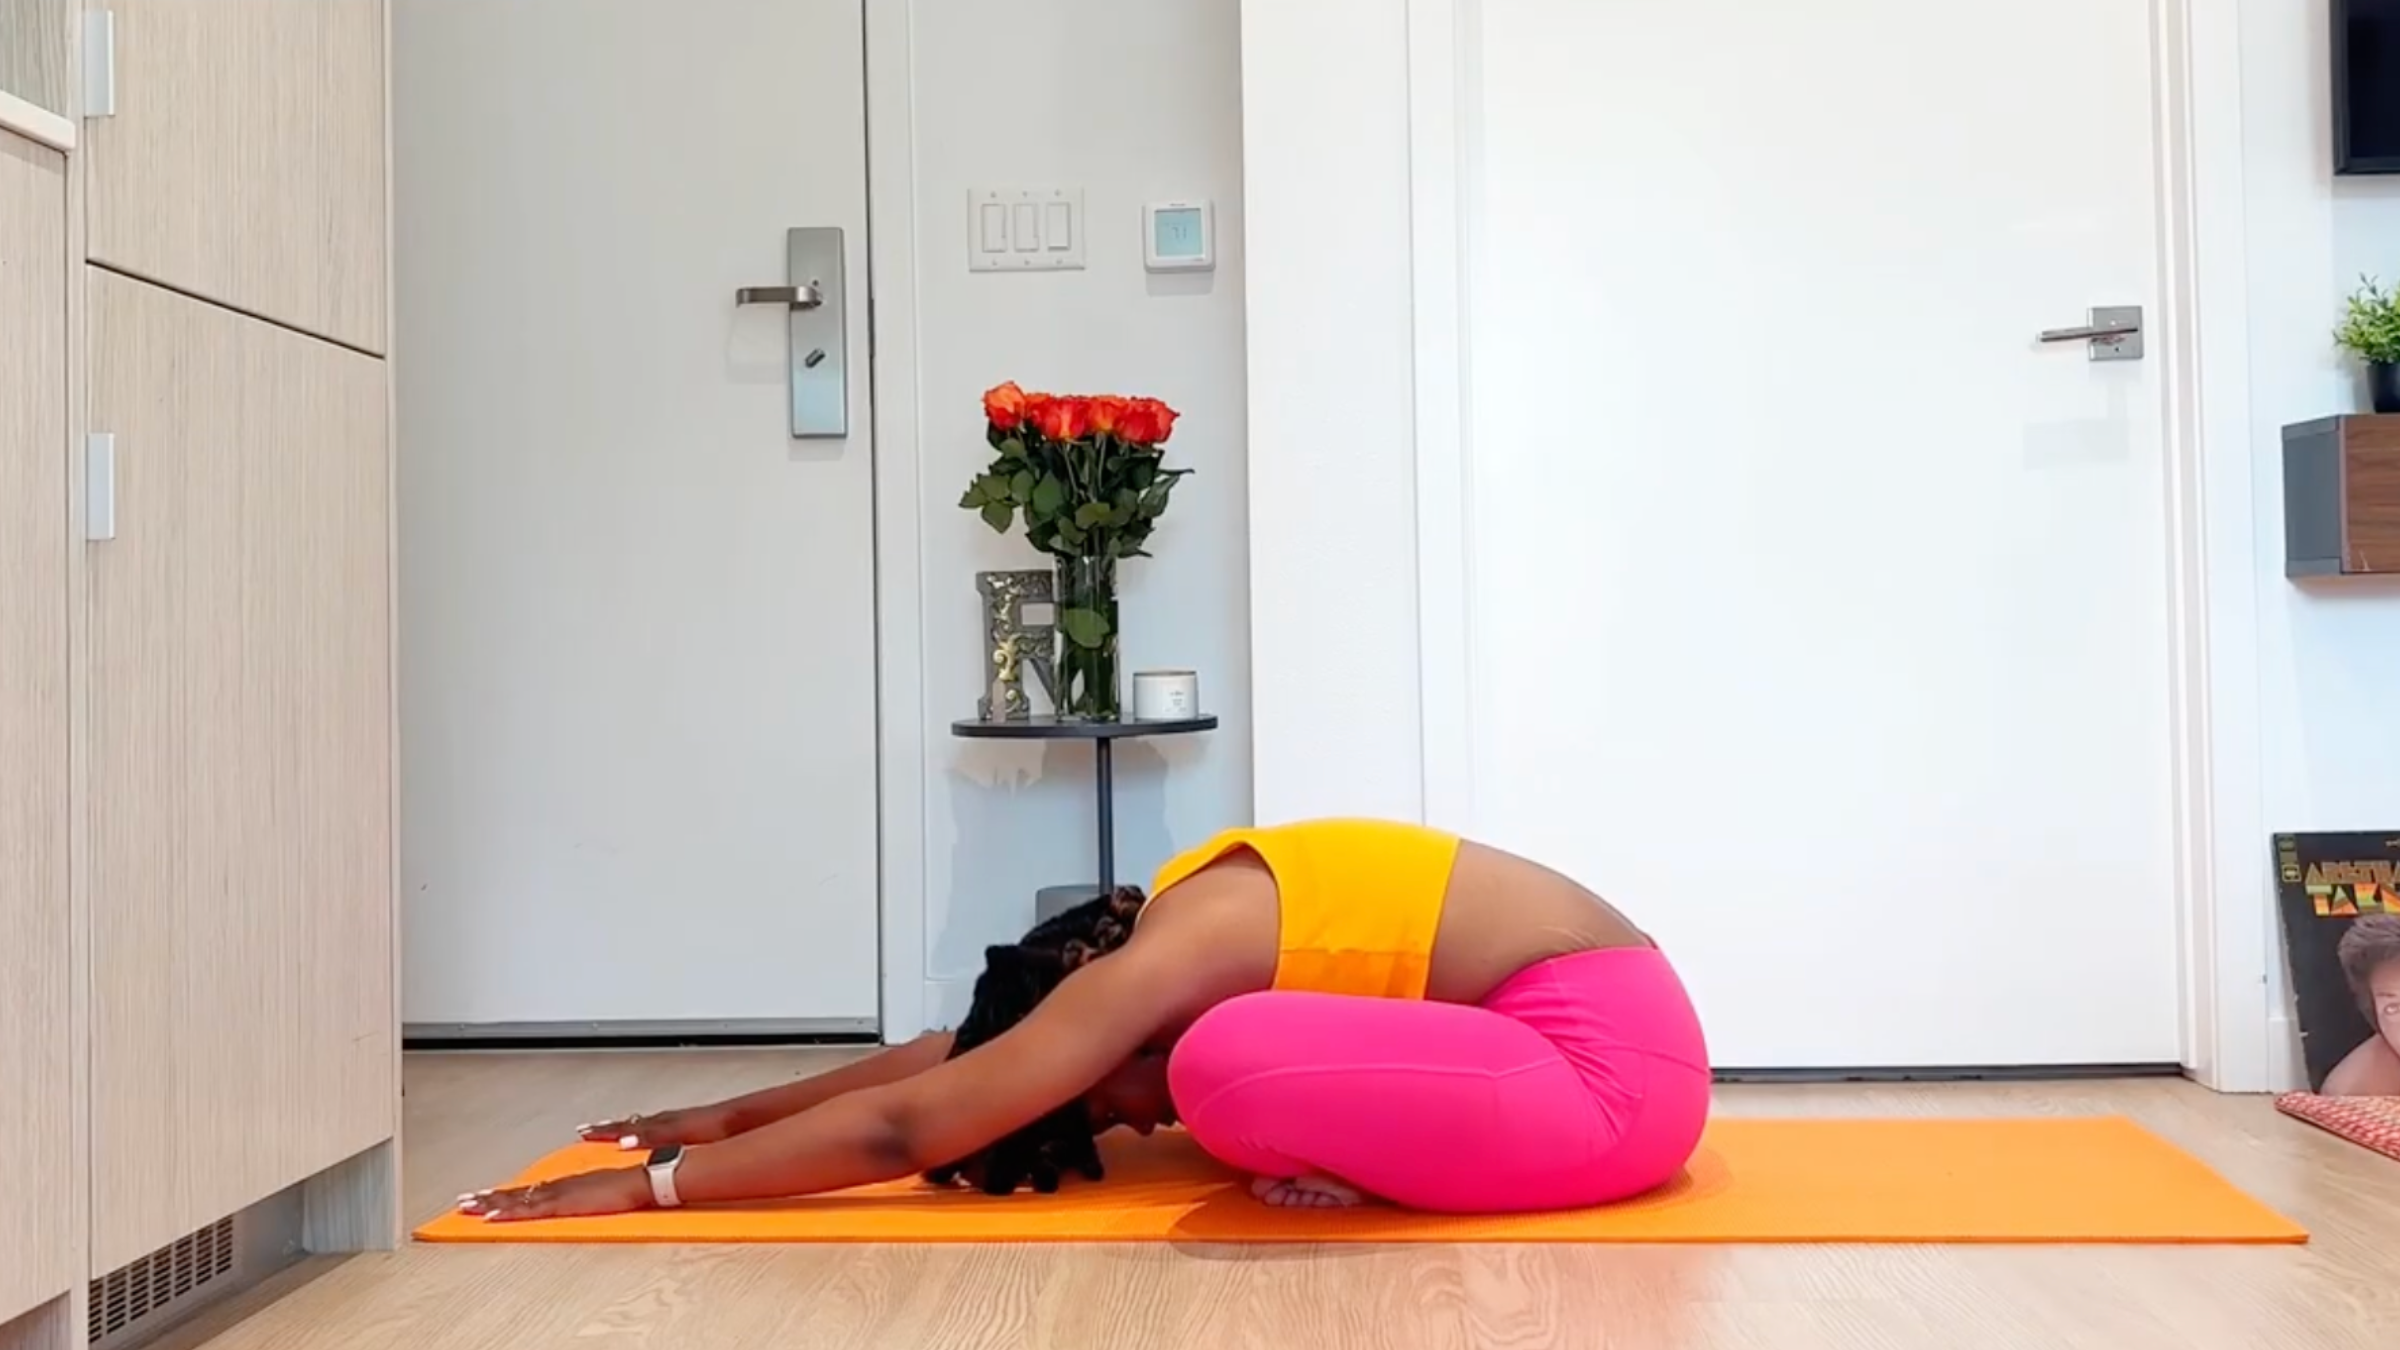
12. Cross-Legged Forward Fold
Still sitting, cross your legs, walk your hands forward on the mat, and relax your upper body over your legs. Take a few breaths here, then slowly roll up.
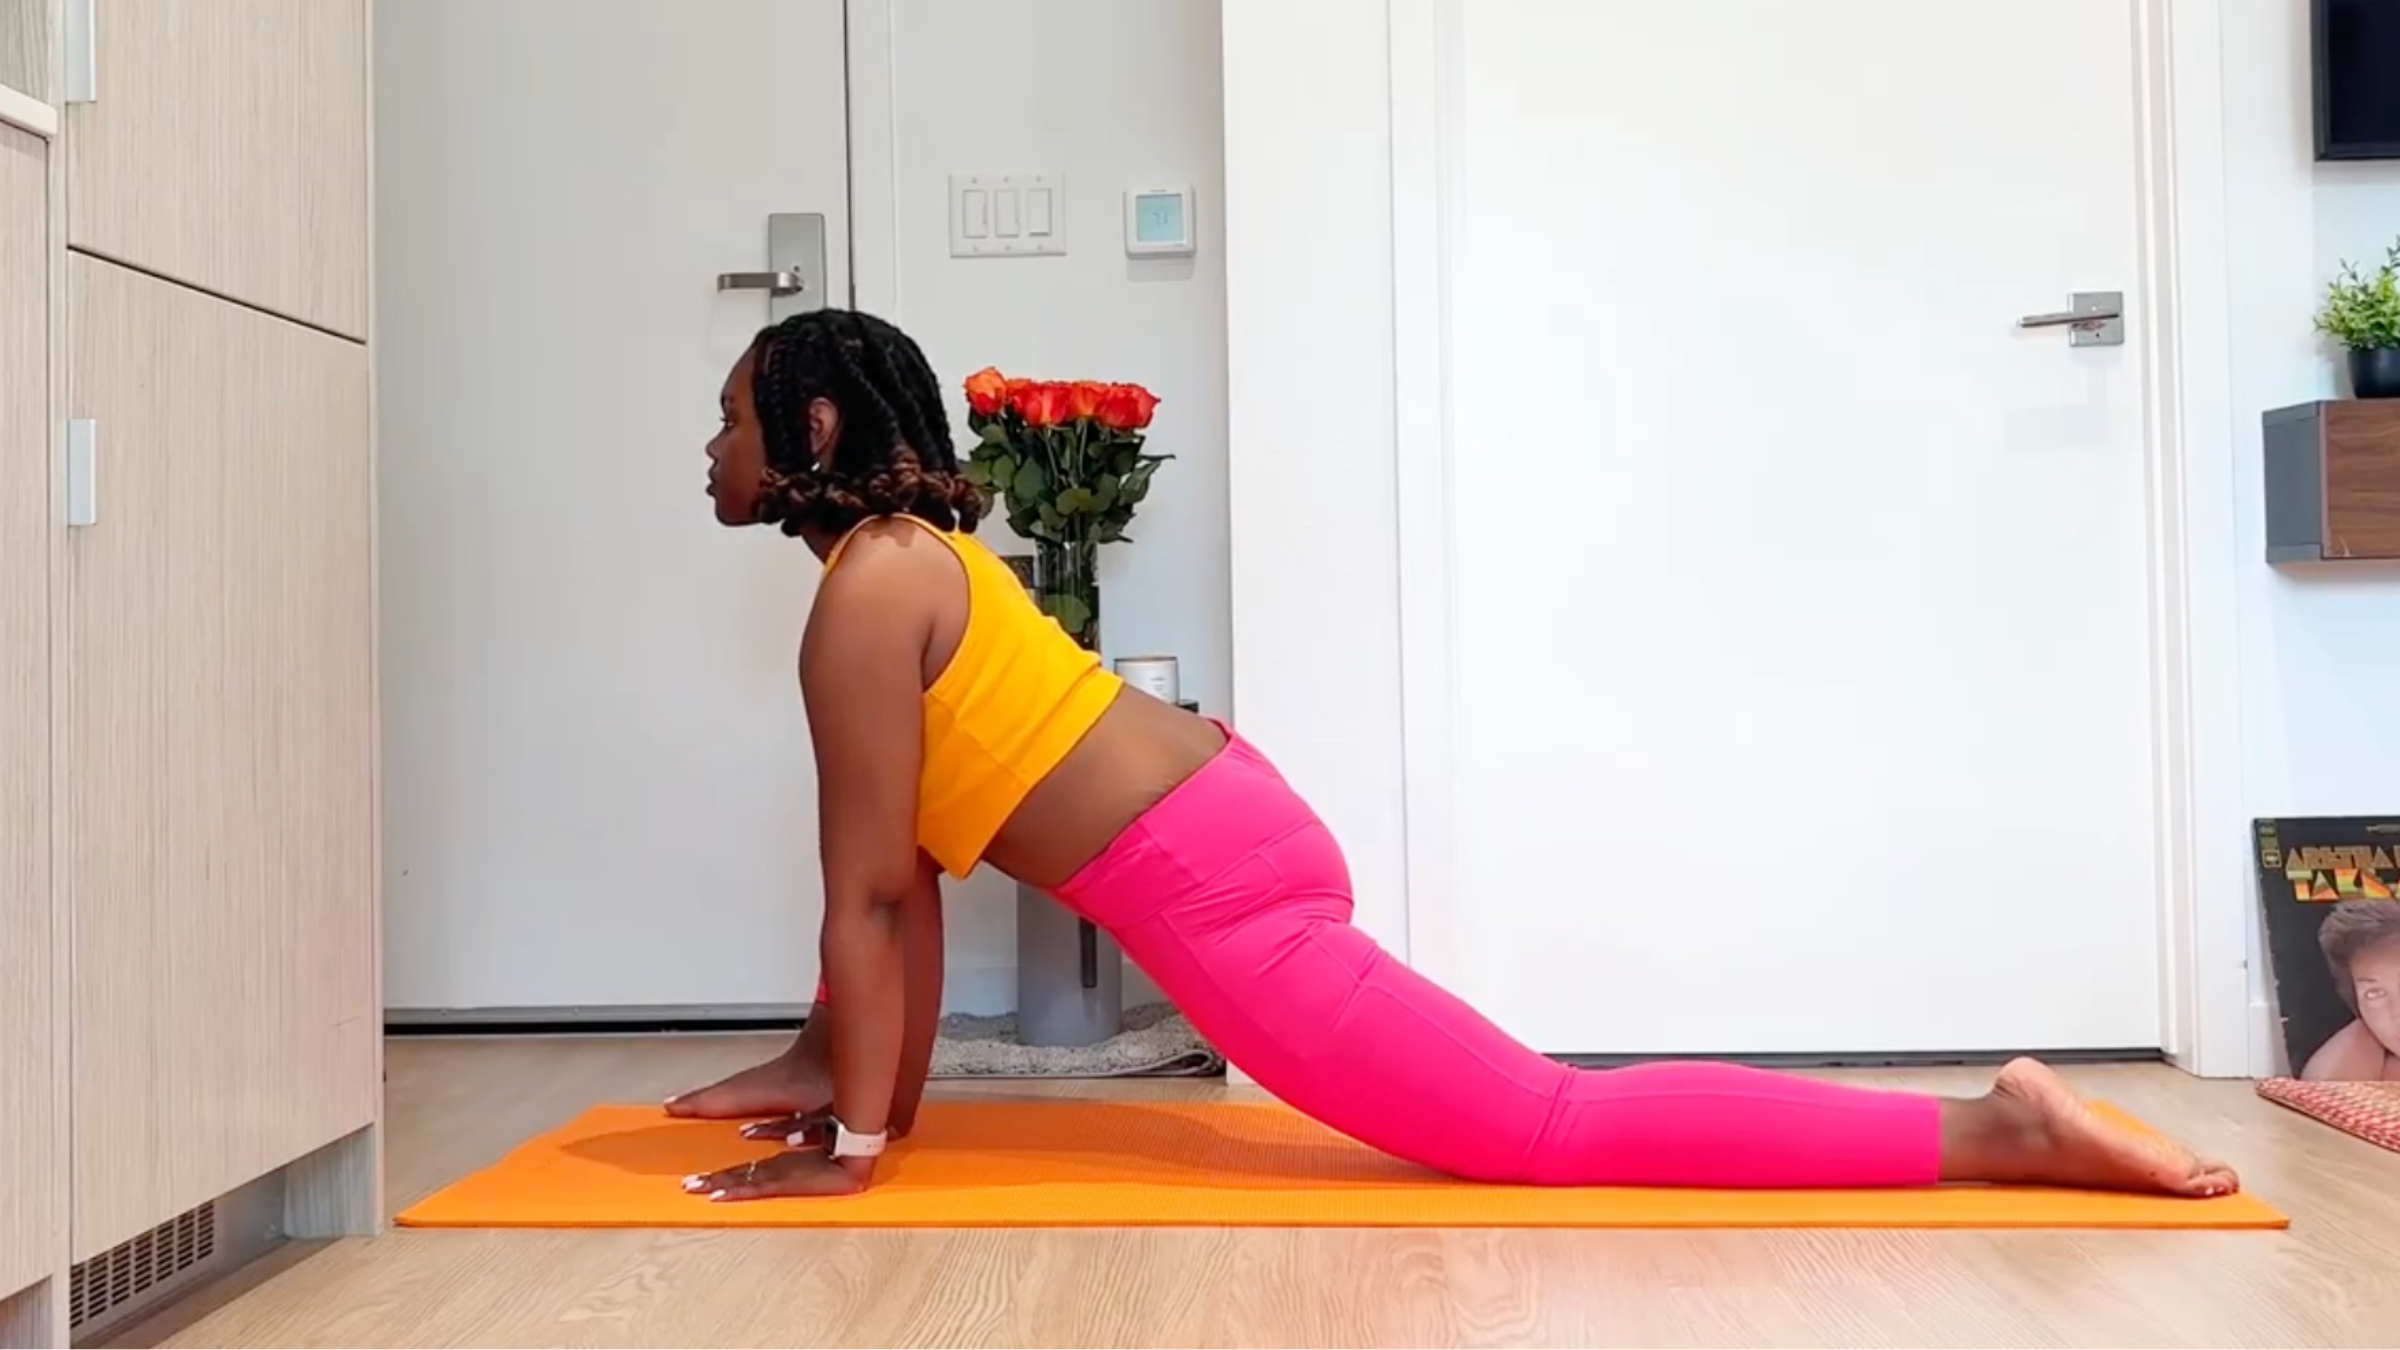
13. Lizard Pose
Come to your hands and knees on the mat. Step your right foot forward outside your right hand. Inch your back knee behind you and shift your hips forward in Lizard Pose. Take a few breaths here.
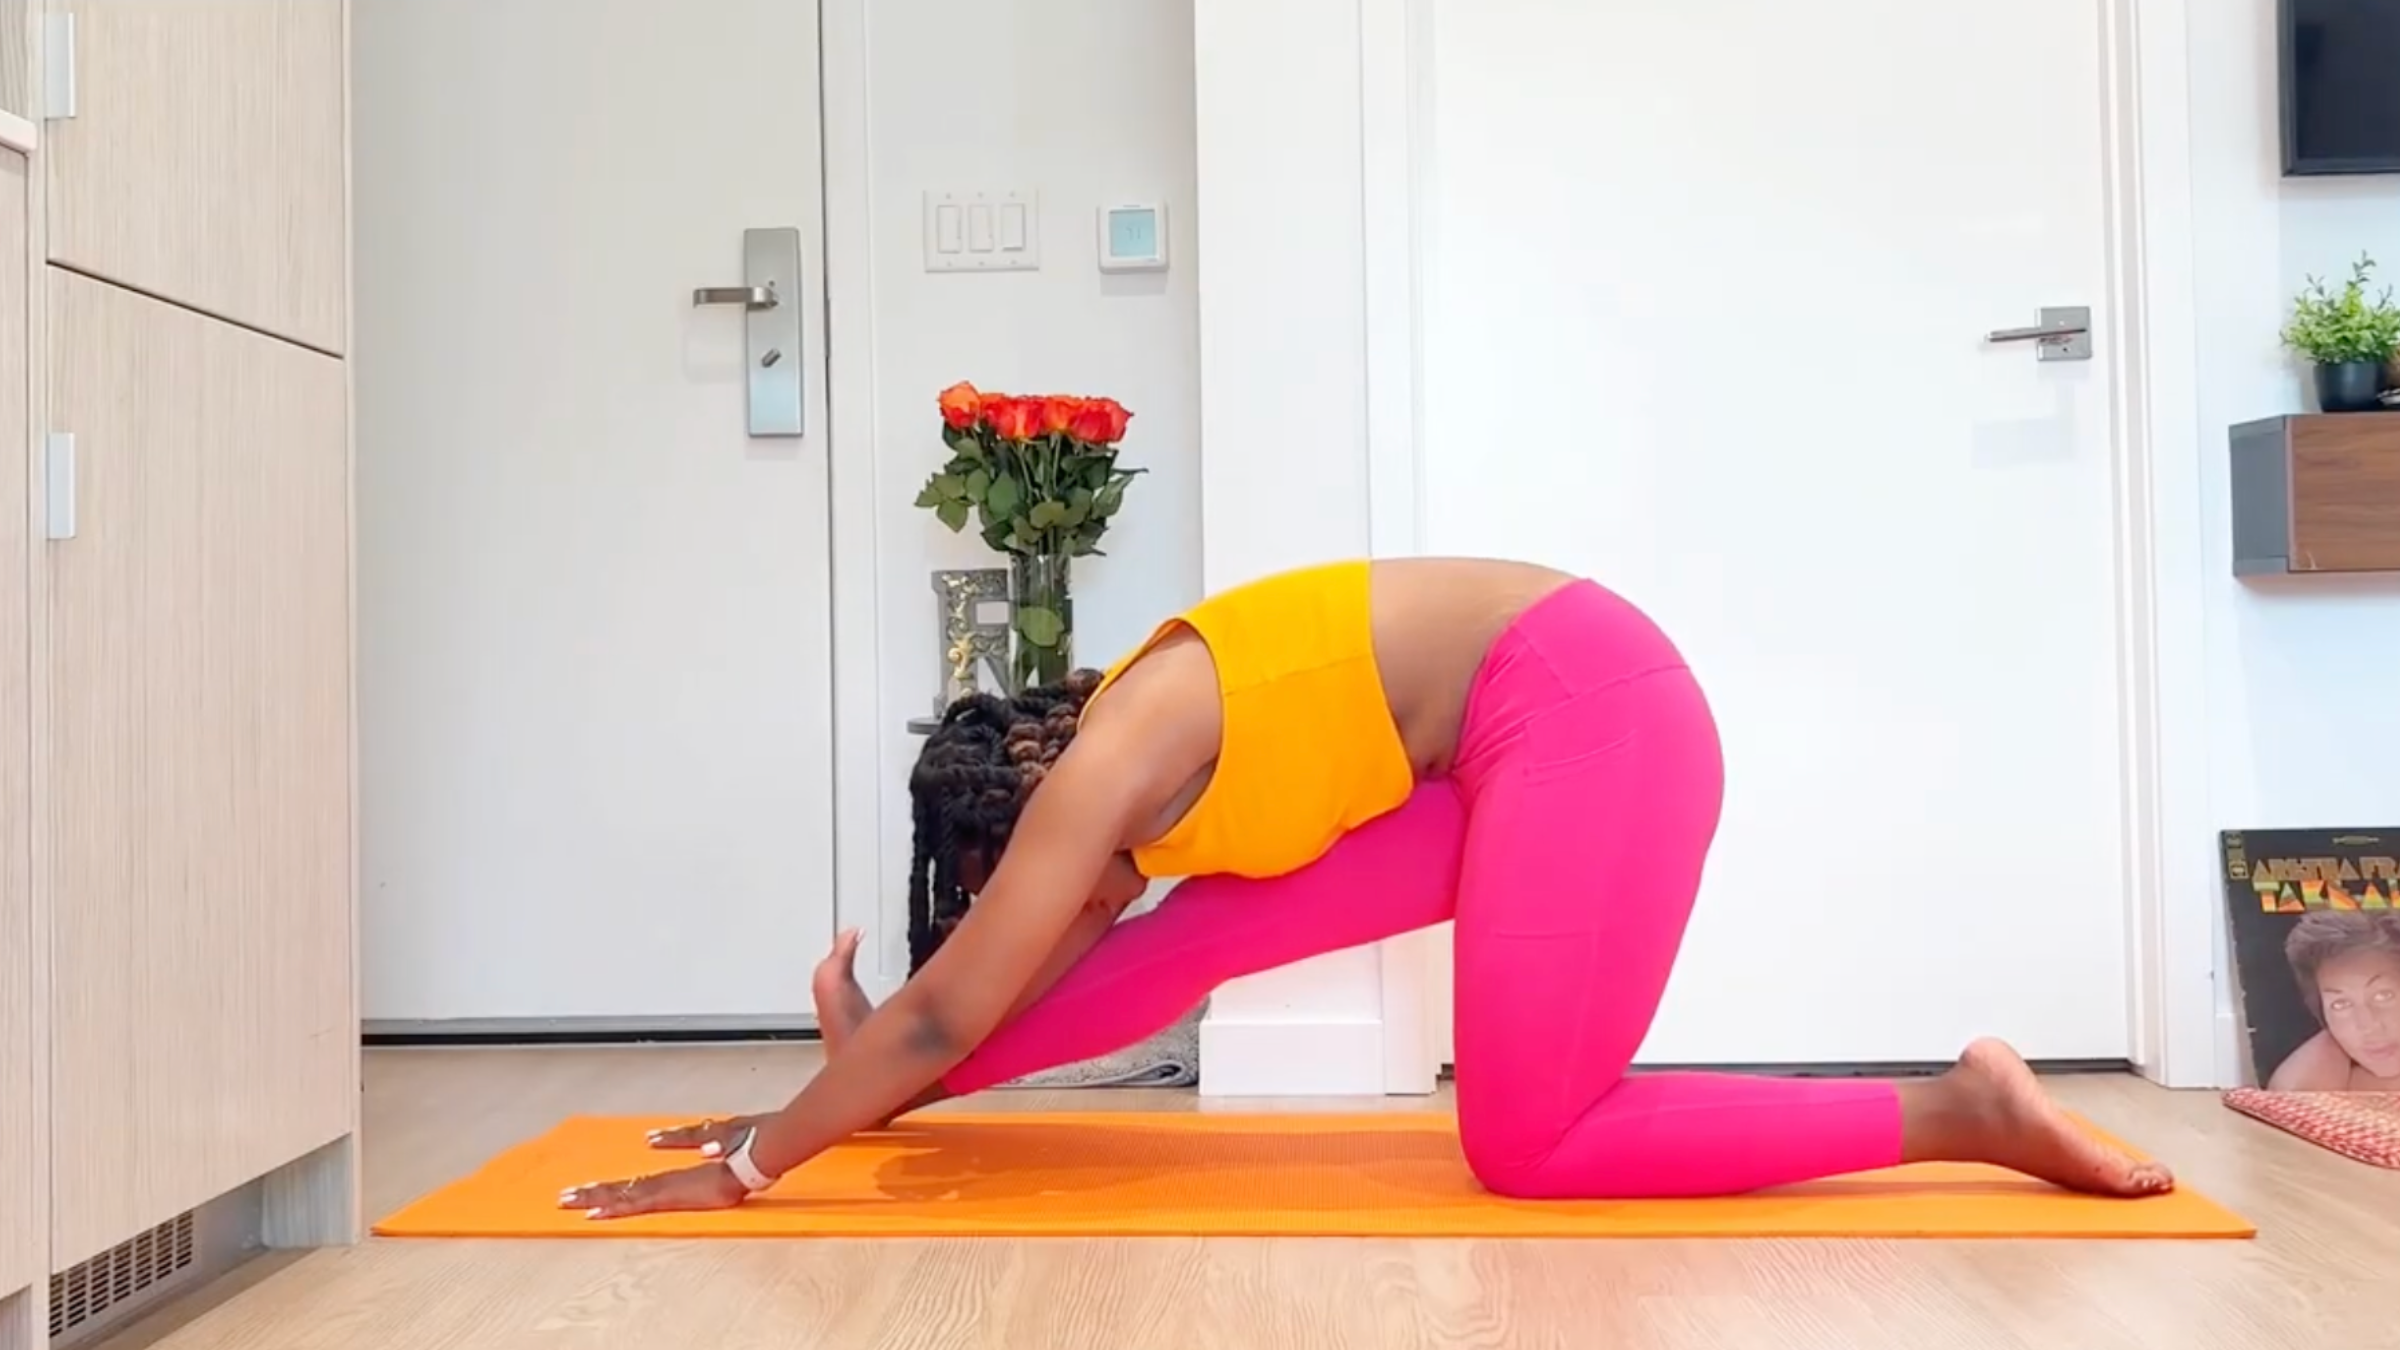
14. Half Splits
From Lizard Pose, draw your hips back over your left knee as you straighten your right leg. Place your hands on the mat or on blocks on either side of your right leg. Fold your chest forward over your right leg in Half Splits. If it’s comfortable, walk your hands slightly forward. Take a few breaths here.
Bend your right knee, shift your hips forward, and return to Lizard Pose.
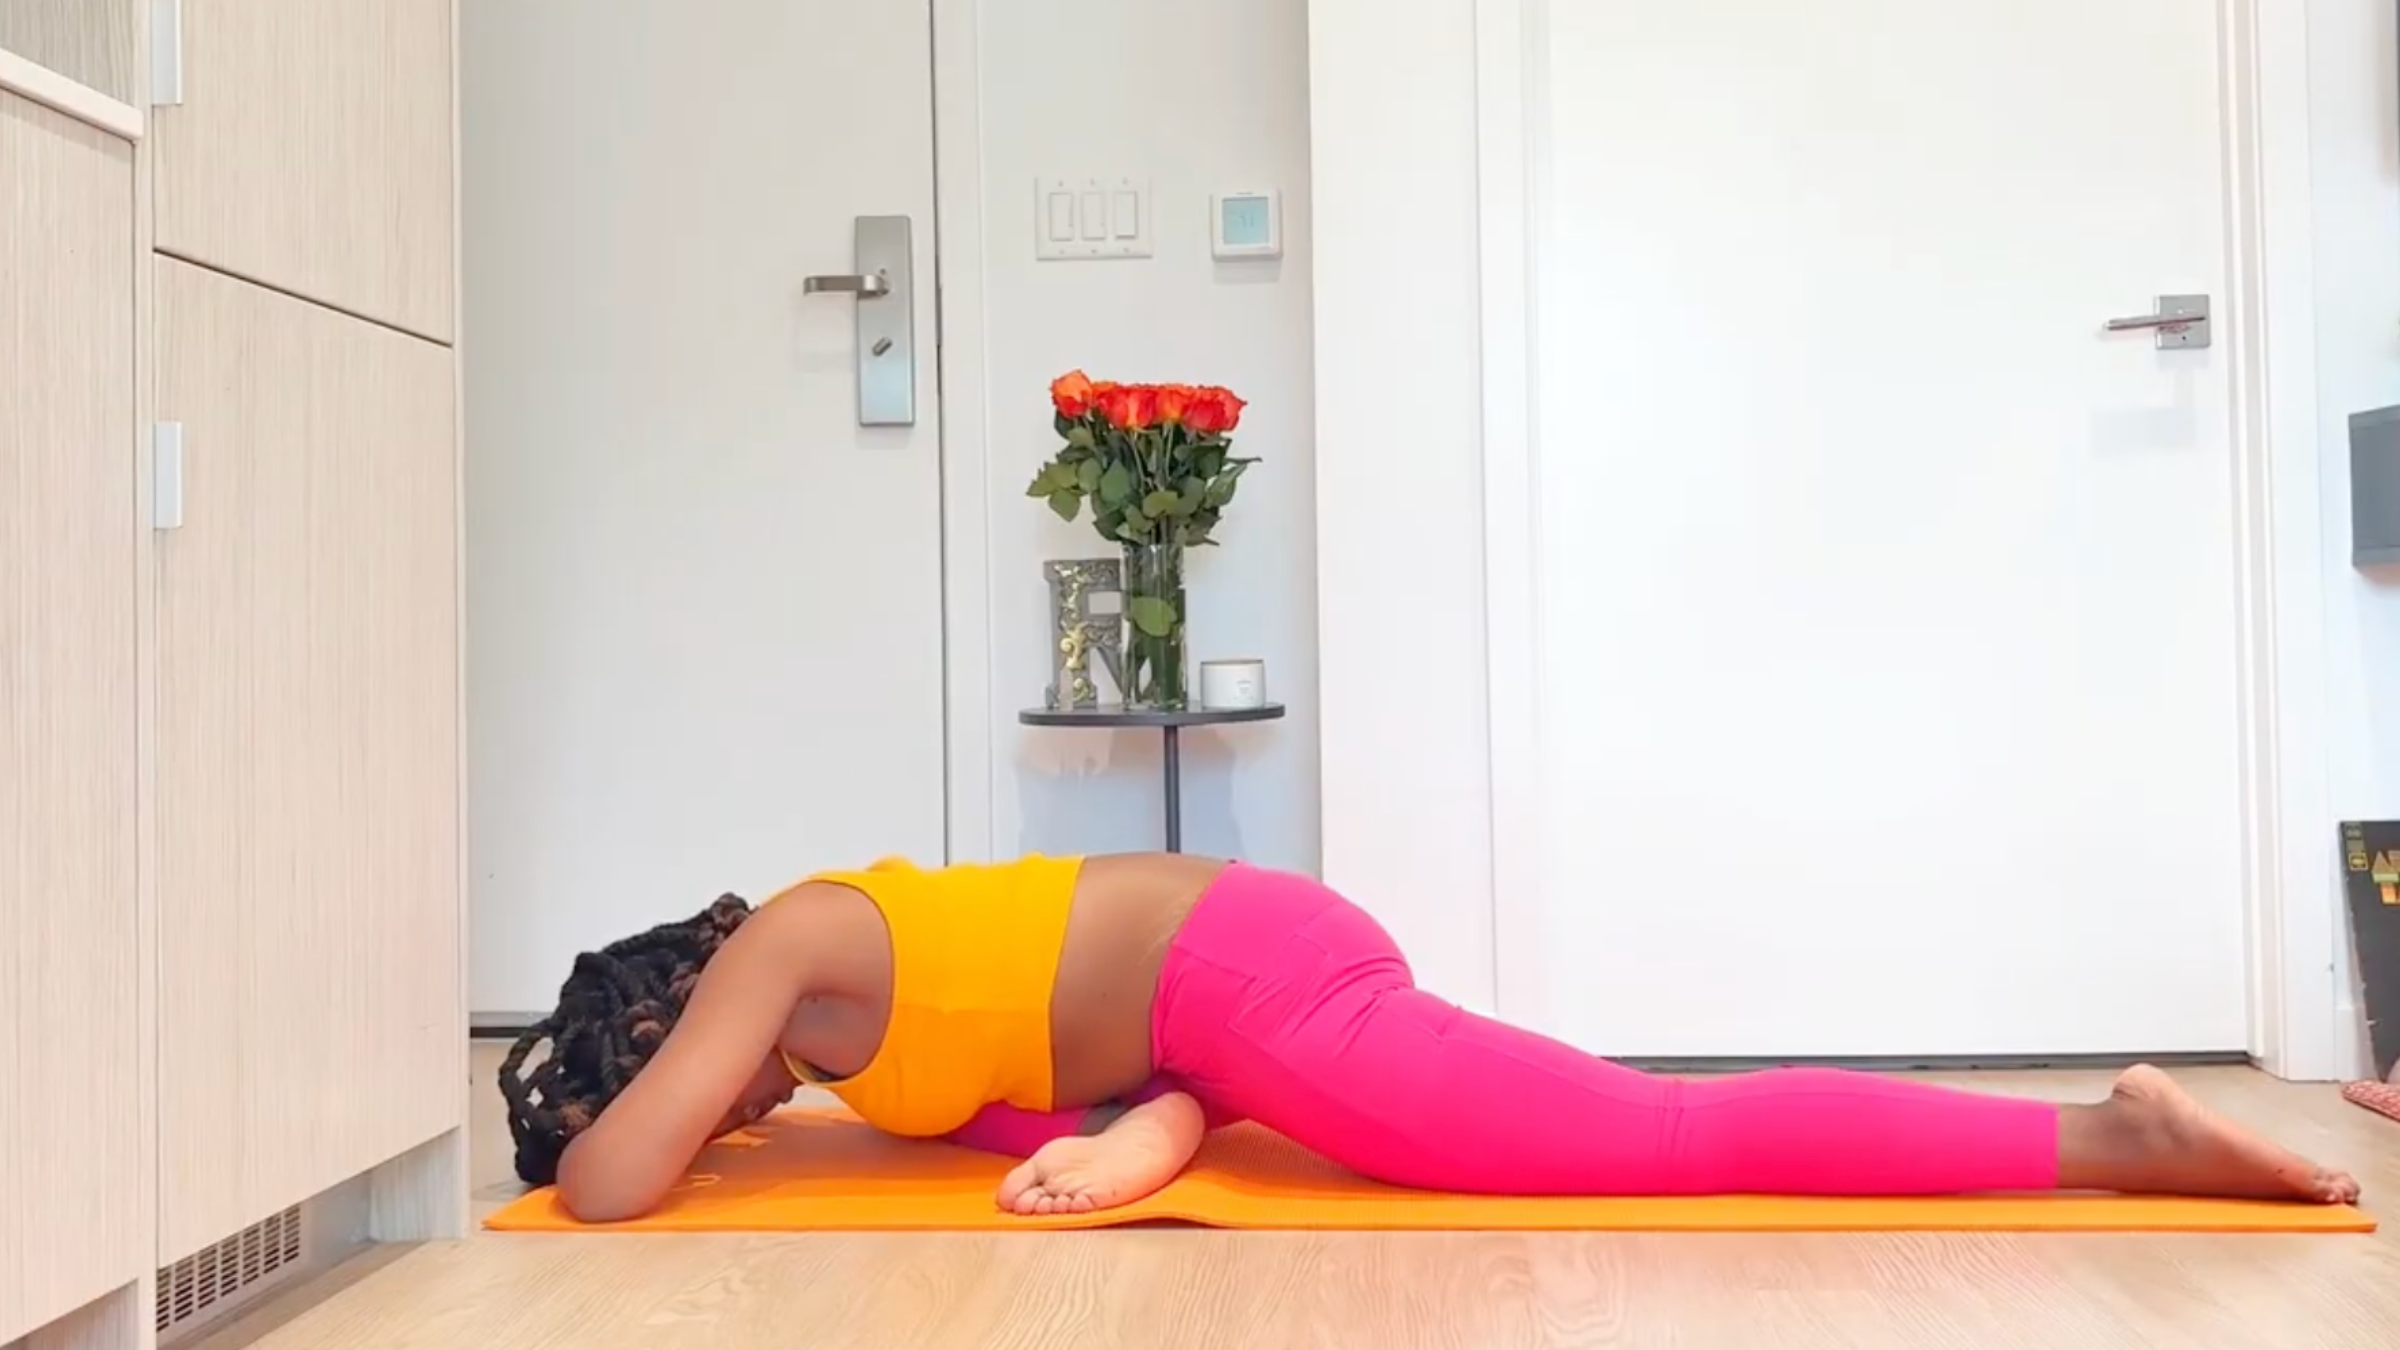
15. Pigeon Pose
From Lizard Pose, draw your right knee forward behind your right wrist and plant it on the mat. Straighten your left leg behind you in Pigeon Pose. Take a few breaths here.
Press your hands into the mat and come to your hands and knees. Repeat Lizard Pose, Half Splits, and Pigeon Pose on the left side.
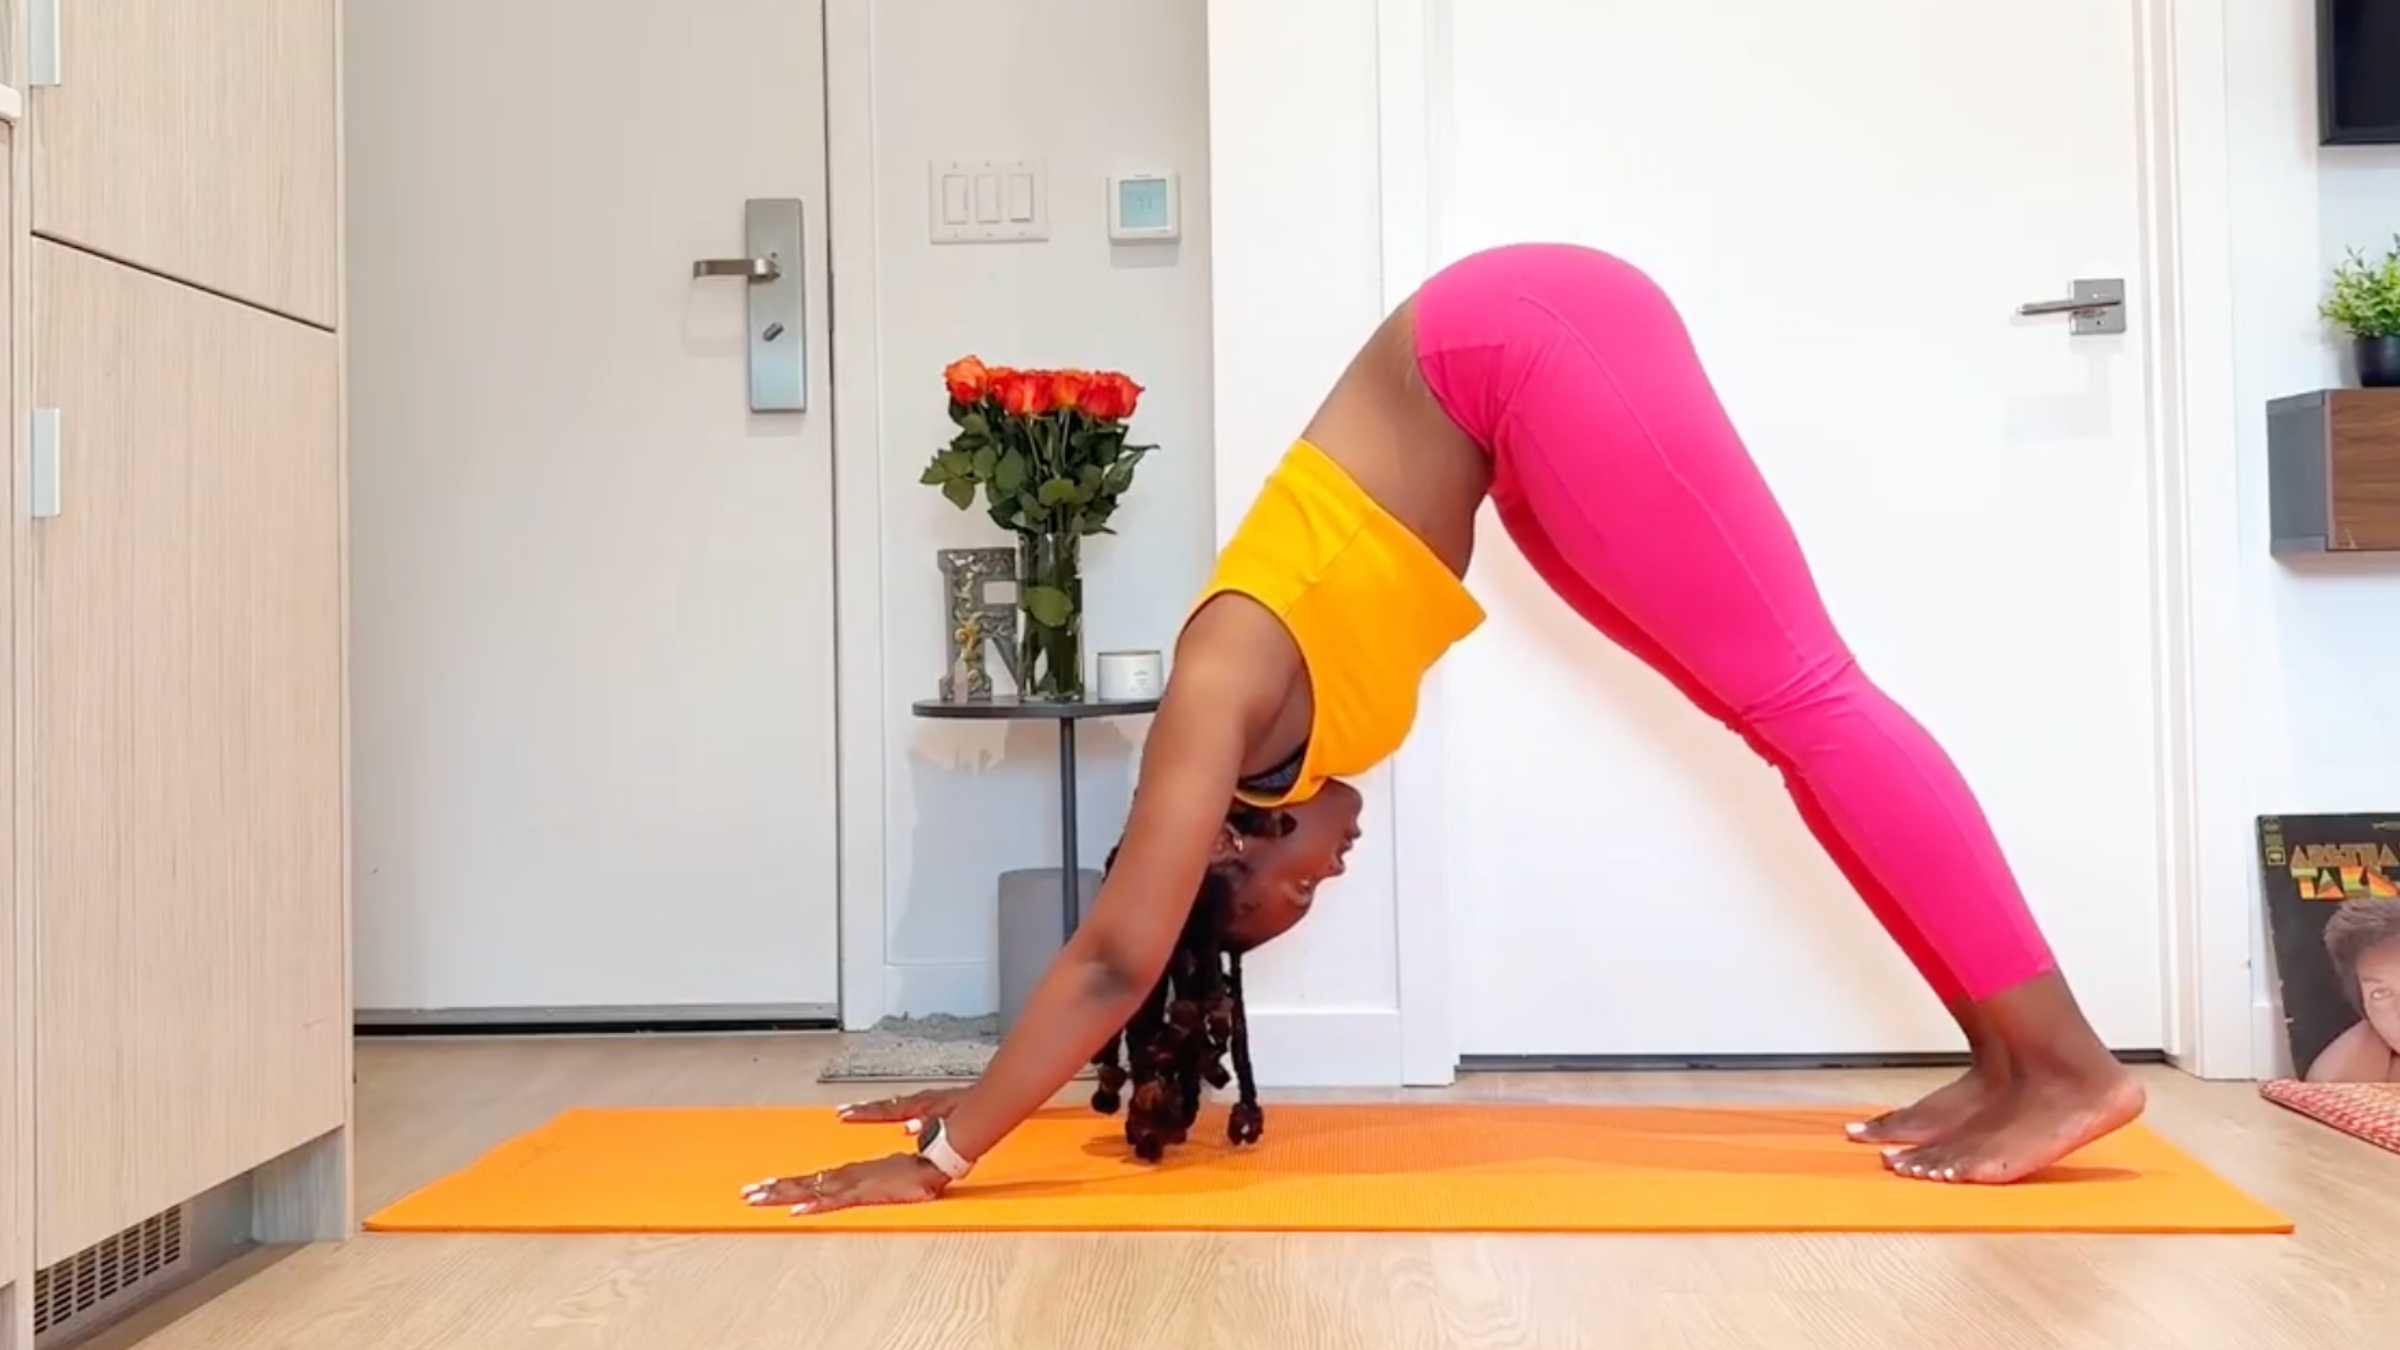
16. Downward-Facing Dog
From Pigeon Pose, plant your hands on either side of your left leg. Press into your hands and begin to straighten your arms as you lift your hips off the mat. Step your feet back into Downward-Facing Dog.
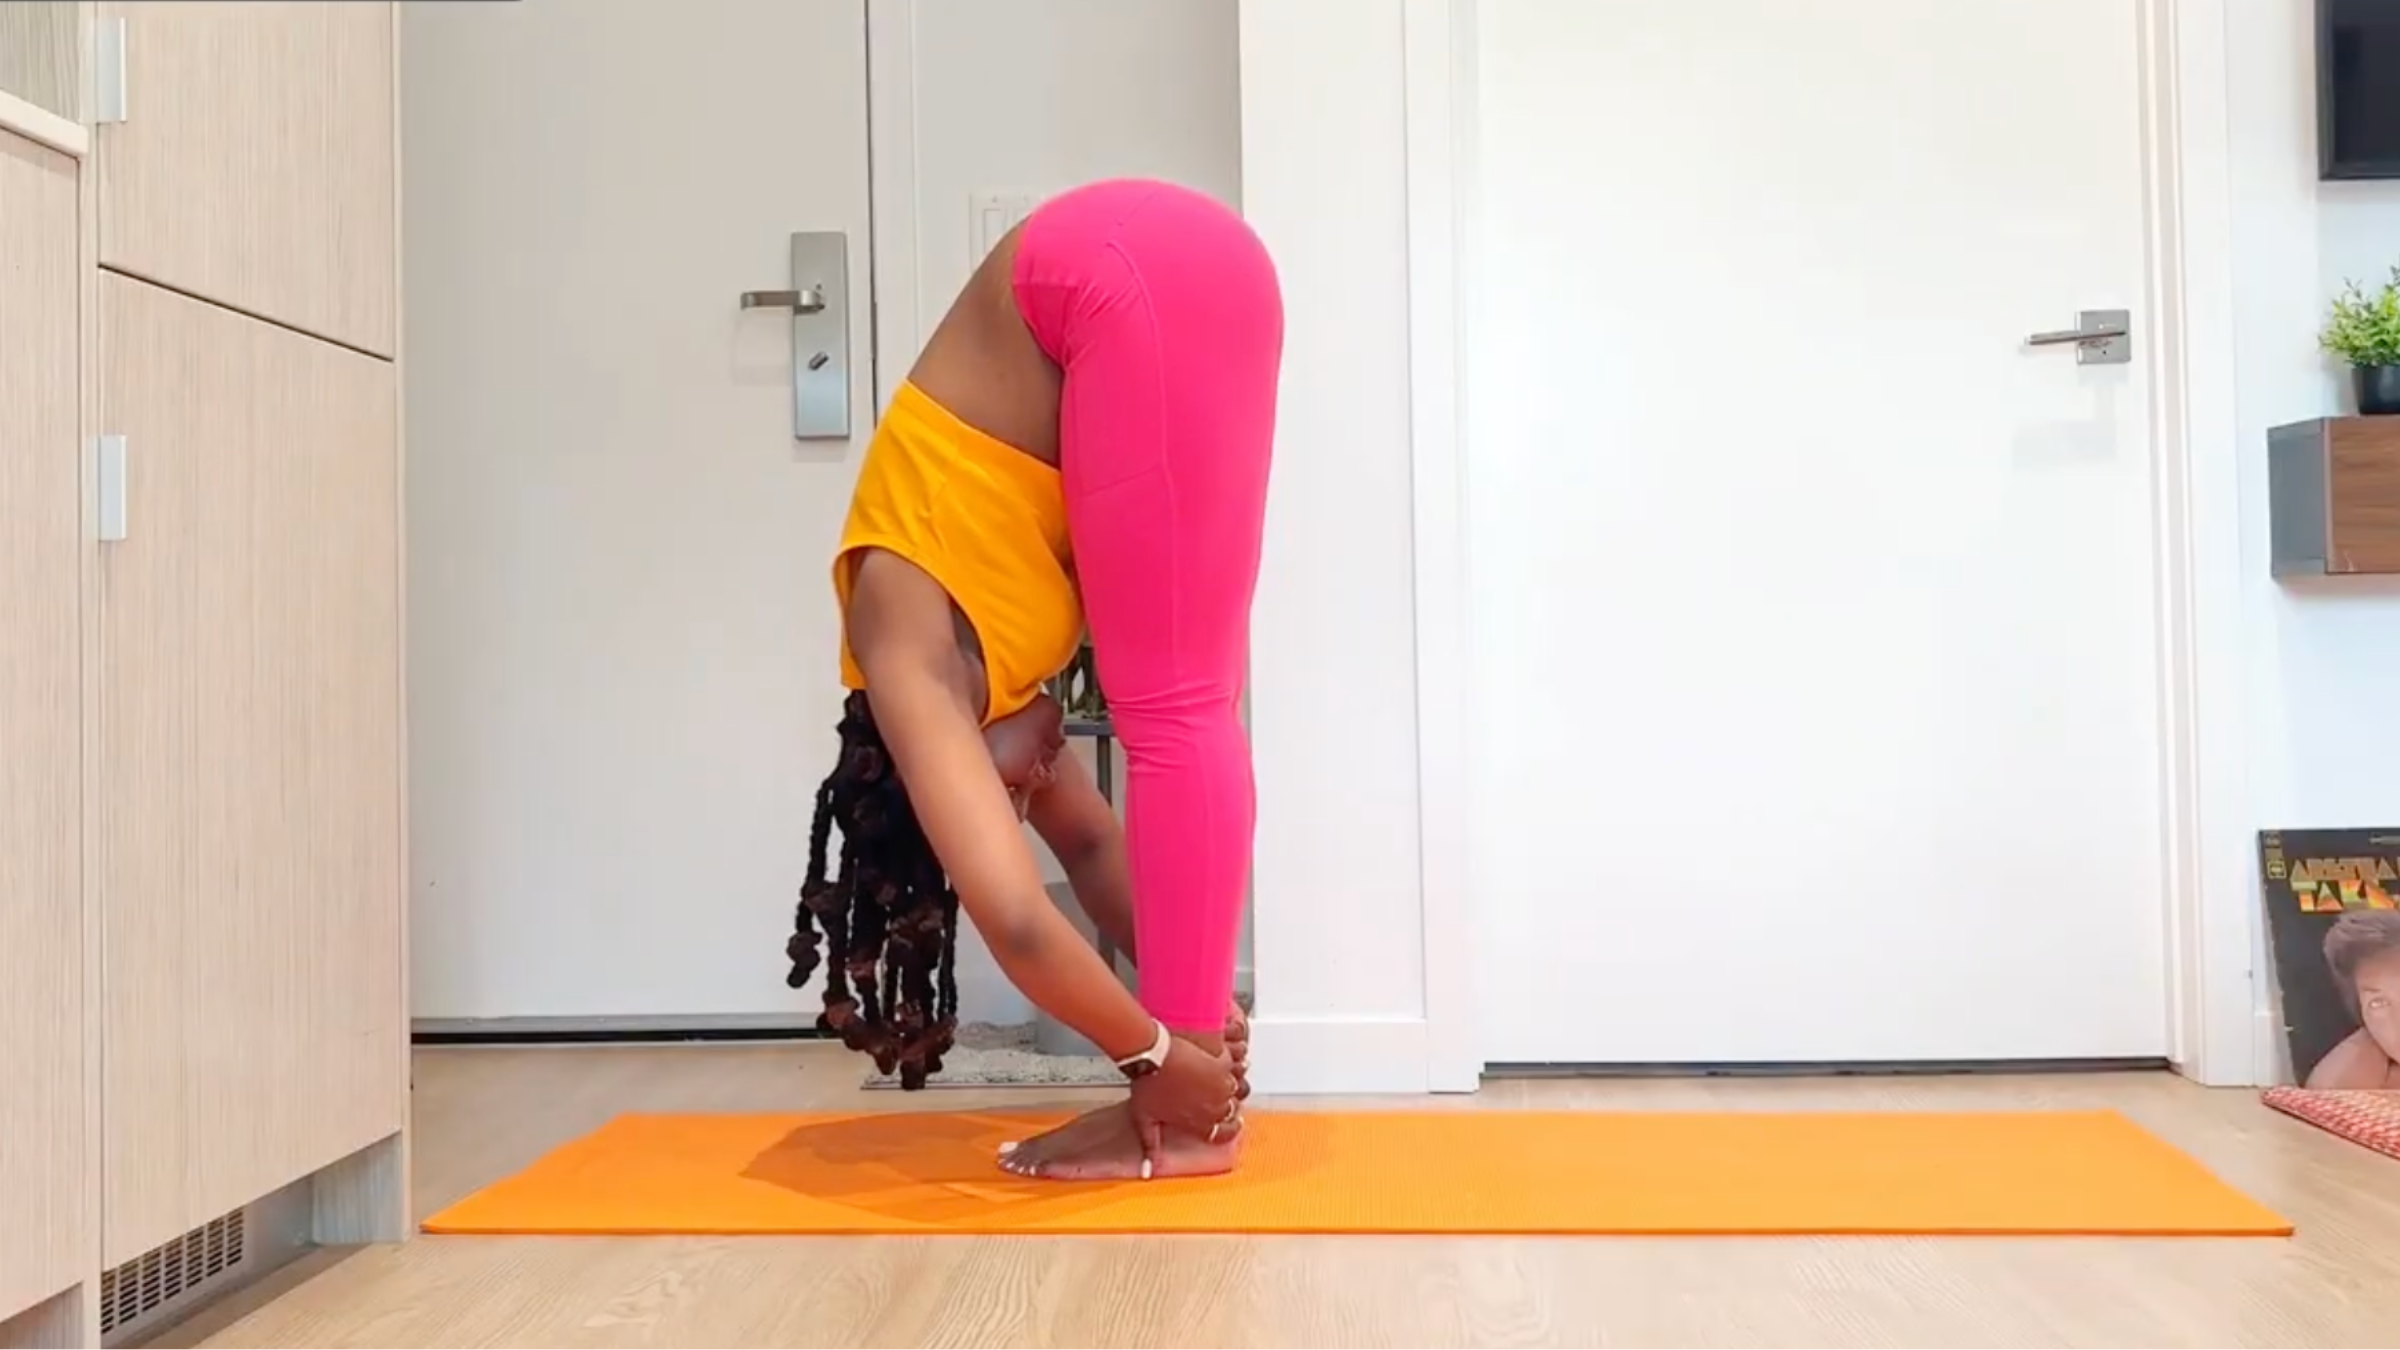
17. Standing Forward Bend
From Downward Dog, walk your feet forward toward your hands. Bend your knees as much as is comfortable in Standing Forward Bend. Let your head and neck relax.
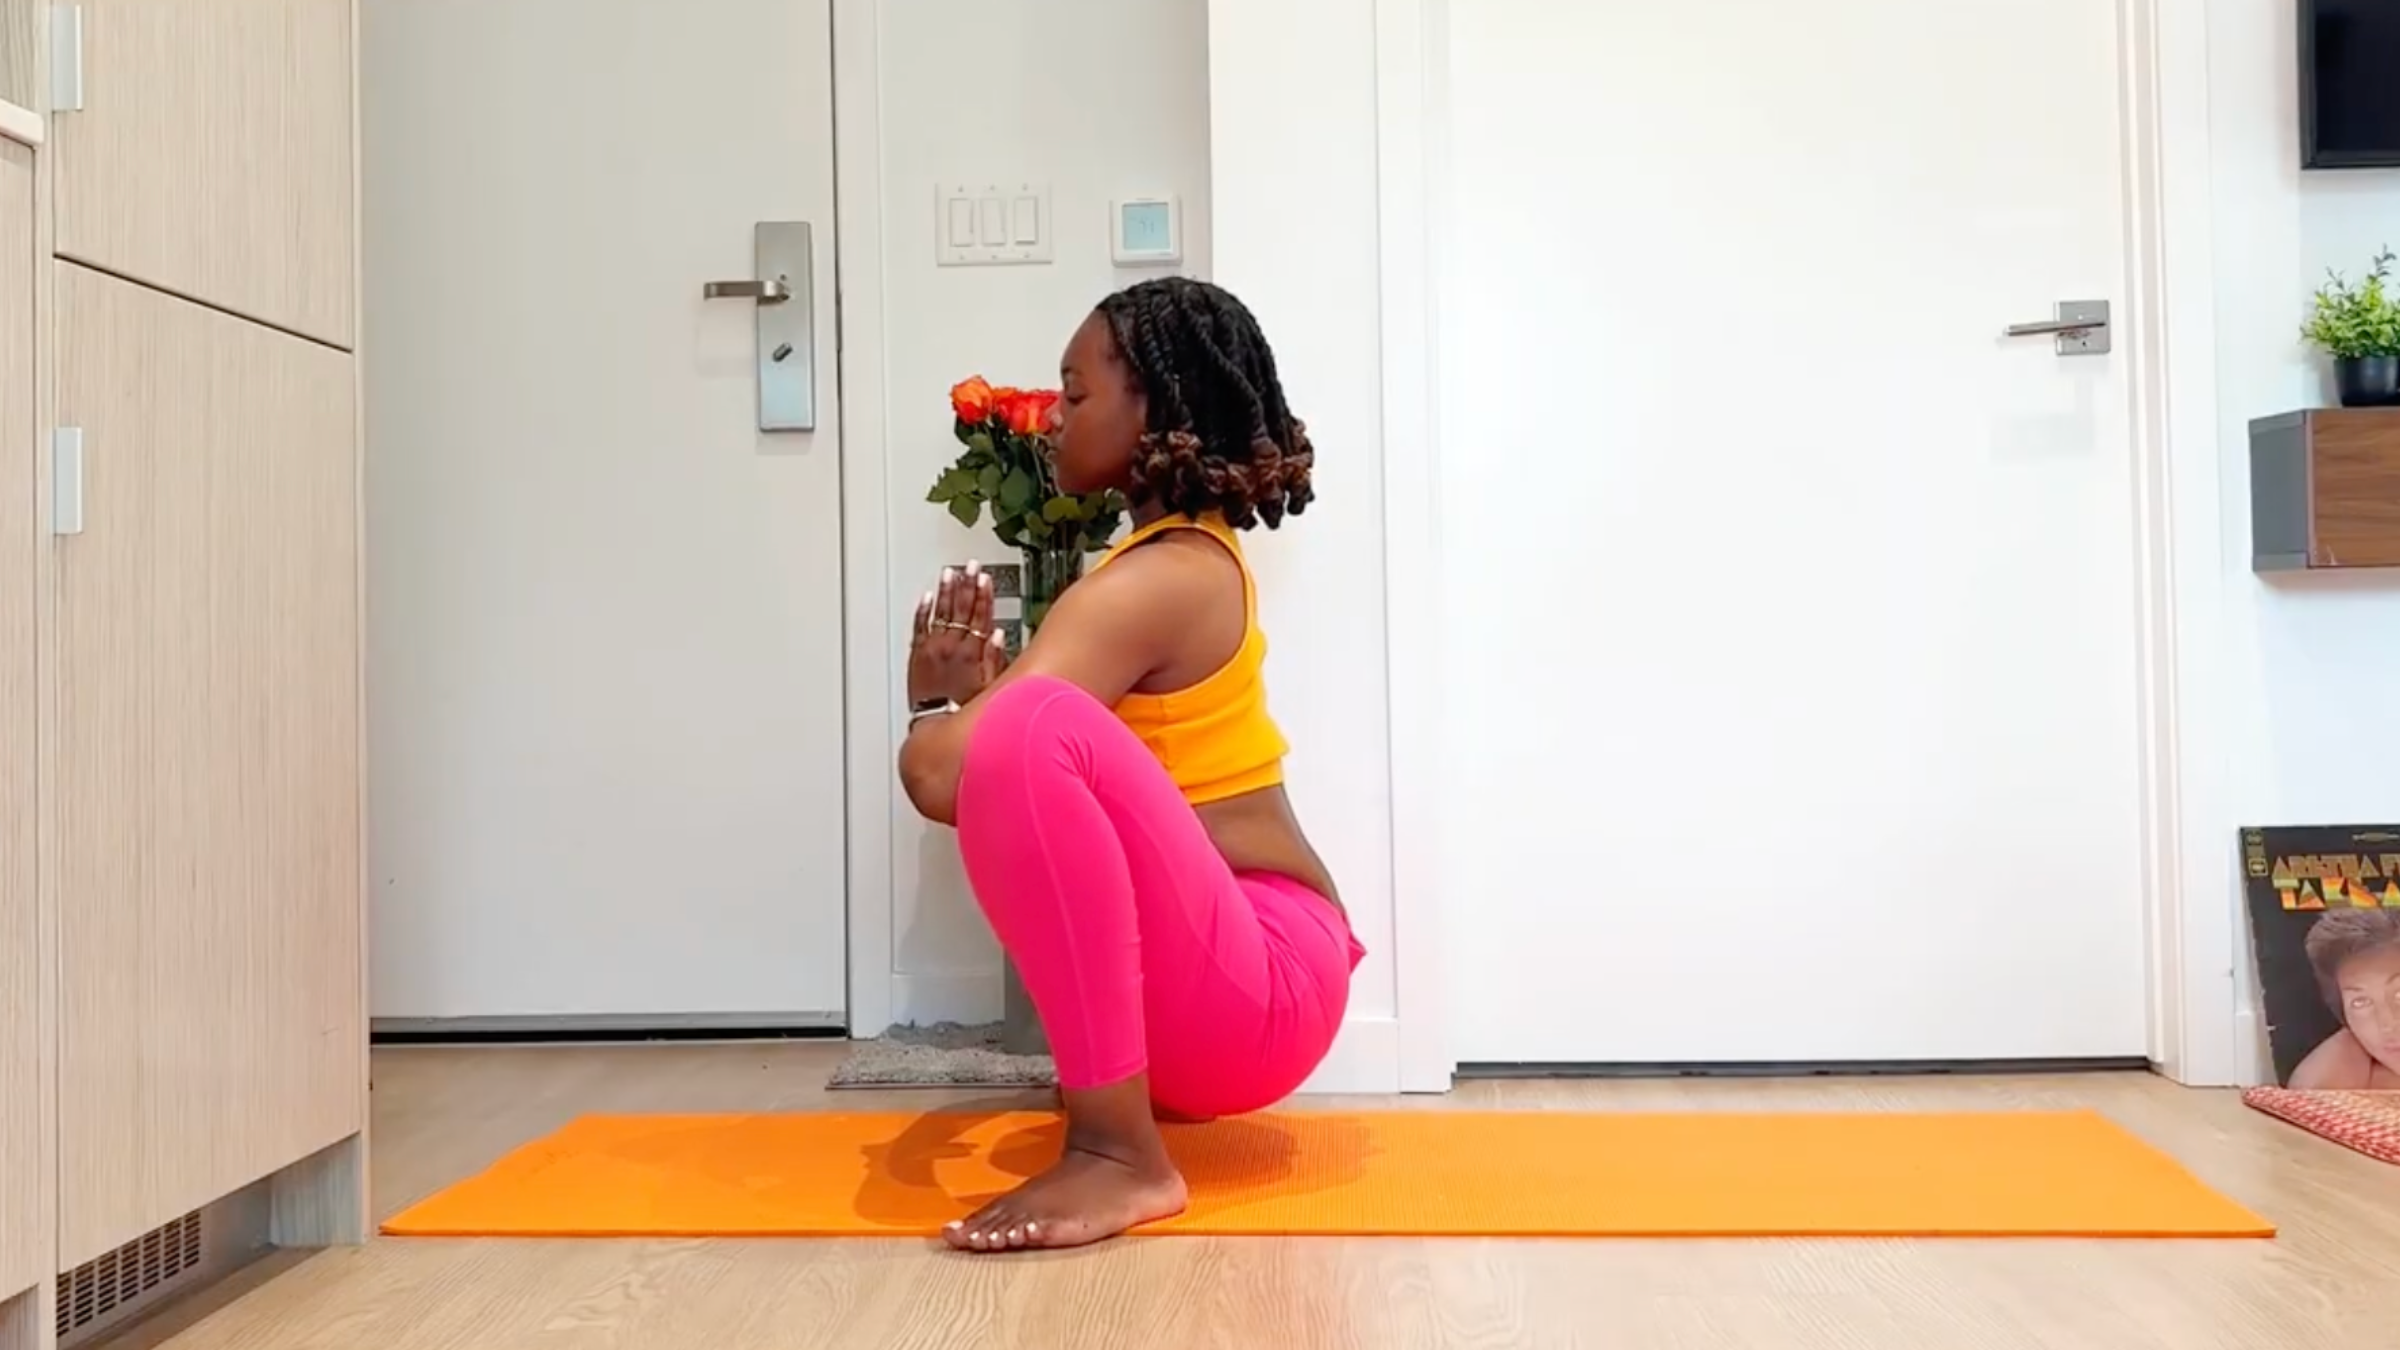
18. Squat
Bend your knees and lower your hips toward the space between your heels in Squat. Bring your hands to prayer position (anjali mudra) in front of your chest. Gently press your elbows against your inner thighs. Take a few breaths here, then come to a seated position on the mat.
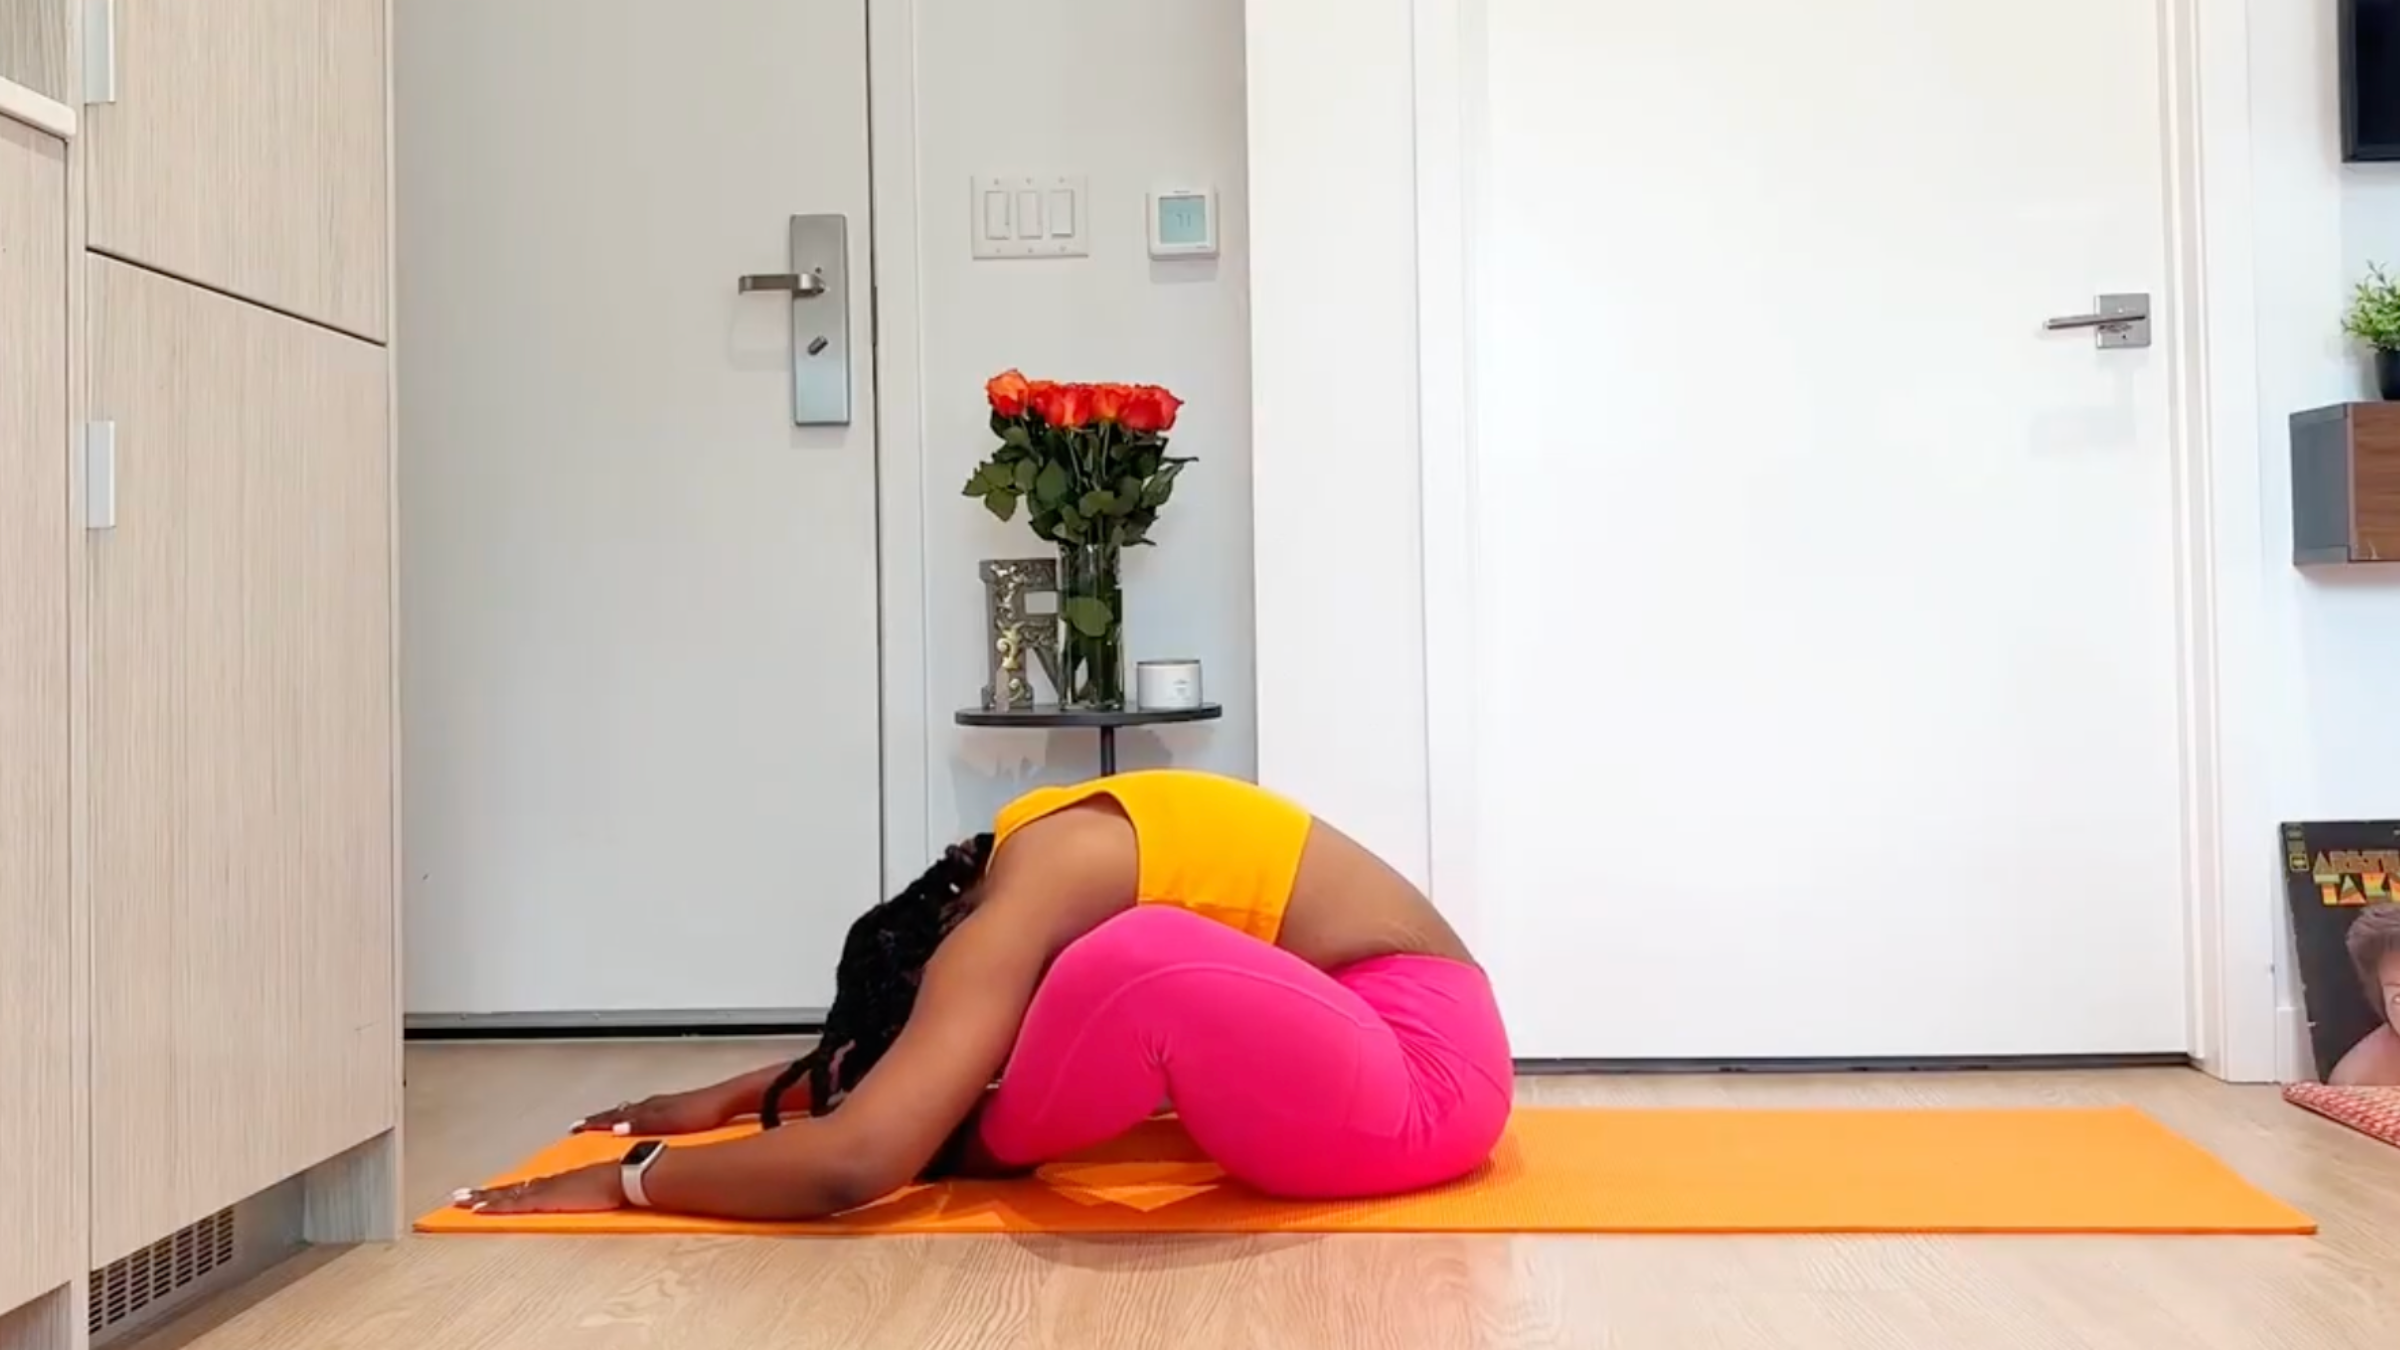
19. Bound Angle Pose
Draw the soles of your feet together. Reach your chest forward as you walk your hands on the mat in front of you. Round your spine over your legs and let your head and neck relax in Bound Angle Pose. Take a few breaths here, then slowly roll up.