


Published June 24, 2026 11:22AM
Ever ask yourself, “Why am I so tired?” Yet maybe you struggle to pinpoint the answer. The truth is, you don’t need a massive reason to feel depleted. The invisible admin of everyday life—from taking out the trash to scheduling that overdue doctor’s appointment—can seriously stack up against you in the form of consistent exhaustion and fatigue.
Whether you’re experiencing mental fatigue (fogginess or a lack of focus) or physical fatigue (tired muscles, joints, and overall weakness), the last thing you probably want is to task yourself with strenuous movement. On the other hand, anything that lightly challenges your muscles while also signaling to your mind that it’s okay to stop thinking can bring back that high-spirited and less fatigued version of you. That’s where yoga for fatigue comes in.
6 Yoga Stretches to Help Relieve Fatigue
The following yoga poses can help wake up tired muscles and give your mind something to focus on that’s not all the things you told yourself you’d get done today. Practice one or all of these poses for an energy boost any time of day.
If you’re experiencing chronic fatigue, consult a health professional.
1. Mountain Pose (Tadasana)
It seems so simple as to be boring, but Mountain Pose symbolizes confidence and strength. It’s all about standing tall, engaging even the smallest muscles, and feeling at the ready.
How to: Stand tall with your feet hip-width apart or together—whichever feels more stable in Mountain Pose. Spread your toes and press them into the floor. Then ground through the edges of your feet and lift your arches. Point your tailbone down toward the floor and broaden across your chest. Draw your shoulders away from your ears. Stay here for 5-8 breaths.
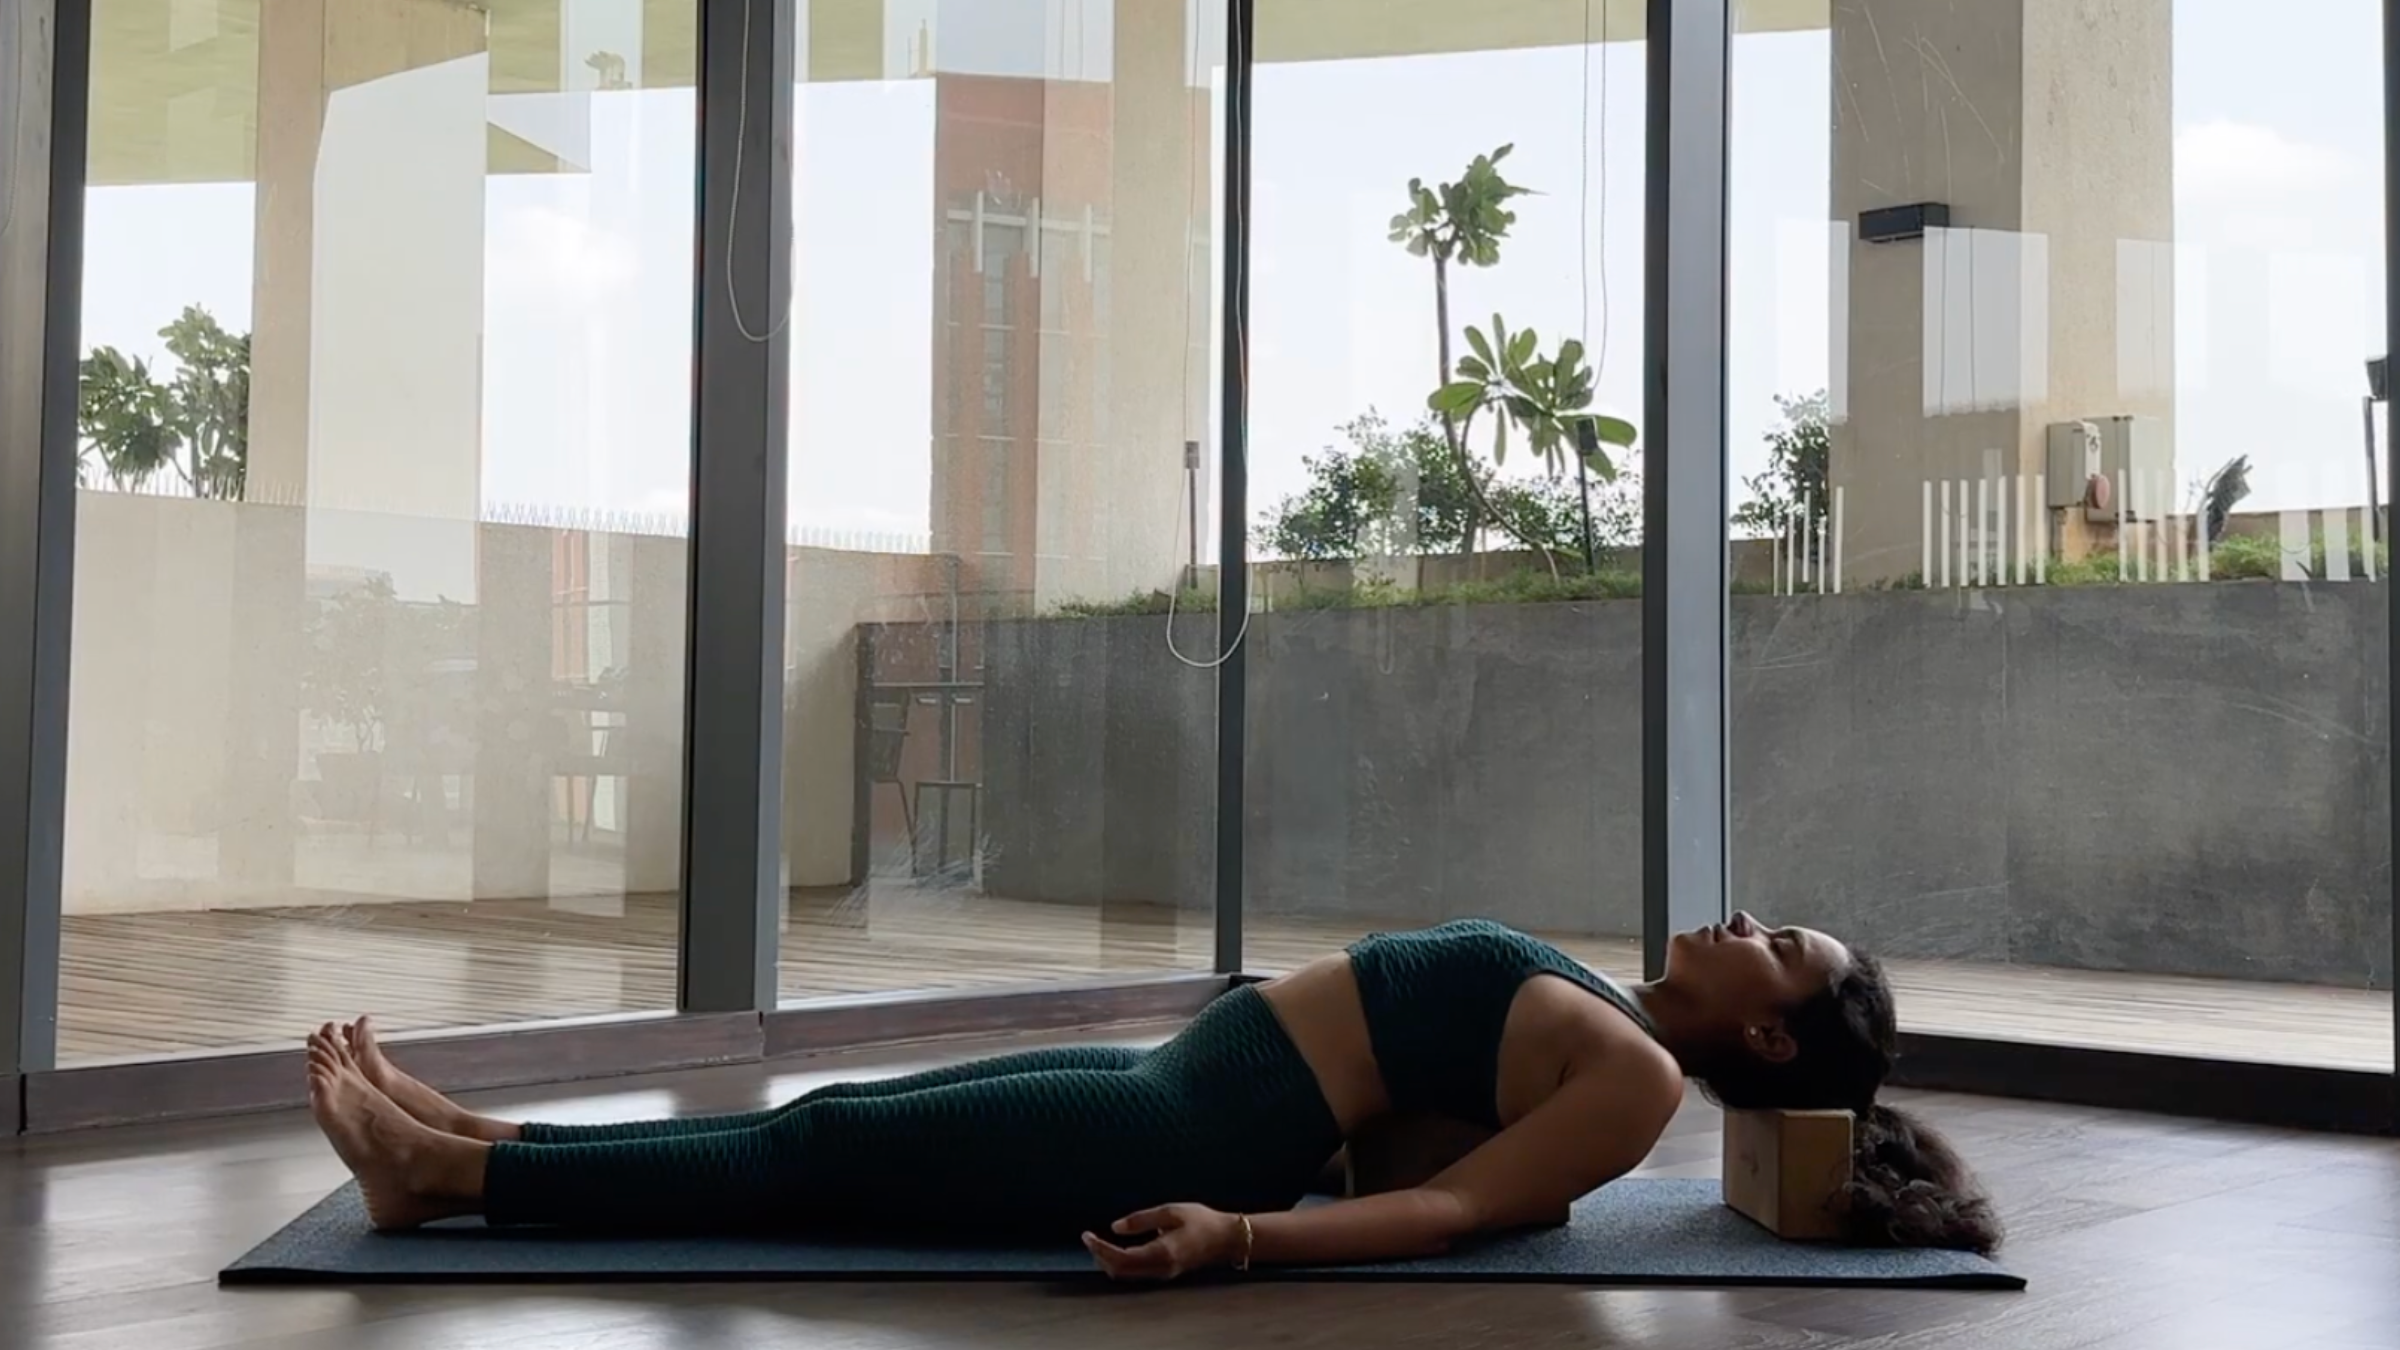
2. Supported Fish Pose (Matsyasana)
When you’re fatigued, you might notice your body sinks inward and “curls in” on itself. This pose uses props to help relieve your shoulders of that tension.
How to: Lie on the floor with a block or firm cushion under your mid-back and another block or cushion underneath the back of your head. Adjust the height of the props so your chest, lower back, and neck feel supported. Avoid tilting your head too far back. Bend your knees and plant your feet on the floor. Let your arms rest by your sides in Supported Fish Pose. Keep your legs bent or straighten them. Stay here for 2-3 minutes.
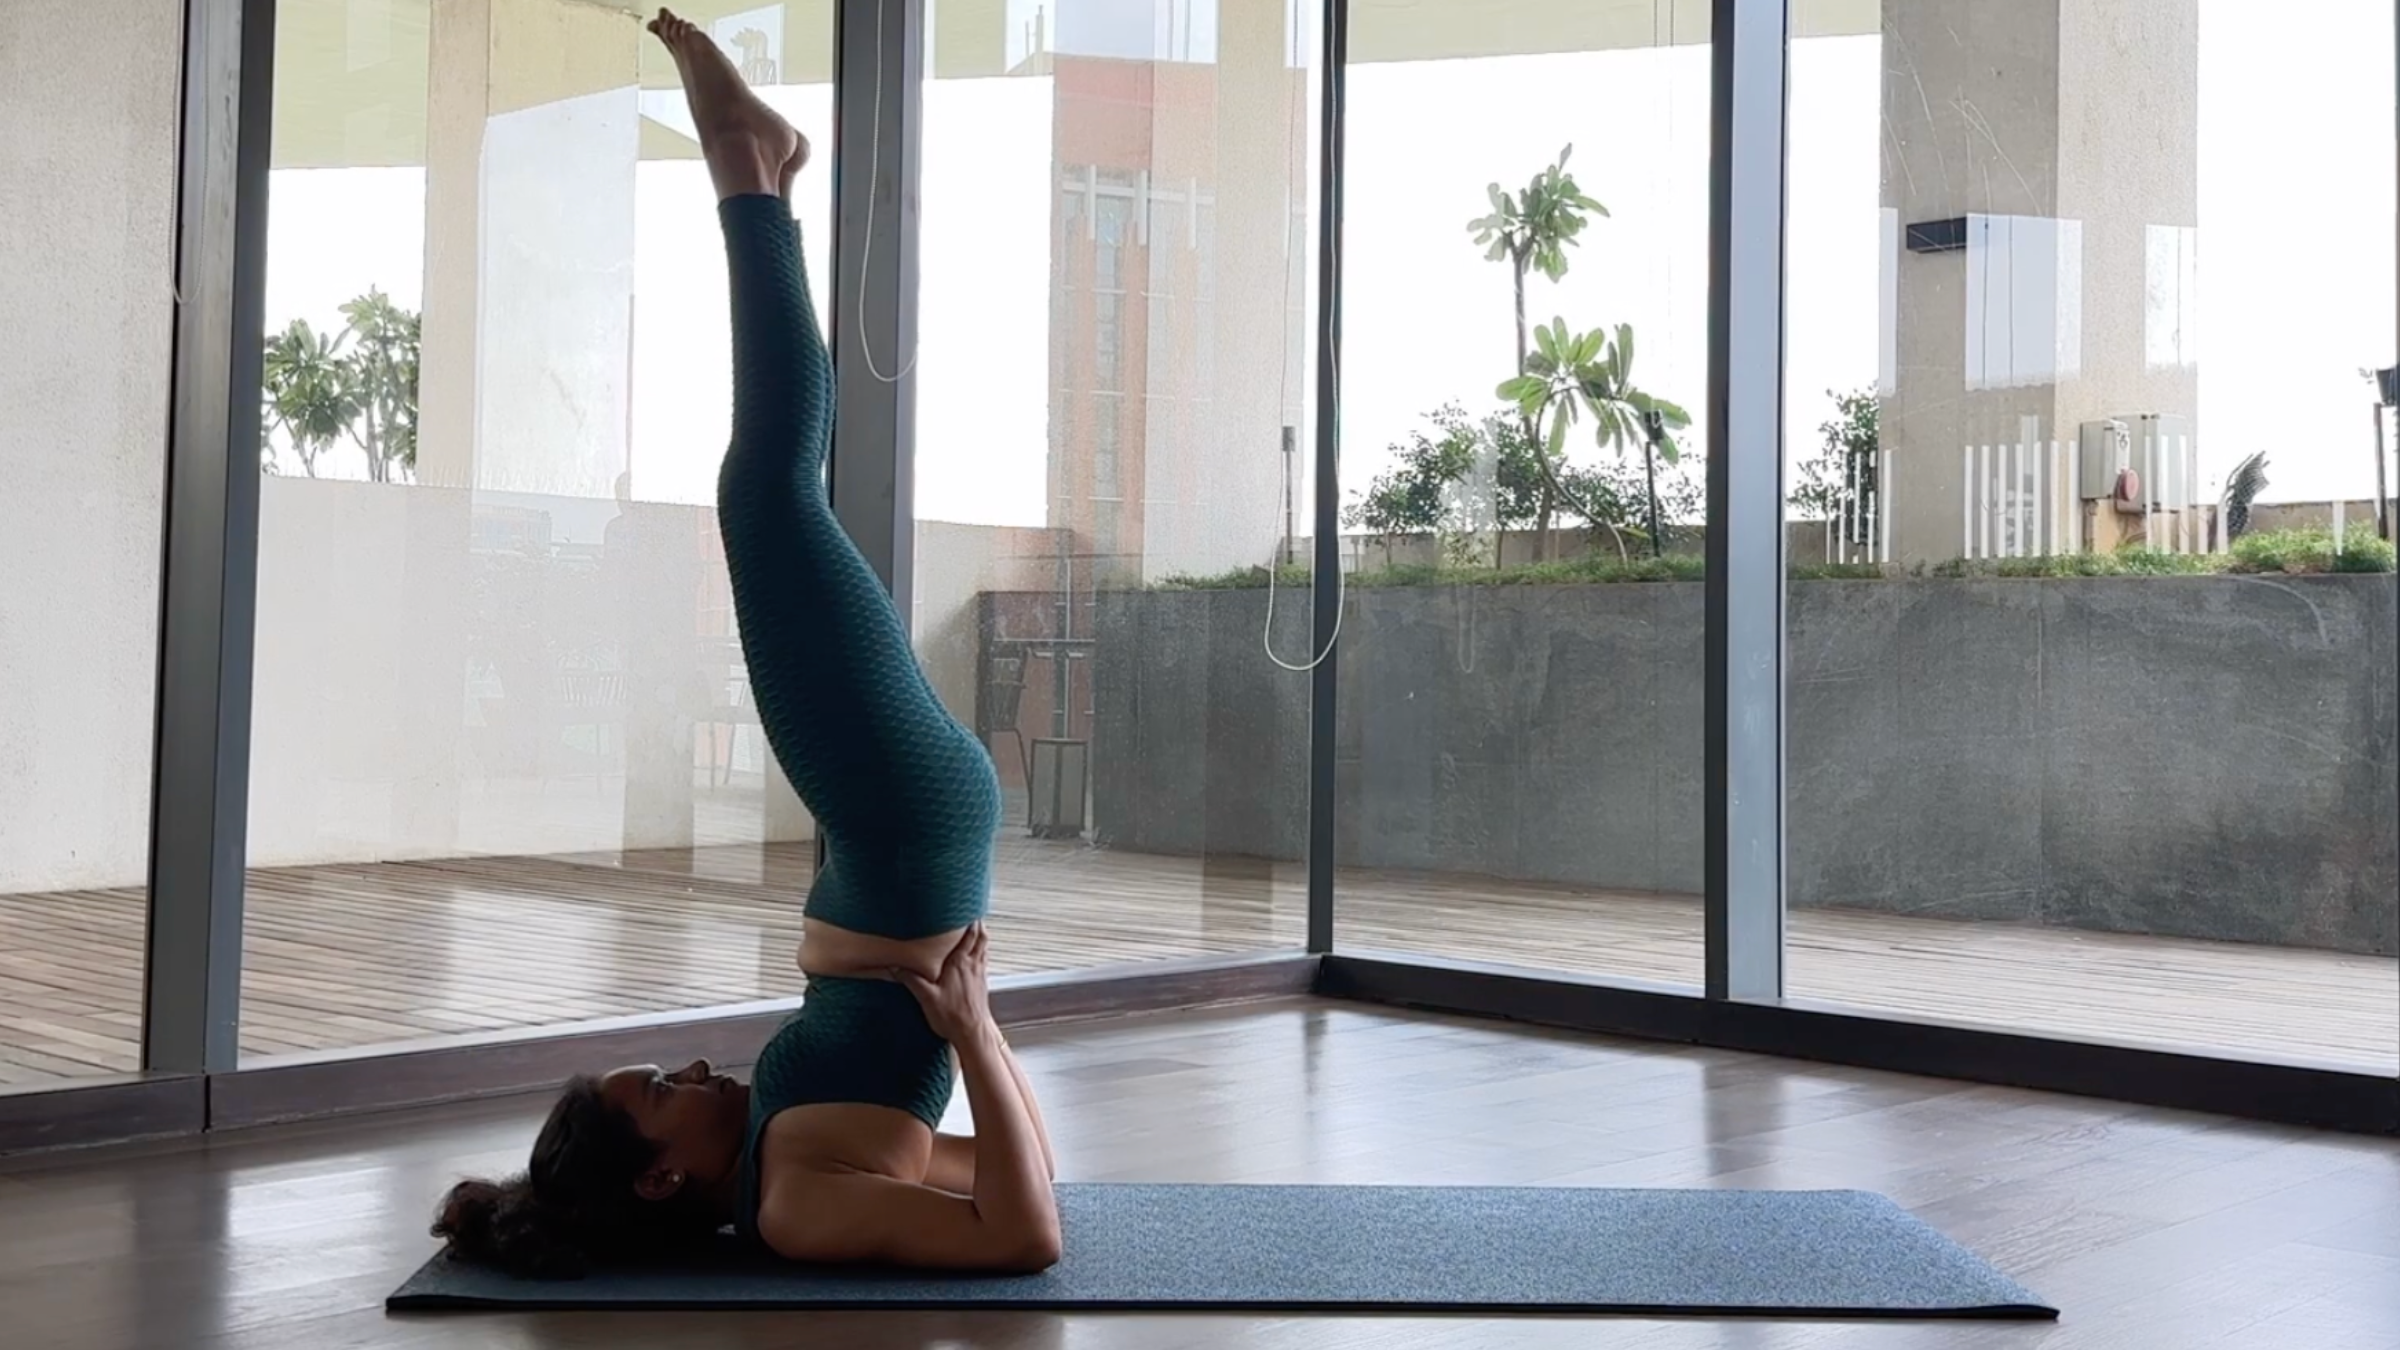
3. Supported Shoulderstand (Salamba Sarvangasana)
When you explore the sweet spot between effort and ease in Supported Shoulderstand, you’ll find that it’s both physically energizing and mentally calming.
How to: Lie on your back with your knees bent, your feet flat on the mat, and your arms by your sides with your palms facing down. Press your arms into the mat, then draw your knees toward your chest. Curl your lower back off the floor and use your hands to support both sides of your waist.
Inhale and straighten one leg, then the other, toward the ceiling in Supported Shoulderstand. (If you experience discomfort in your neck, slowly come out of the pose and skip it.) Stay here for 3-5 breaths, then bend both knees toward your chest. Slowly roll your lower hips down to the mat.
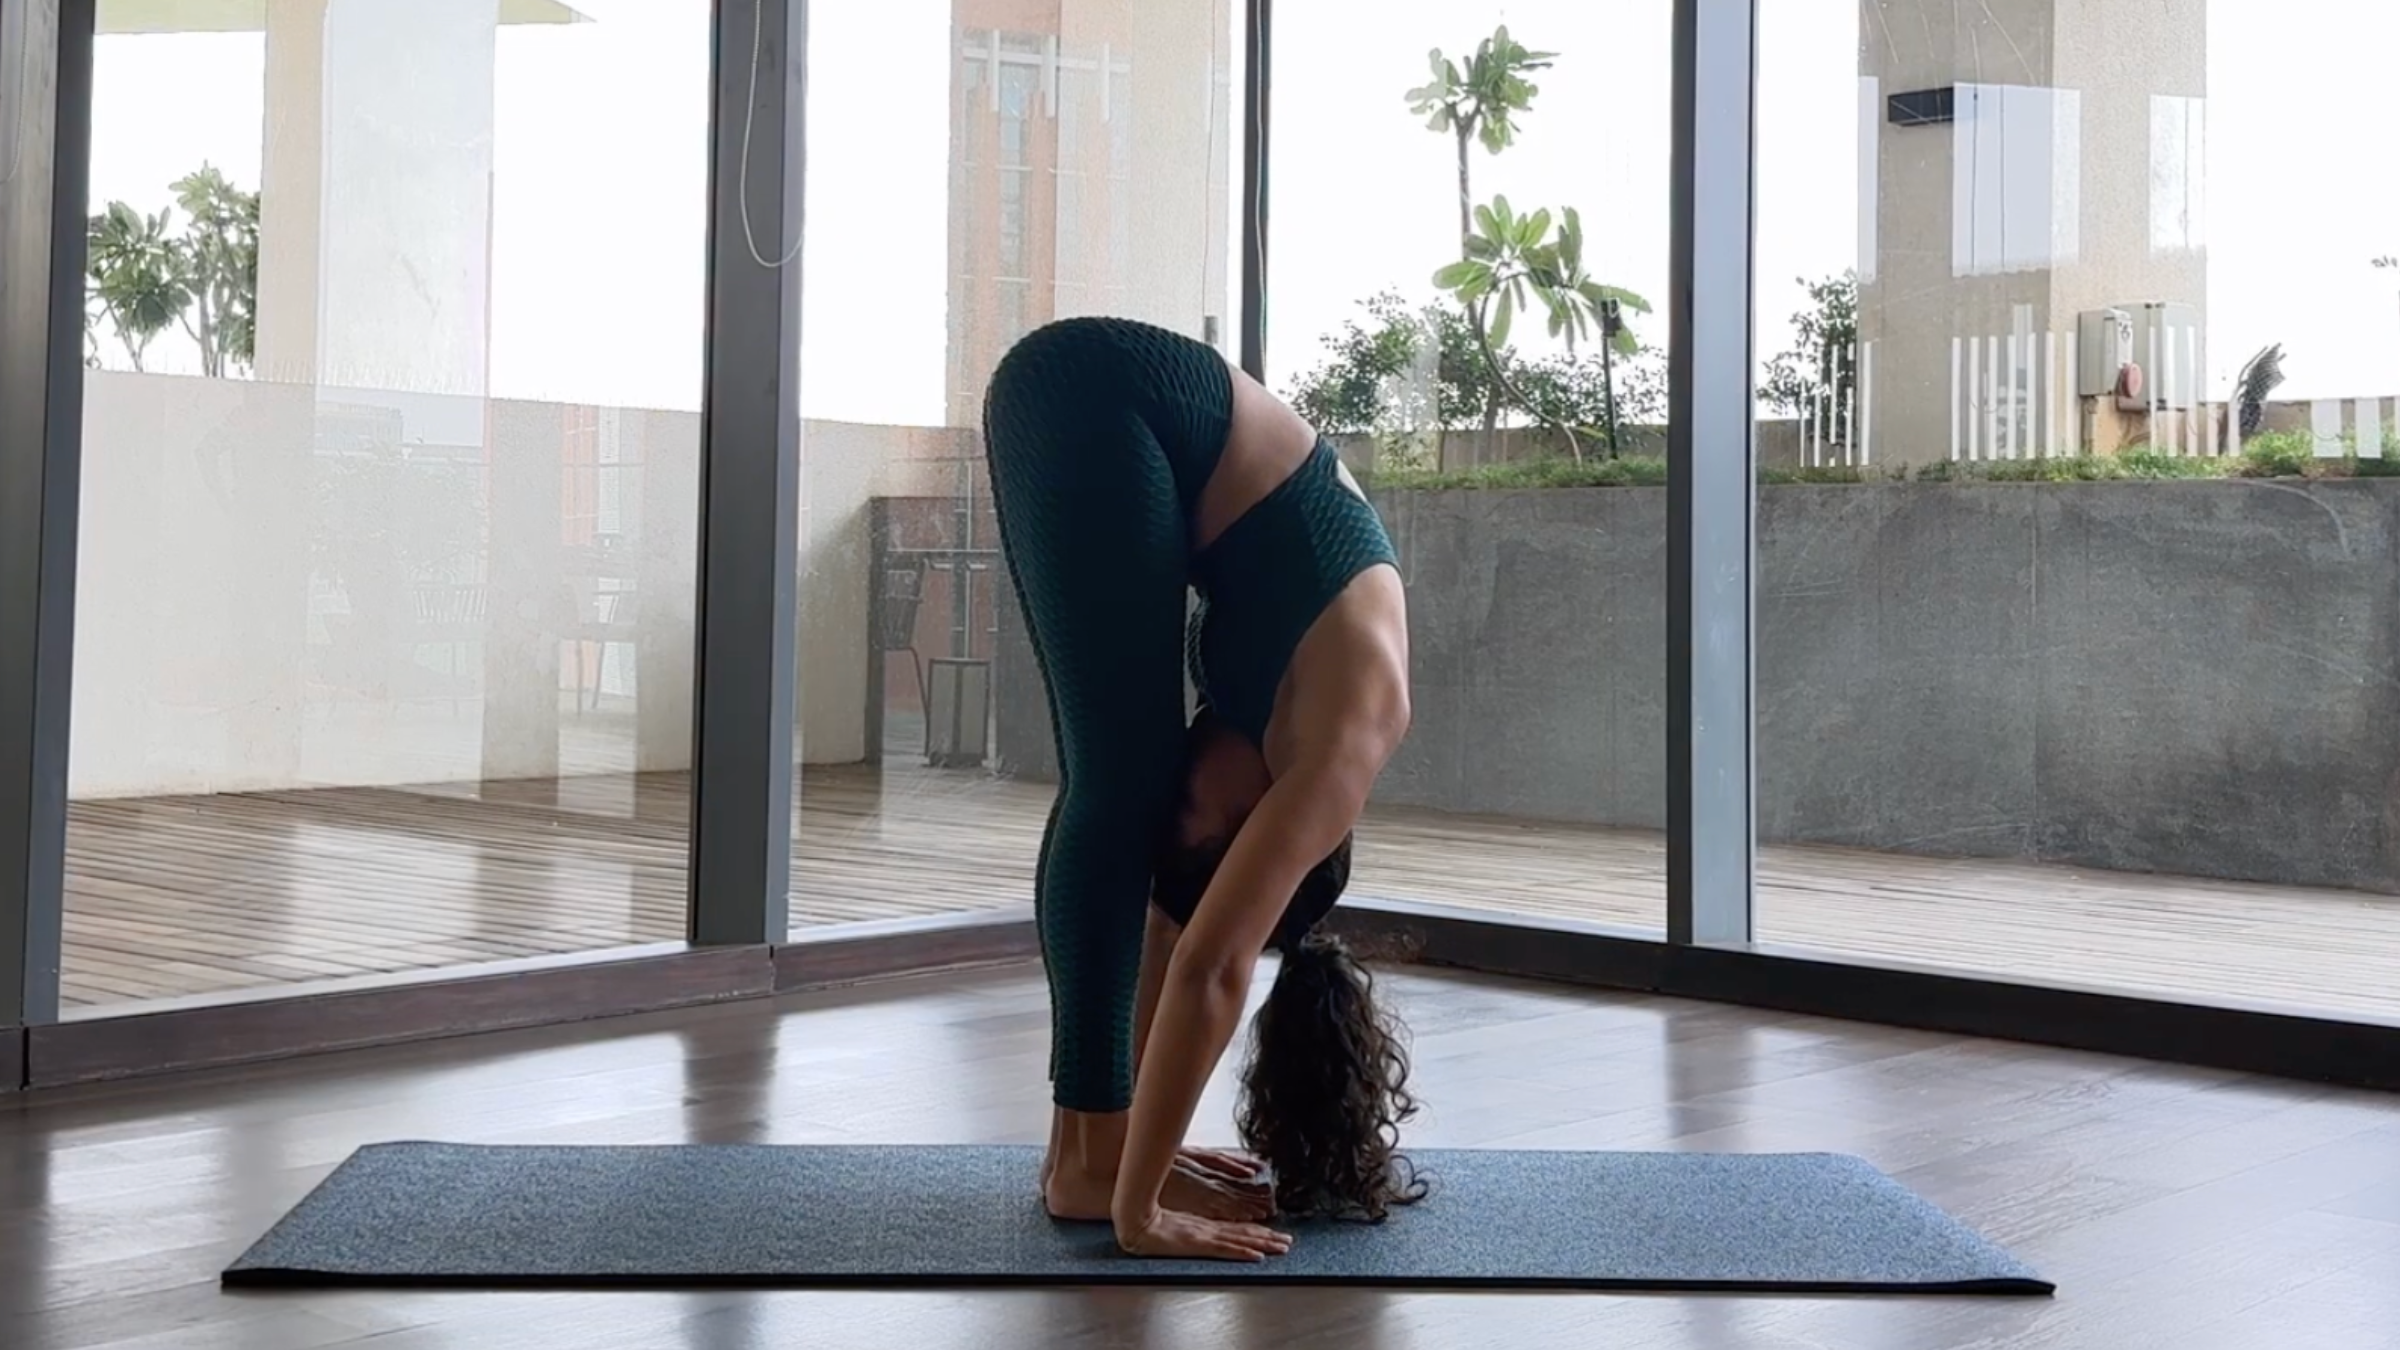
4. Standing Forward Bend (Uttanasana)
In yoga, forward bends are considered reflective postures because you’re turning in toward yourself. Standing Forward Bend helps you access that grounding energy while also giving your calves, hamstrings, glutes, lower back, and neck a release.
How to: Stand tall with your feet hip-distance apart. Hinge forward from your hips and lower your hands or fingertips to the floor or blocks. Keep a slight bend in your knees if it’s more comfortable. Gently move your body weight toward your toes, while pressing your feet into the floor. Let your head and neck hang freely in Standing Forward Bend. Stay here for 5-8 breaths, then slowly roll up to standing.
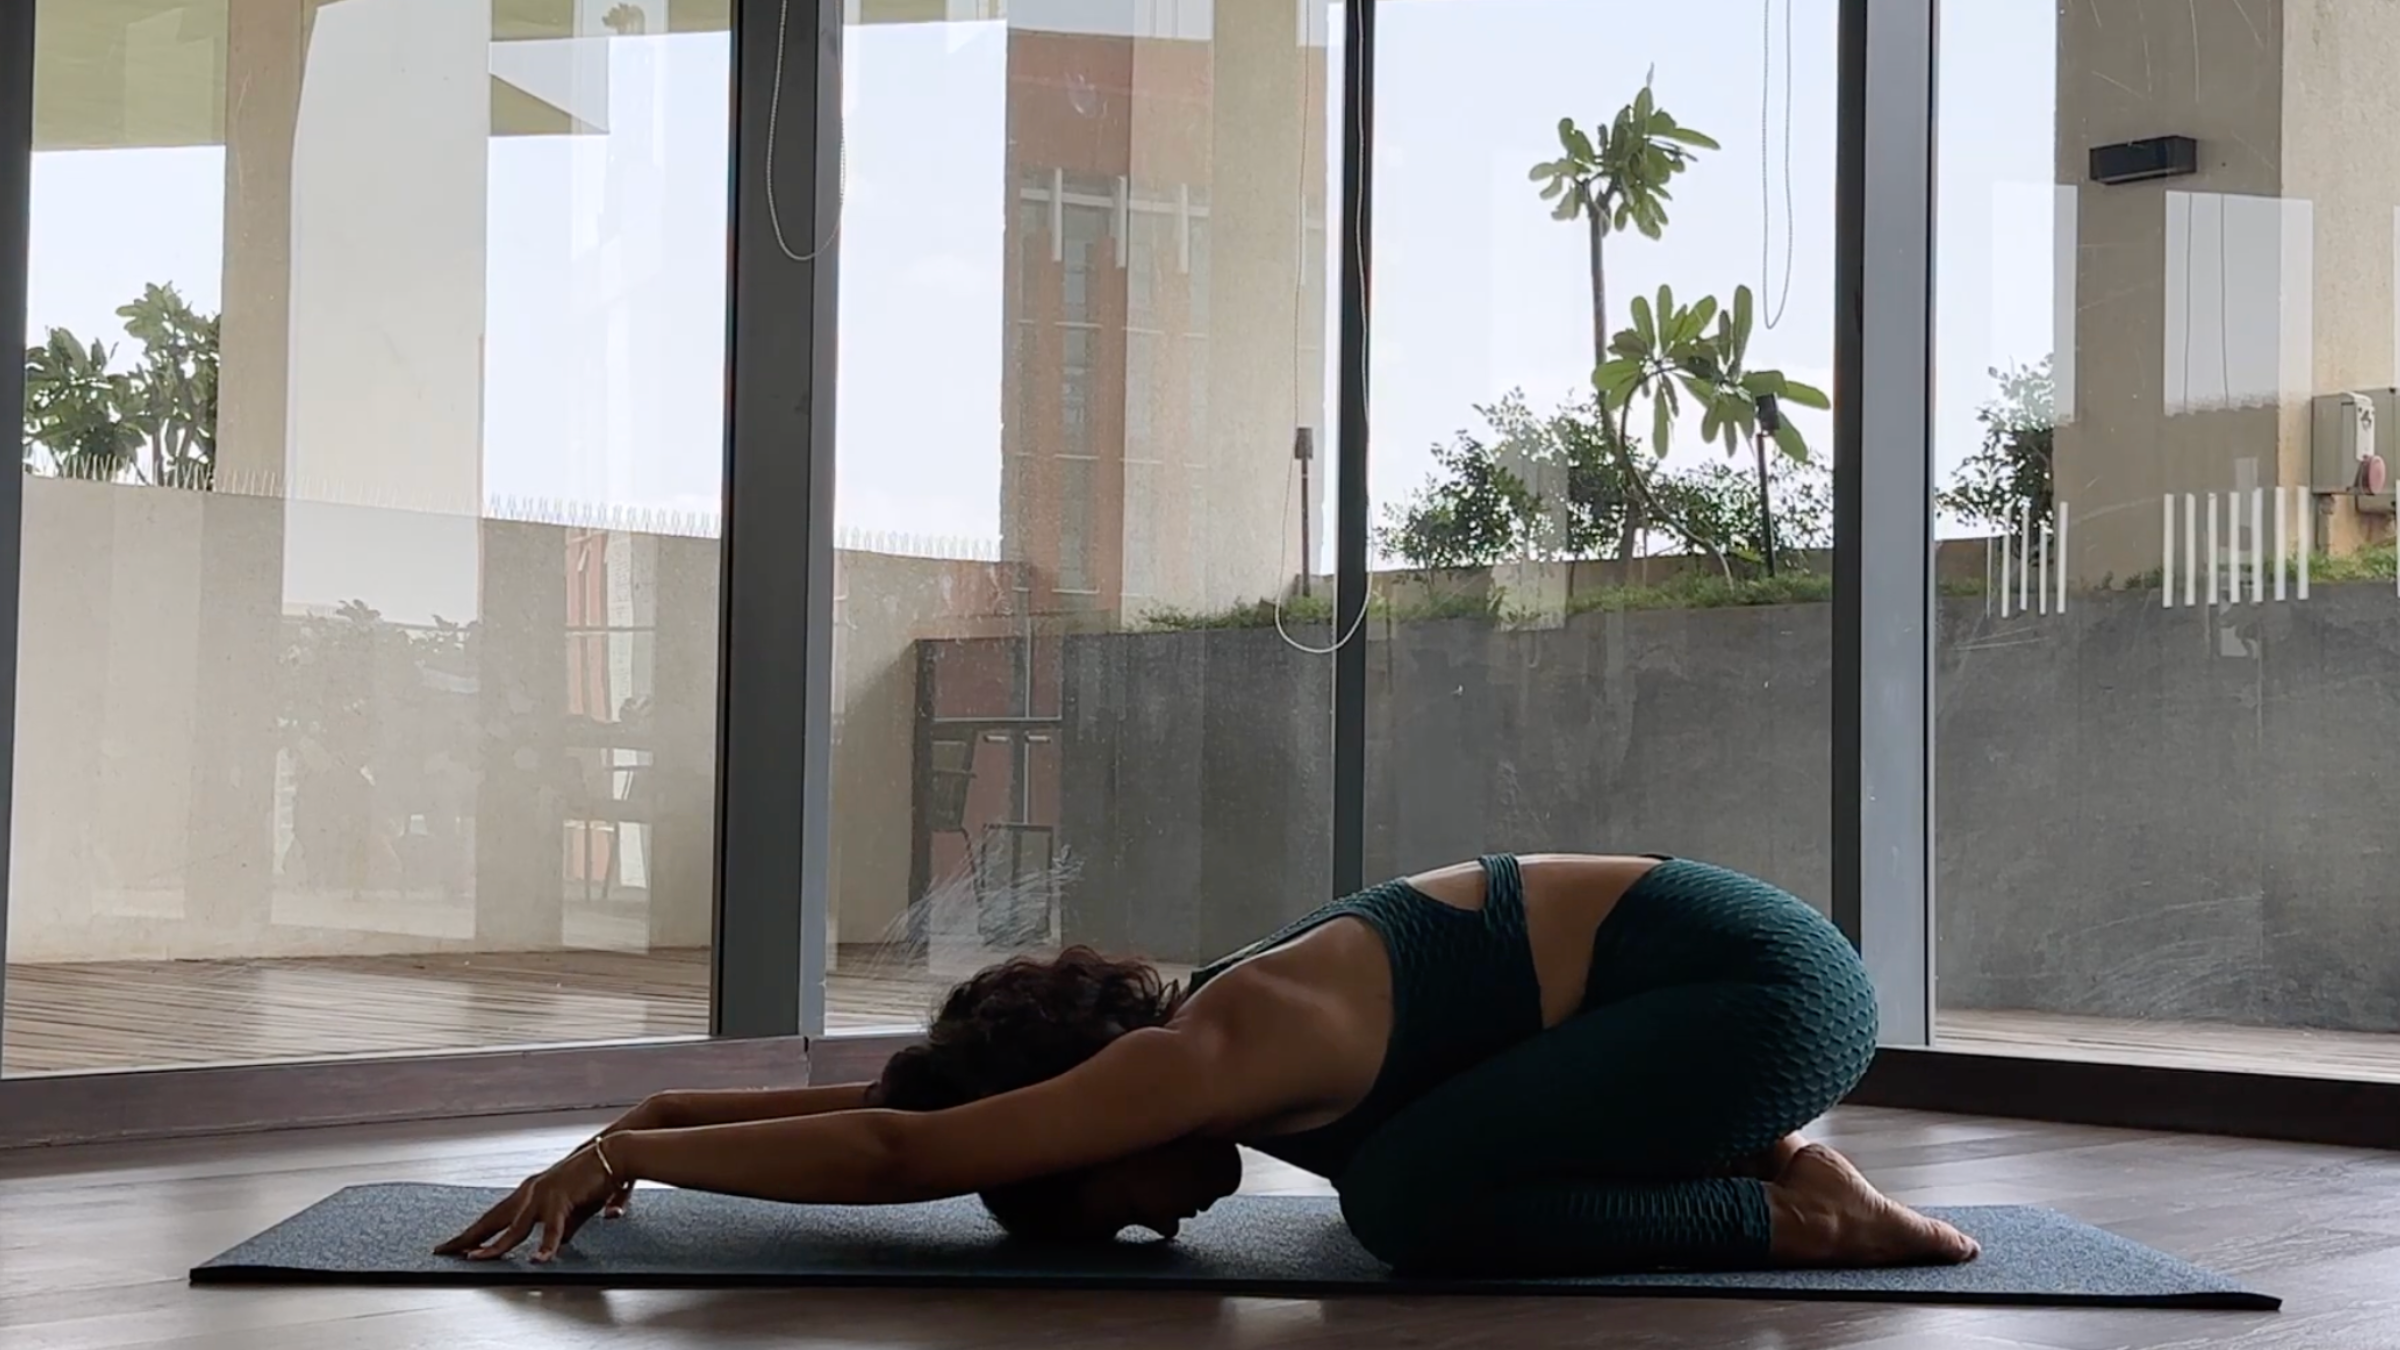
5. Active Child’s Pose (Balasana)
This variation of Child’s Pose is considered “active” because you keep your muscles engaged—and energized—rather than let them collapse into a passive hold.
How to: Come to your hands and knees. Gently sink your hips back towards your heels. Keep your arms forward and touch your forehead down on the floor or a block in Child’s Pose. Walk your fingers a little farther away from you. Press your hands into the floor. Stay here as long as you feel comfortable.
6. Toe and Ankle Movement
Movement in the feet can help improve blood circulation throughout the body, which makes this practice especially revitalizing if you spend long hours sitting or standing. You can practice it literally anytime—including while sitting at your desk, on the couch, even in bed.
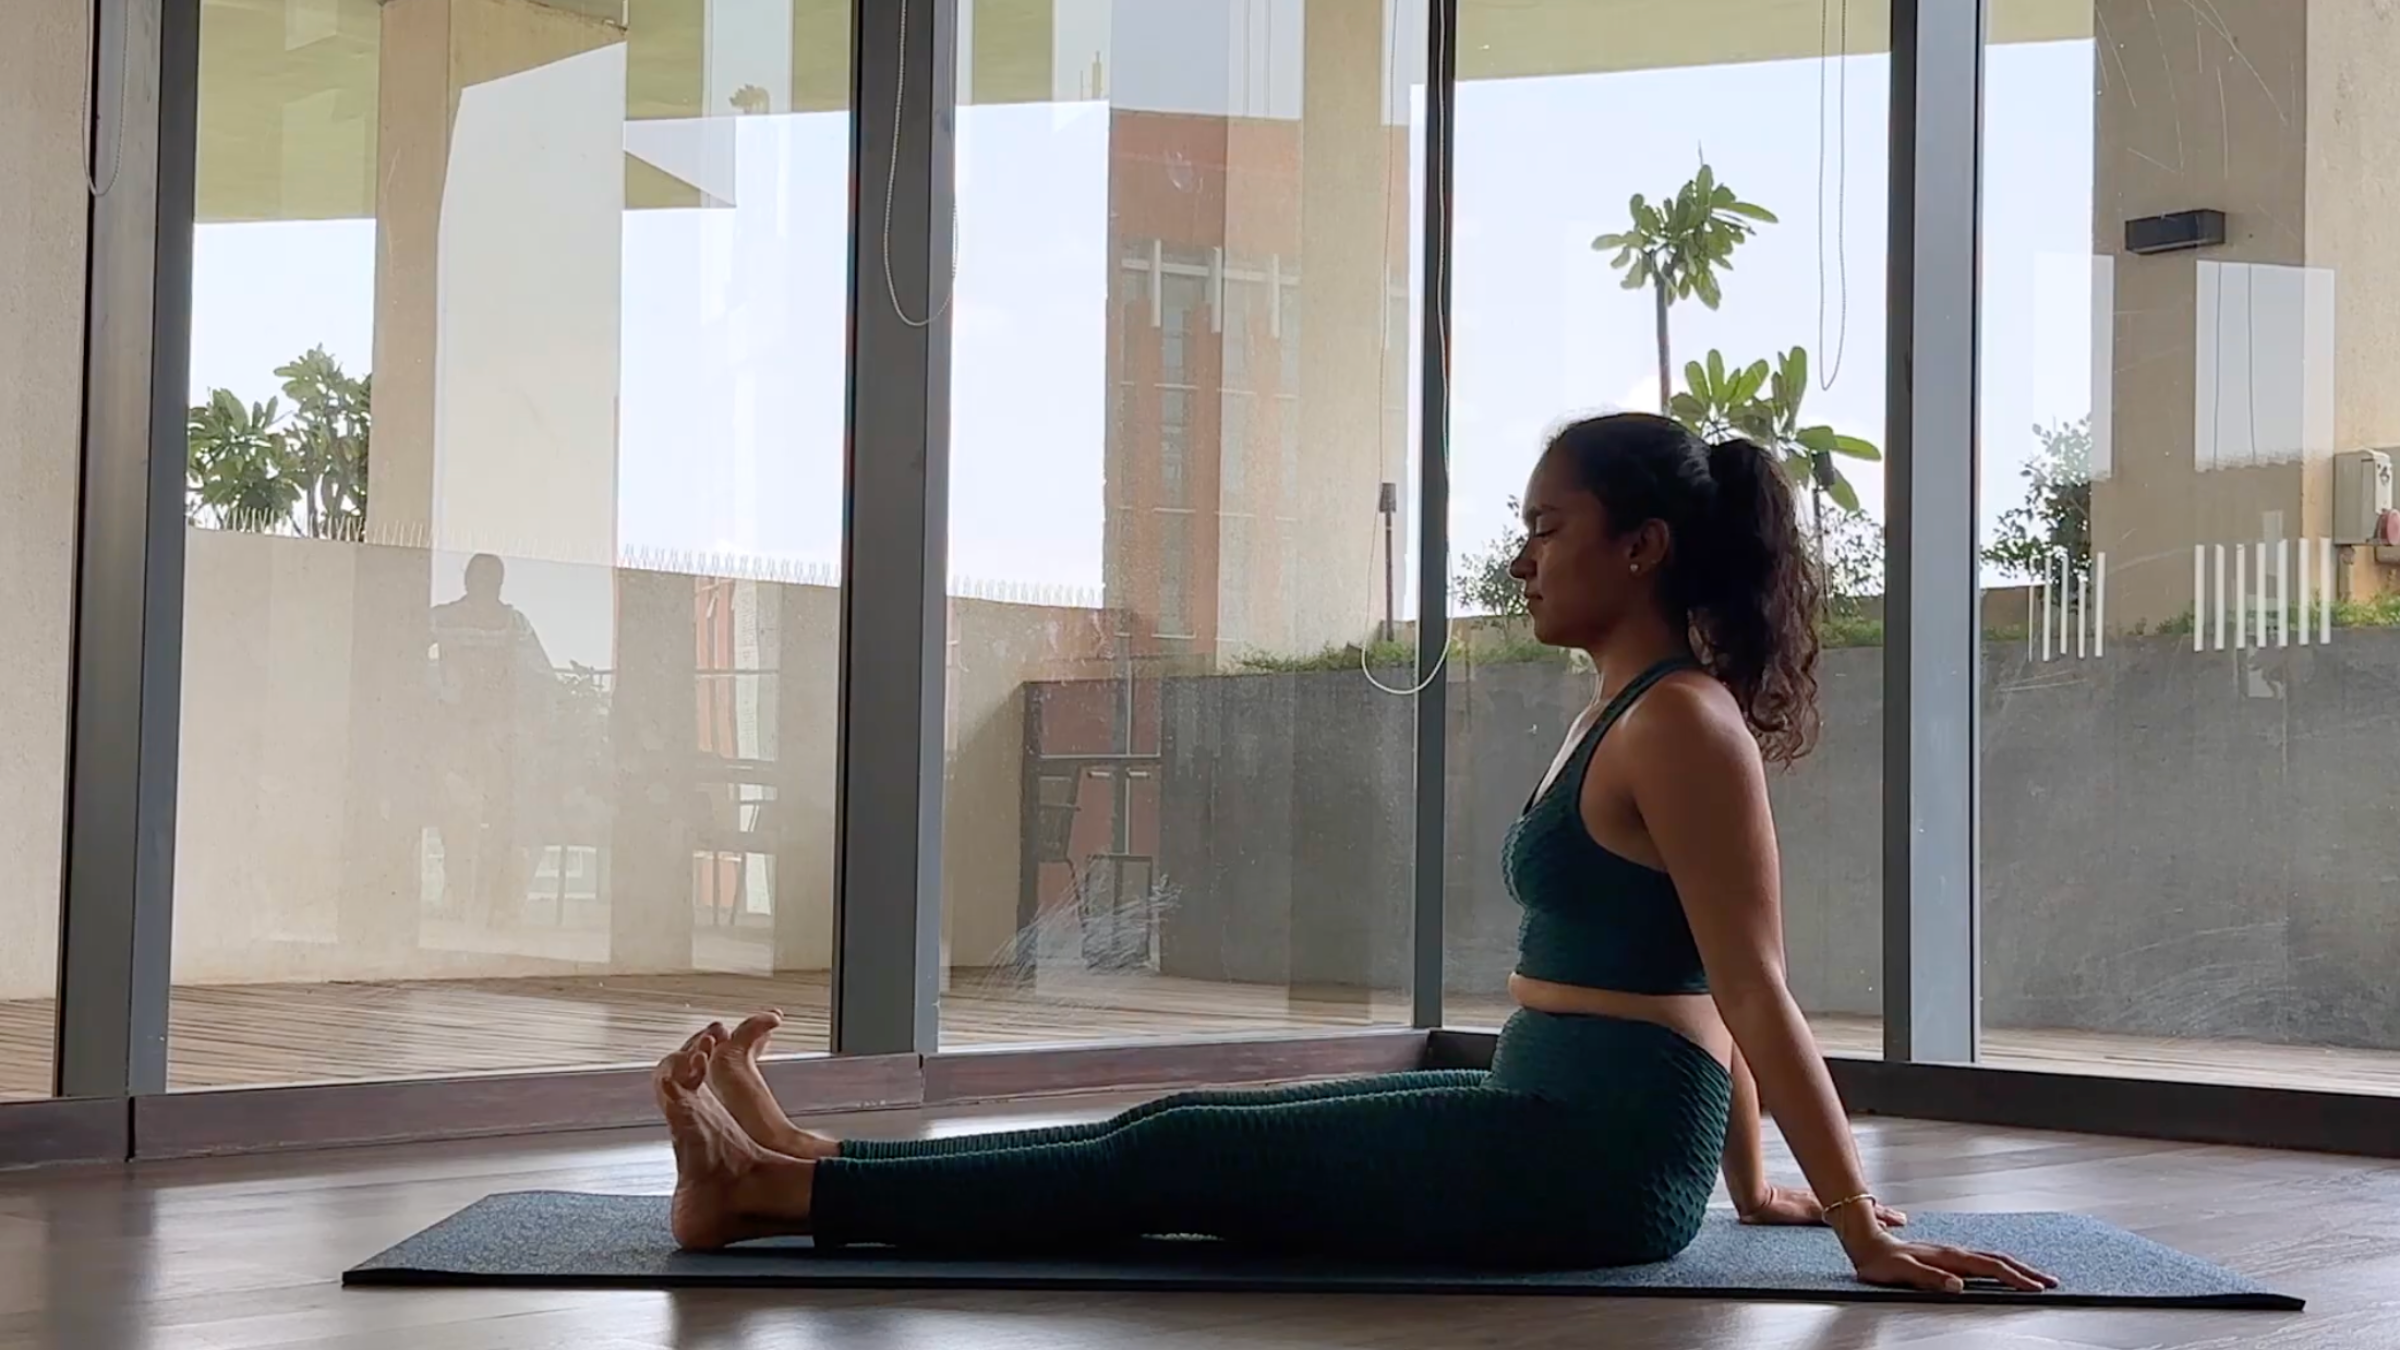
How to: Sit with your legs straight in front of you with your hands planted on the floor on either side of your hips. Point your toes toward the wall in front of you. Then draw them back (flex them) toward you while you push your heels toward the wall in front of you. Repeat this a few times, letting your ankles move freely.
Spread your toes apart, then scrunch them in. Repeat this a few rounds.
Breathwork
Aum Chanting
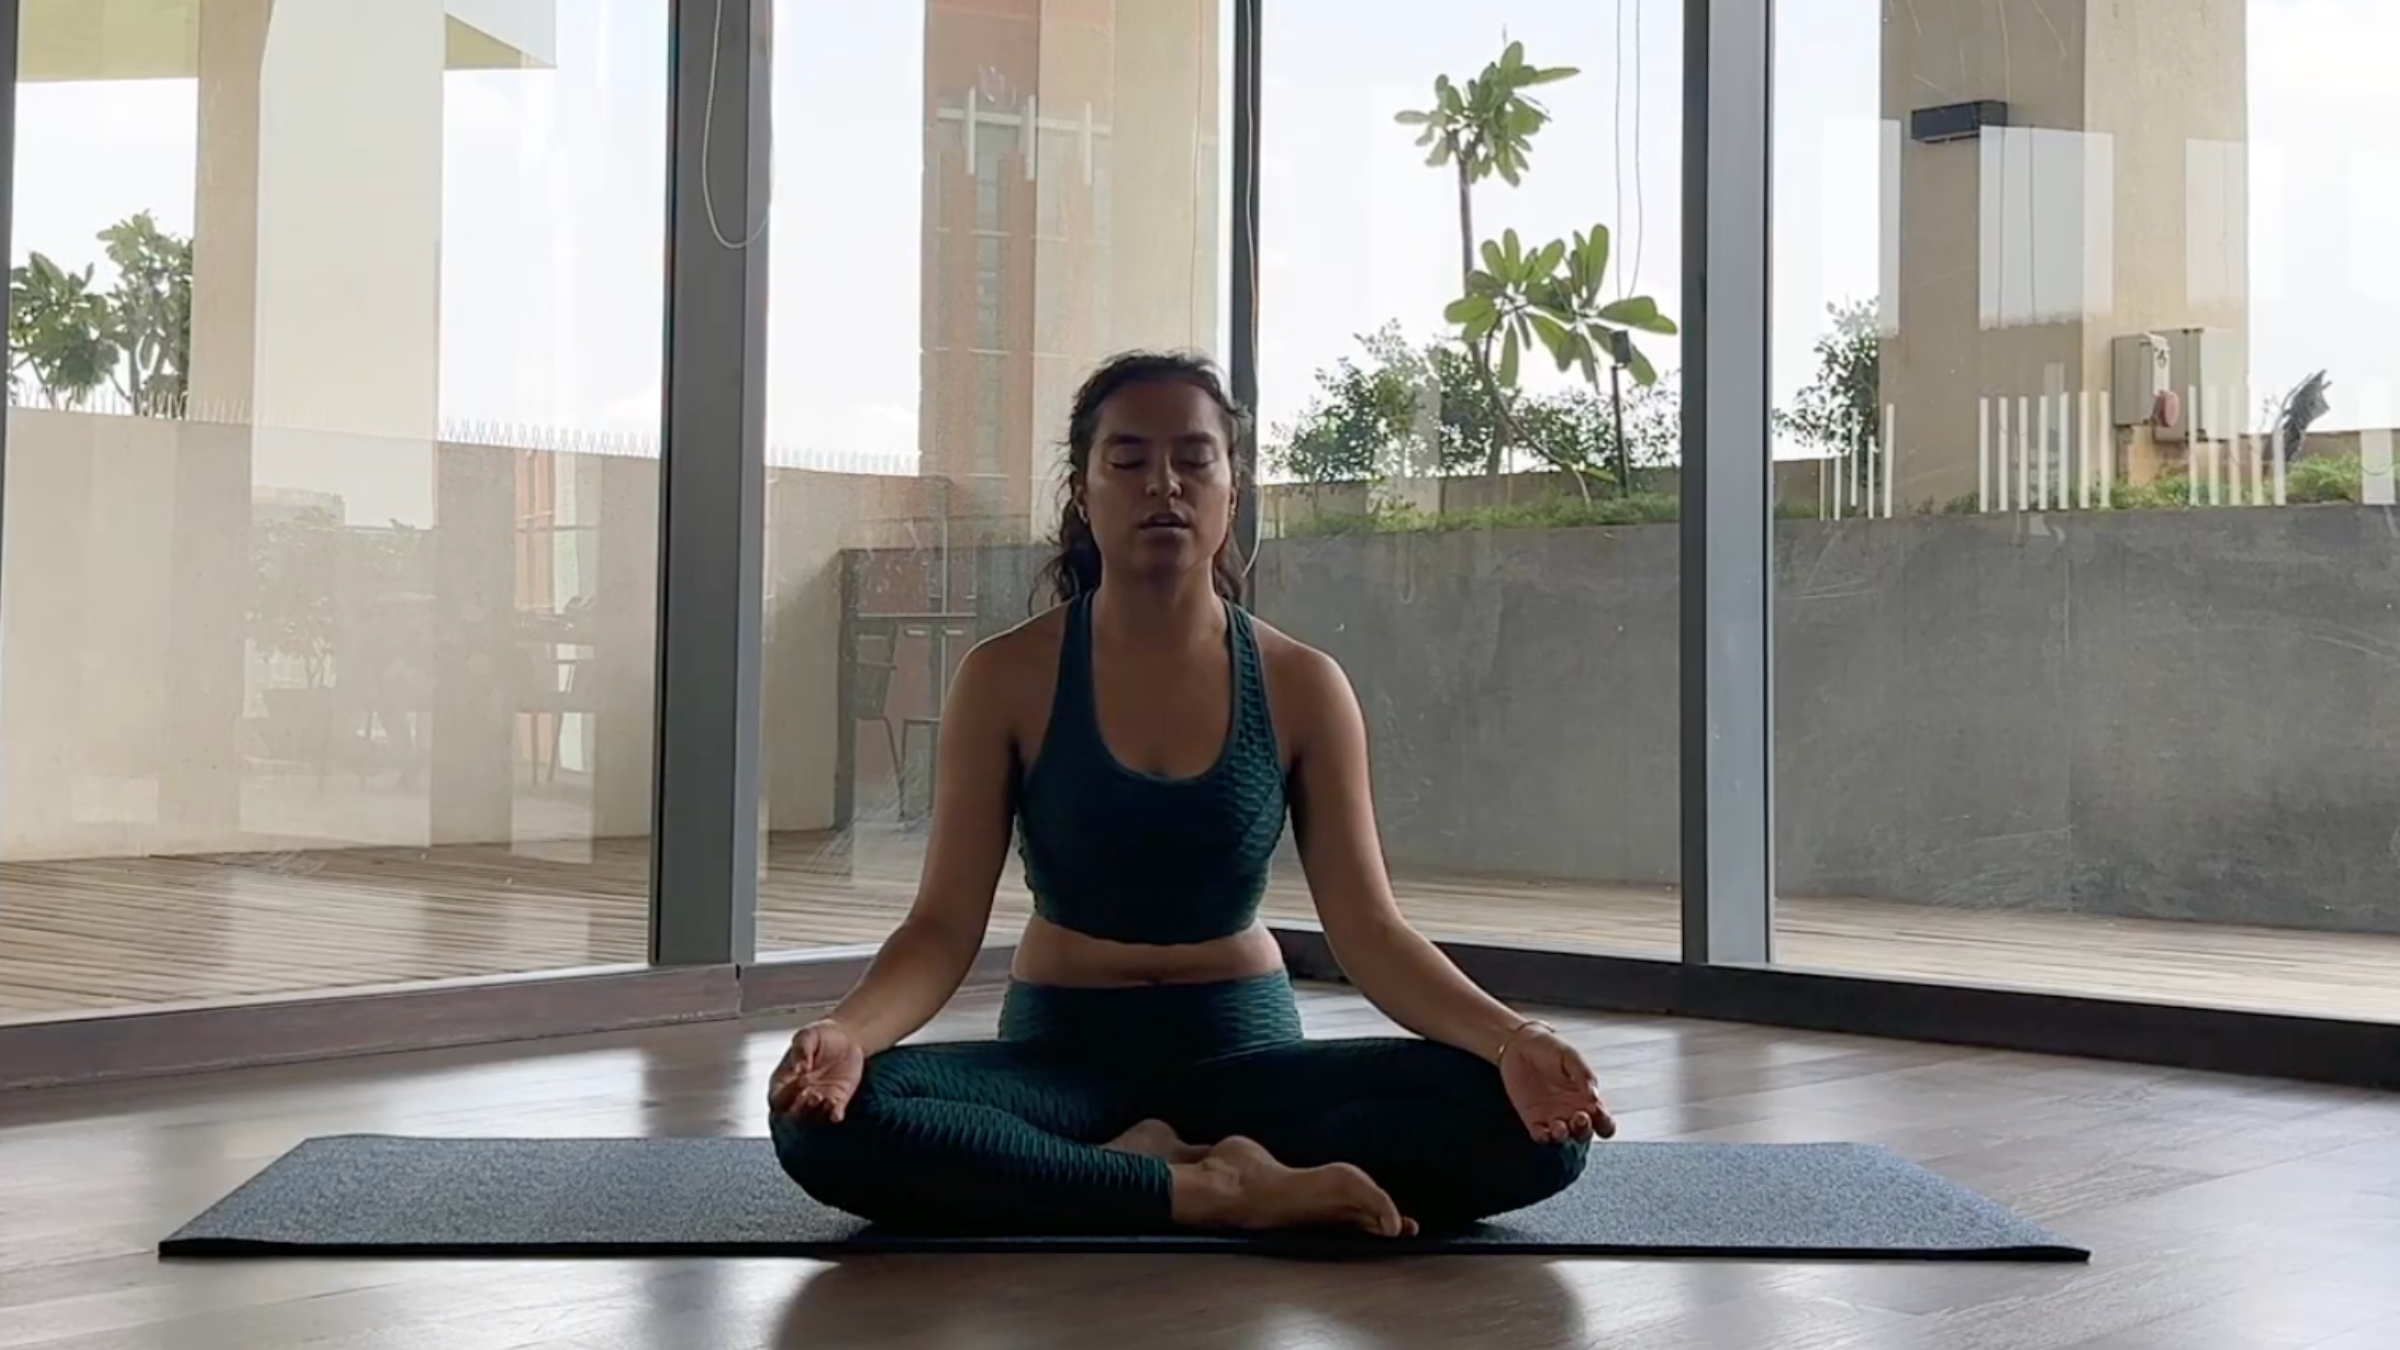
To close your practice and leave you with a grounded, gently energized feeling, practice Aum chanting. It’s almost identical to Om chanting, the difference being the emphasis on each of the syllables.
How to: Sit comfortably. Take a few full inhalations. Then, on your next inhalation, chant “A” (pronounced “ah”). Inhale again. Then exhale and chant U (pronounced “oo”). Inhale again. Exhale and chant M (pronounced “mmm”). During and after your chanting, notice how the vibrations of the sound manifest as sensation in your body.
When you’re ready, continue with the rest of your day and notice whether you don’t feel a little more grounded, present, and energized than before you practiced.


 🧘")


